

现在我们有一个可以输入日志的界面了,但日志就是每天都要写的意思,只有一篇怎么够呢?我们来加上 blog。
首先新增BlogModel类,里面很简单只有 4 个属性,分别为 Id、名称、日志列表及新增时间。
using System.ComponentModel.DataAnnotations;

namespace BlazorServer.Models;

public class BlogModel
{
	[Key] public int Id { get; set; }

	[MaxLength(10, ErrorMessage = "博客名称太长")]
	public string? Name { get; set; }

	public List<PostModel>? Posts { get; set; }

	public DateTime CreateDateTime { get; set; }
}
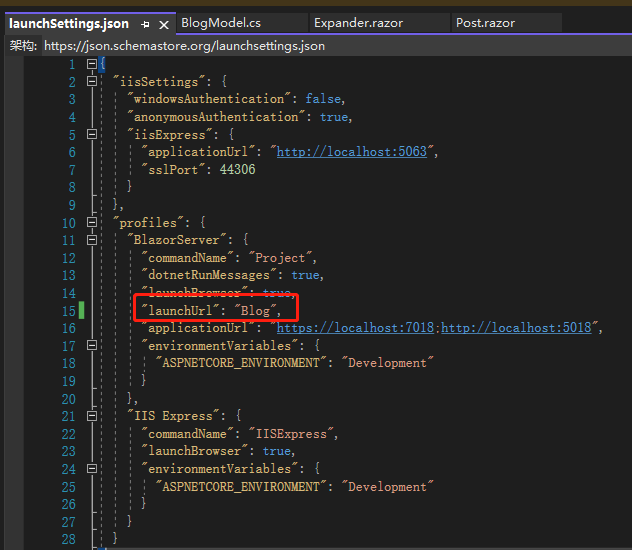
接着将Post.razor的@page指示词跟EditForm底下的 Expander 案例移除,打开launchSettings.json将launchUrl改为 Blog,因为我们的首页要改成 Blog。
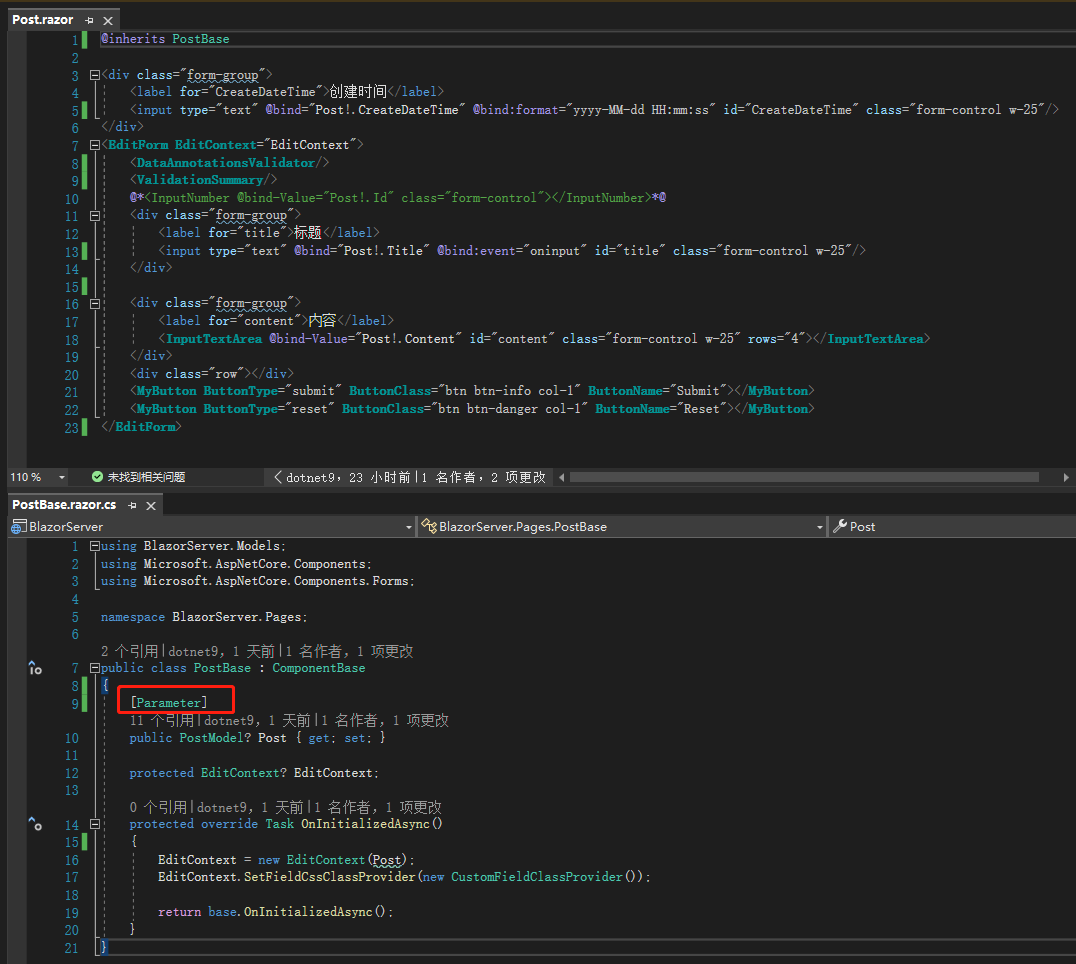
再把PostBase的OnInitializedAsync中指派值给Post的部分移除,Post上面加入Parameter,表示要从外部传进来。
最后新增BlogBase.cs跟Blog.razor,可以看到BlogBase.cs的OnInitializedAsync调用一个方法LoadData,实体化一个Blog,里面的Posts有 4 条数据。
using BlazorServer.Models;
using Microsoft.AspNetCore.Components;

namespace BlazorServer.Pages;

public class BlogBase : ComponentBase
{
	public BlogModel? Blog { get; set; }

	protected override Task OnInitializedAsync()
	{
		LoadData();
		return base.OnInitializedAsync();
	}

	private void LoadData()
	{
		Blog = new BlogModel
		{
			Id = 1,
			Name = "我的博客",
			Posts = new List<PostModel>
			{
				new PostModel
					{ Id = 1, Title = "标题1", Content = "内容1", CreateDateTime = new(2021, 12, 11, 10, 20, 50) },
				new PostModel { Id = 1, Title = "标题2", Content = "内容2", CreateDateTime = new(2021, 12, 12, 9, 13, 15) },
				new PostModel
					{ Id = 1, Title = "标题3", Content = "内容3", CreateDateTime = new(2021, 12, 13, 20, 31, 26) },
				new PostModel { Id = 1, Title = "标题4", Content = "内容4", CreateDateTime = new(2021, 12, 14, 22, 15, 27) }
			},
			CreateDateTime = new(2021, 12, 14, 23, 46, 59)
		};
	}
}
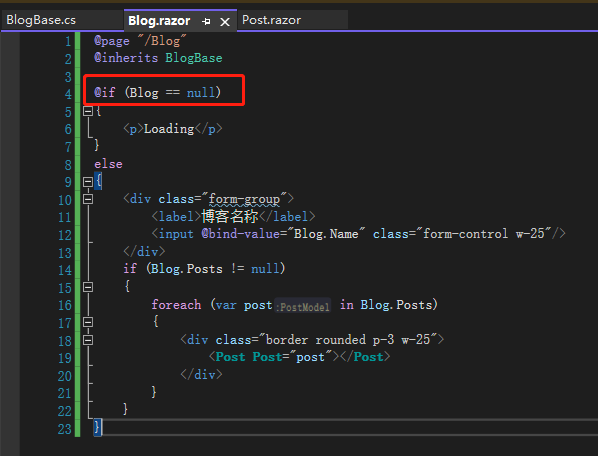
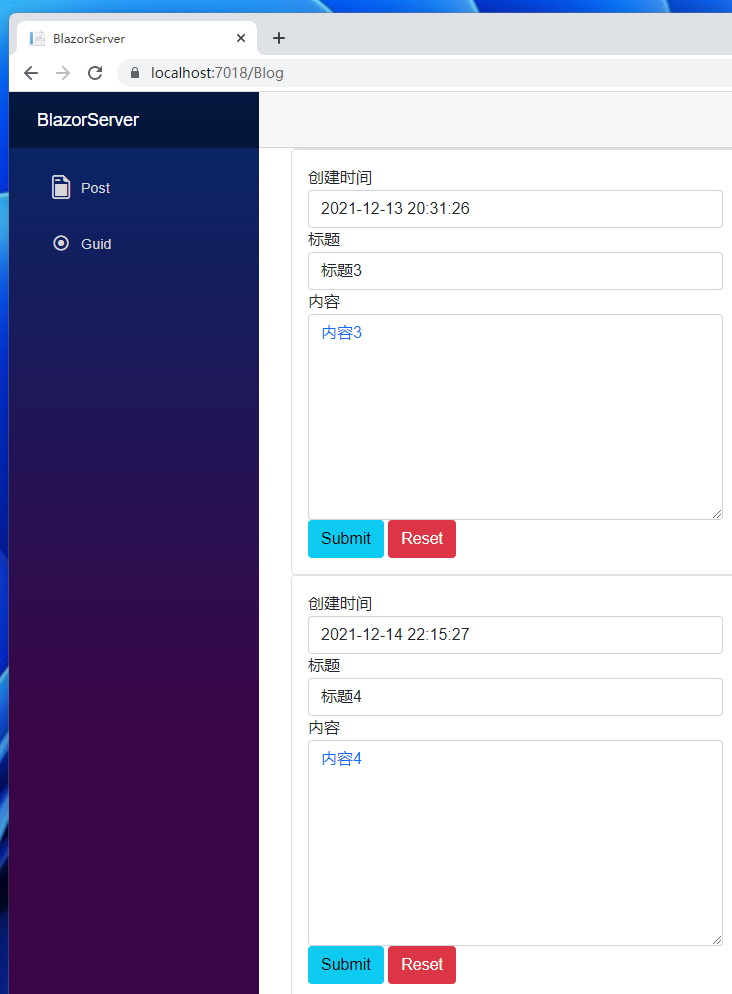
Blog.razor则是如下图一样,要记住Blog==null的判断很重要,因为真实的数据大都会用异步方式传递,所以取得数据的速度会比画面渲染的时间晚,若没有这样判断,很容易发生 Blazor 找不到该数据而报错的状况。
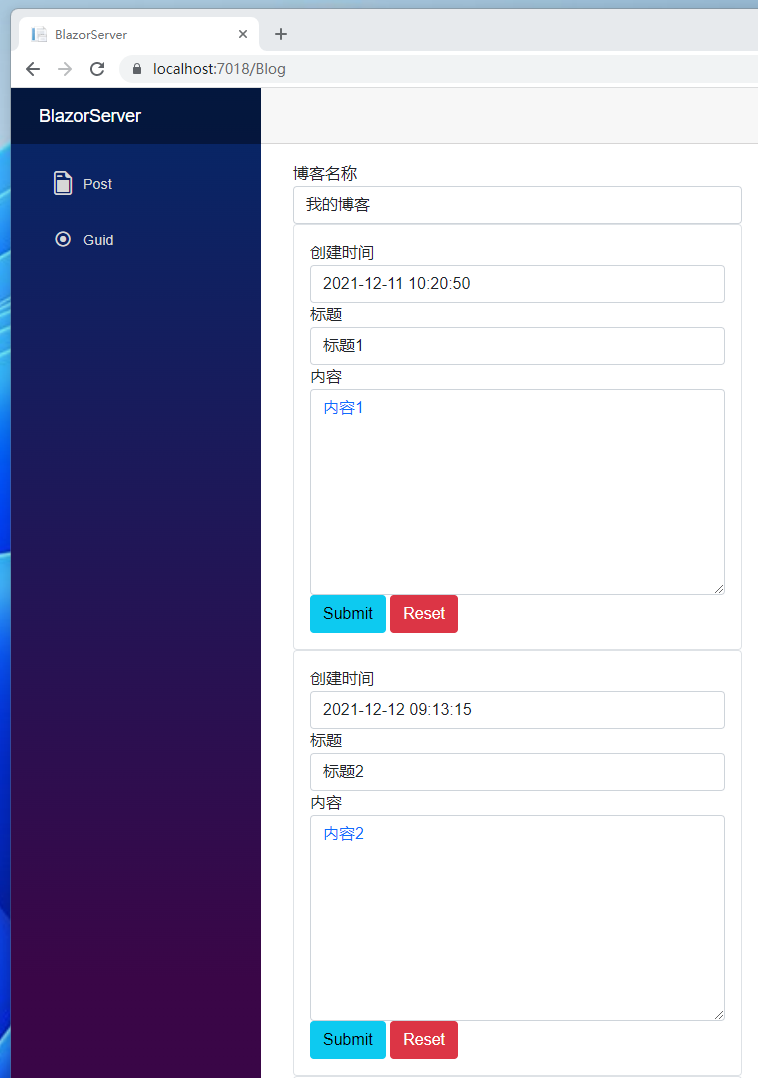
另外Post.razor也做了相应调整,可以看到画面呈现了博客名称及 4 条日志,这样一来我们就完成了简单的博客雏型了。
Post.razor:
@inherits PostBase

<div class="form-group">
  <label for="CreateDateTime">创建时间</label>
  <input
    type="text"
    @bind="Post!.CreateDateTime"
    @bind:format="yyyy-MM-dd HH:mm:ss"
    id="CreateDateTime"
    class="form-control"
  />
</div>
<EditForm EditContext="EditContext">
  <DataAnnotationsValidator />
  <ValidationSummary />
  @*<InputNumber @bind-Value="Post!.Id" class="form-control"></InputNumber>*@
  <div class="form-group">
    <label for="title">标题</label>
    <input
      type="text"
      @bind="Post!.Title"
      @bind:event="oninput"
      id="title"
      class="form-control"
    />
  </div>

  <div class="form-group">
    <label for="content">内容</label>
    <InputTextArea
      @bind-Value="Post!.Content"
      id="content"
      class="form-control"
      rows="8"
    ></InputTextArea>
  </div>
  <MyButton
    ButtonType="submit"
    ButtonClass="btn btn-info"
    ButtonName="Submit"
  ></MyButton>
  <MyButton
    ButtonType="reset"
    ButtonClass="btn btn-danger"
    ButtonName="Reset"
  ></MyButton>
</EditForm>
引用:
注:本文代码通过 .NET 6 + Visual Studio 2022 重构,可点击原文链接与重构后代码比较学习,谢谢阅读,支持原作者