MrHuo.OAuth
是 .NET 项目集成 OAuth2 登录最全面的、最方便的框架



.NET Core 项目或 .NET Framework 4.6 项目均可使用
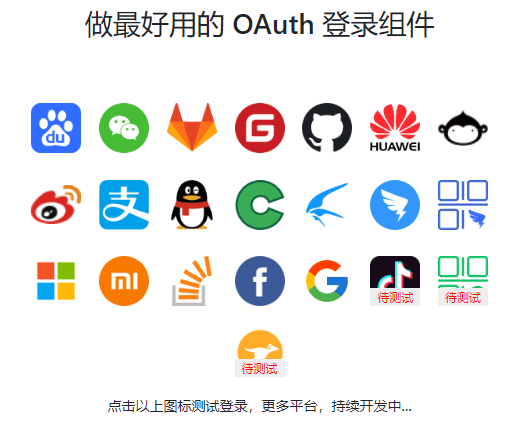
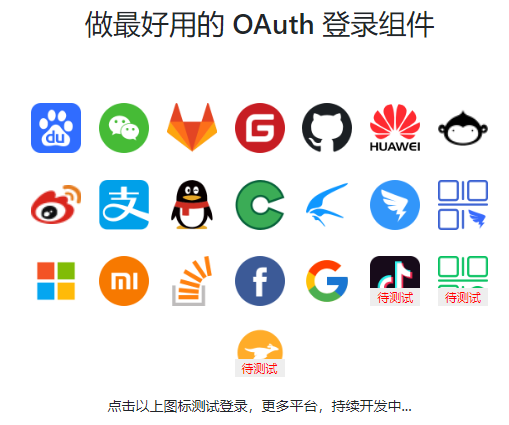
已支持平台
- 百度(可用)
- 微信公众号(可用)
- Gitlab(可用)
- Gitee(可用)
- GitHub(可用)
- 华为(可用)
- Coding.net(可用)
- 新浪微博(可用)
- 支付宝(可用)
- OSChina(可用)
- 迅雷(可用)
- 钉钉内登录(可用)
- 钉钉扫码登录(可用)
- QQ(可用)
- 微软(可用)
- 小米(可用)
- StackOverflow(可用)
- Facebook(可用) by Donma Hsu
- Google(可用)
- LinkedIn(可用,待发布 nuget)
- 抖音(可用,待发布 nuget) by feng lui
- 快手(可用,待发布 nuget) by feng lui
- 微信开放平台(待测试)
- 美团(待测试)
计划
- 飞书
- 淘宝
- 西瓜
- 今日头条
- 人人网
- Teambition
- 企业微信二维码登录
- 企业微信网页登录
- 酷家乐
- 饿了么
- 京东
- 阿里云
- 喜马拉雅...
使用方法
新建项目 web 项目,安装
nuget包即可使用。
现可用的 nuget 包列表如下:
https://www.nuget.org/packages?q=MrHuo.OAuth
Gitlab
Install-Package MrHuo.OAuth.Gitlab -Version 1.1.1
微信公众号
Install-Package MrHuo.OAuth.Wechat -Version 1.1.1
oschina.net
Install-Package MrHuo.OAuth.OSChina -Version 1.1.1
coding.net
Install-Package MrHuo.OAuth.Coding -Version 1.1.1
github.com
Install-Package MrHuo.OAuth.GitHub -Version 1.1.1
alipay.com
Install-Package MrHuo.OAuth.Alipay -Version 1.1.1
baidu.com
Install-Package MrHuo.OAuth.Baidu -Version 1.1.1
huawei.com
Install-Package MrHuo.OAuth.Huawei -Version 1.1.1
gitee.com
Install-Package MrHuo.OAuth.Gitee -Version 1.1.1
weibo.com
Install-Package MrHuo.OAuth.SinaWeibo -Version 1.1.1
xunlei.com
Install-Package MrHuo.OAuth.XunLei -Version 1.1.1
qq.com
Install-Package MrHuo.OAuth.QQ -Version 1.1.1
microsoft.com
Install-Package MrHuo.OAuth.Microsoft -Version 1.1.1
mi.com
Install-Package MrHuo.OAuth.Mi -Version 1.1.1
stackoverflow.com
Install-Package MrHuo.OAuth.StackOverflow -Version 1.1.1
facebook.com
Install-Package MrHuo.OAuth.Facebook -Version 1.1.1
google.com
Install-Package MrHuo.OAuth.Google -Version 1.0.0
Startup.cs
public void ConfigureServices(IServiceCollection services)
{
    //将第三方登录组件注入进去
    services.AddSingleton(new Baidu.BaiduOAuth(OAuthConfig.LoadFrom(Configuration, "oauth:baidu")));
    services.AddSingleton(new Wechat.WechatOAuth(OAuthConfig.LoadFrom(Configuration, "oauth:wechat")));
    services.AddSingleton(new Gitlab.GitlabOAuth(OAuthConfig.LoadFrom(Configuration, "oauth:gitlab")));
    services.AddSingleton(new Gitee.GiteeOAuth(OAuthConfig.LoadFrom(Configuration, "oauth:gitee")));
    //... 其他登录方式
}
注意:如果用 appsettings.json 方式引入,提供了一个快捷方法从配置中加载。
OAuthConfig.LoadFrom(Configuration, "oauth:baidu")
"oauth:baidu" 这部分是配置前缀,配置格式如下:
{
  "oauth": {
    "qq": {
      "app_id": "qq_app_id",
      "app_key": "qq_app_key",
      "redirect_uri": "https://oauthlogin.net/oauth/qqcallback",
      "scope": "get_user_info"
    },
    "github": {
      "app_id": "github_app_id",
      "app_key": "github_app_key",
      "redirect_uri": "https://oauthlogin.net/oauth/githubcallback",
      "scope": "repo"
    },
    "wechat": {
      "app_id": "wechat_app_id",
      "app_key": "wechat_app_key",
      "redirect_uri": "https://oauthlogin.net/oauth/wechatcallback",
      "scope": "snsapi_userinfo"
    },
    "huawei": {
      "app_id": "huawei_app_id",
      "app_key": "huawei_app_key",
      "redirect_uri": "https://oauthlogin.net/oauth/huaweicallback",
      "scope": "https://www.huawei.com/auth/account"
    },
    "gitee": {
      "app_id": "gitee_app_id",
      "app_key": "gitee_app_key",
      "redirect_uri": "http://oauthlogin.net/oauth/giteecallback",
      "scope": "user_info"
    },
    "baidu": {
      "app_id": "baidu_app_id",
      "app_key": "baidu_app_key",
      "redirect_uri": "http://oauthlogin.net/oauth/baiducallback",
      "scope": "basic"
    },
    "alipay": {
      "app_id": "alipay_app_id",
      "app_key": "alipay_app_key",
      "redirect_uri": "https://oauthlogin.net/oauth/alipaycallback",
      "scope": "auth_user",
      "private_key": "private_key",
      "public_key": "public_key"
    },
    "gitlab": {
      "app_id": "gitlab_app_id",
      "app_key": "gitlab_app_key",
      "redirect_uri": "http://oauthlogin.net/oauth/gitlabcallback",
      "scope": "read_user"
    }
  }
}
OAuthController.cs根据实际需要自行命名
public class OAuthController : Controller
{
    [HttpGet("oauth/{type}")]
    public IActionResult Index(
        string type,
        [FromServices] BaiduOAuth baiduOAuth,
        [FromServices] WechatOAuth wechatOAuth
    )
    {
        var redirectUrl = "";
        switch (type.ToLower())
        {
            case "baidu":
                {
                    redirectUrl = baiduOAuth.GetAuthorizeUrl();
                    break;
                }
            case "wechat":
                {
                    redirectUrl = wechatOAuth.GetAuthorizeUrl();
                    break;
                }
            default:
                return ReturnToError($"没有实现【{type}】登录方式!");
        }
        return Redirect(redirectUrl);
    }

    [HttpGet("oauth/{type}callback")]
    public async Task<IActionResult> LoginCallback(
        string type,
        [FromServices] BaiduOAuth baiduOAuth,
        [FromServices] WechatOAuth wechatOAuth,
        [FromQuery] string code,
        [FromQuery] string state)
    {
        try
        {
            switch (type.ToLower())
            {
                case "baidu":
                    {
                        var authorizeResult = await baiduOAuth.AuthorizeCallback(code, state);
                        if (!authorizeResult.IsSccess)
                        {
                            throw new Exception(authorizeResult.ErrorMessage);
                        }
                        return Json(authorizeResult);
                    }
                case "wechat":
                    {
                        var authorizeResult = await wechatOAuth.AuthorizeCallback(code, state);
                        if (!authorizeResult.IsSccess)
                        {
                            throw new Exception(authorizeResult.ErrorMessage);
                        }
                        return Json(authorizeResult);
                    }
                default:
                    throw new Exception($"没有实现【{type}】登录回调!");
            }
        }
        catch (Exception ex)
        {
            return Content(ex.Message);
        }
    }
}
Views
<!--在代码中放置授权按钮-->
<a href="/oauth/baidu">Baidu 登录</a>
<a href="/oauth/wechat">Wechat 扫码登录</a>
<!-- //其他登录方式照样子往下写 -->
扩展
扩展其他平台非常容易,拿 Gitee 平台的代码来说:https://github.com/mrhuo/MrHuo.OAuth/tree/main/MrHuo.OAuth.Gitee
第一步:找平台对应 OAuth 文档,找到获取用户信息接口返回 JSON,转换为 C# 实体类。如下:
根据自己需要和接口标准,扩展用户属性
public class GiteeUserModel : IUserInfoModel
{
    [JsonPropertyName("name")]
    public string Name { get; set; }

    [JsonPropertyName("avatar_url")]
    public string Avatar { get; set; }

    [JsonPropertyName("message")]
    public string ErrorMessage { get; set; }

    [JsonPropertyName("email")]
    public string Email { get; set; }

    [JsonPropertyName("blog")]
    public string Blog { get; set; }

    //...其他属性类似如上
}
第二步:写对应平台的授权接口
/// <summary>
/// https://gitee.com/api/v5/oauth_doc#/
/// </summary>
public class GiteeOAuth : OAuthLoginBase<GiteeUserModel>
{
    public GiteeOAuth(OAuthConfig oauthConfig) : base(oauthConfig) { }
    protected override string AuthorizeUrl => "https://gitee.com/oauth/authorize";
    protected override string AccessTokenUrl => "https://gitee.com/oauth/token";
    protected override string UserInfoUrl => "https://gitee.com/api/v5/user";
}
加上注释,总共十行,如你所见,非常方便。如果该平台协议遵循 OAuth2 标准开发,那么就这么几行就好了。
就连修改字段的微信登录实现,也不过复杂,只需要定义基本参数就 OK。代码如下:
/// <summary>
/// Wechat OAuth 相关文档参考:
/// <para>https://developers.weixin.qq.com/doc/offiaccount/OA_Web_Apps/Wechat_webpage_authorization.html</para>
/// </summary>
public class WechatOAuth : OAuthLoginBase<WechatAccessTokenModel, WechatUserInfoModel>
{
    public WechatOAuth(OAuthConfig oauthConfig) : base(oauthConfig) { }
    protected override string AuthorizeUrl => "https://open.weixin.qq.com/connect/oauth2/authorize";
    protected override string AccessTokenUrl => "https://api.weixin.qq.com/sns/oauth2/access_token";
    protected override string UserInfoUrl => "https://api.weixin.qq.com/sns/userinfo";
    protected override Dictionary<string, string> BuildAuthorizeParams(string state)
    {
        return new Dictionary<string, string>()
        {
            ["response_type"] = "code",
            ["appid"] = oauthConfig.AppId,
            ["redirect_uri"] = System.Web.HttpUtility.UrlEncode(oauthConfig.RedirectUri),
            ["scope"] = oauthConfig.Scope,
            ["state"] = state
        };
    }
    public override string GetAuthorizeUrl(string state = "")
    {
        return $"{base.GetAuthorizeUrl(state)}#wechat_redirect";
    }
    protected override Dictionary<string, string> BuildGetAccessTokenParams(Dictionary<string, string> authorizeCallbackParams)
    {
        return new Dictionary<string, string>()
        {
            ["grant_type"] = "authorization_code",
            ["appid"] = $"{oauthConfig.AppId}",
            ["secret"] = $"{oauthConfig.AppKey}",
            ["code"] = $"{authorizeCallbackParams["code"]}"
        };
    }
    protected override Dictionary<string, string> BuildGetUserInfoParams(WechatAccessTokenModel accessTokenModel)
    {
        return new Dictionary<string, string>()
        {
            ["access_token"] = accessTokenModel.AccessToken,
            ["openid"] = accessTokenModel.OpenId,
            ["lang"] = "zh_CN",
        };
    }
}
特别贡献
为了能让各位朋友能顺利的使用各种平台登录组件,先急求各种平台的 APPID 做测试,有这方面资源的朋友联系我。 提供测试的朋友,可以永久出现在项目首页特别贡献列表里,可带链接。
邮件:admin@mrhuo.com 备注:OAuth Appid
Contribution
1.欢迎参与开发,贡献其他未完成平台代码。 2.欢迎在 issue 里提交需求平台,带上平台链接地址,我们将加入到计划之中。 3.欢迎提交各种建议,文明交流。
License
项目地址
- 框架名:
MrHuo.OAuth - 作者:mrhuo
- GitHub:https://github.com/mrhuo/MrHuo.OAuth