本文由網友投稿,歡迎更多朋友來分享。
作者:VleaStwo
1. 語言背景
- .NET 6/7/8
- ASP.NET Core Blazor
2. 需求背景
- 將URL或其他資訊產生二維碼
- 用於終端掃碼檢視資訊
- 在二維碼附近佈置一定的文字資訊
- 用於使用者直接檢視資訊 (部分)
3. 解決路線
- 二維碼產生工具
產生二維碼的版本非常多,這裡選用的是 Net.Codecrete.QrCodeGenerator v2.0.3
- 連結:
GitHub 連結:https://github.com/manuelbl/QrCodeGenerator
NuGet 連結:https://www.nuget.org/packages/Net.Codecrete.QrCodeGenerator/2.0.3
這裡沒出現什麼問題,所以就不嘗試其他方案了,大同小異。
- 繪圖工具
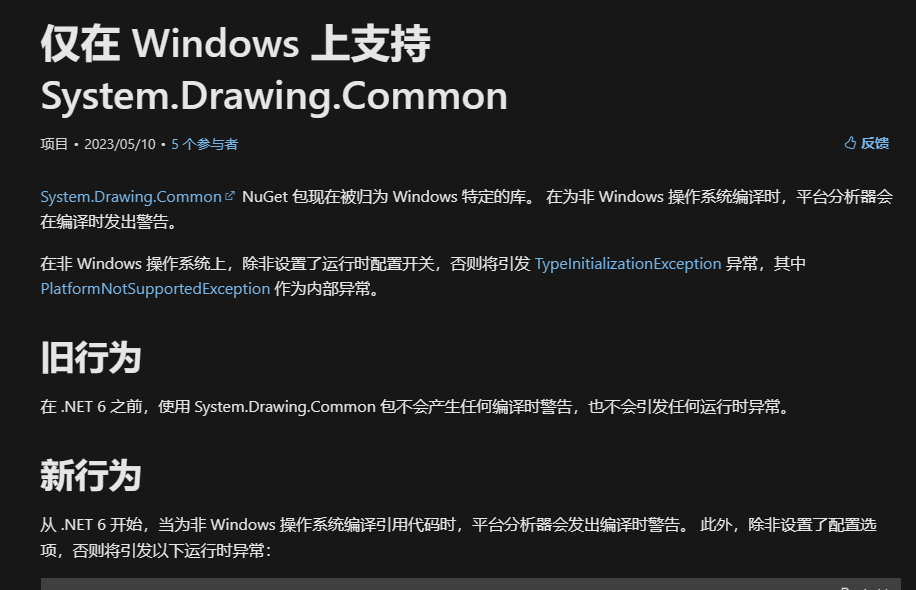
- 根據群裡大佬給的方案,採用 "Graphics" 結果失敗
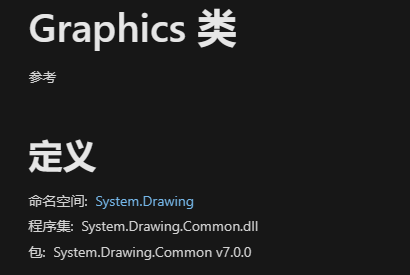
- 查閱微軟資料發現從 .NET 6 開始只能在 Windows 上使用,不過好在官方也給了幾條解決方案:
- 我選擇的是 SkiaSharp v2.88.3
- 連結:
GitHub 連結:https://github.com/mono/SkiaSharp
NuGet 連結:https://www.nuget.org/packages/SkiaSharp/2.88.3
- 佈局
二維碼和文字的位置關係基本上是固定的,選擇徒手畫在紙上還是在電腦上畫佈置圖都不影響,提前畫圖的目的是為了方便計算定位點,實際還是要根據自己的業務來設計佈局(腦力強大的可以不畫,靠大腦快取)。
實作程式碼
- QR 產生
沒什麼需要講解的,一行程式碼解決:
// 呼叫陳述式
var qr = QrCode.EncodeText(mes, QrCode.Ecc.Quartile);

// 庫原始碼
// 簡化備註
//    text: 要編碼的文字
//    ecl:  二維碼品質等級
public static QrCode EncodeText(string text, Ecc ecl)
{
    Objects.RequireNonNull(text);
    Objects.RequireNonNull(ecl);
    var segments = QrSegment.MakeSegments(text);
    return EncodeSegments(segments, ecl);
}
- 繪圖
- qr 需要轉換成類似 bitmap 的類別才能繼續二次繪圖
https://www.nuget.org/packages/Net.Codecrete.QrCodeGenerator/2.0.3
裡面已經說明了不同平台需要不同方案
Raster Images / Bitmaps Starting with .NET 6, System.Drawing is only supported on Windows operating system and thus cannot be used for multi-platform libraries like this one. Therefore, ToBitmap() has been removed and three options are now offered in the form of method extensions. To use it: Select one of the imaging libraries below Add the NuGet dependencies to your project Copy the appropriate QrCodeBitmapExtensions.cs file to your project Imaging library Recommendation NuGet dependencies Extension file System.Drawing For Windows only projects System.Drawing.Common QrCodeBitmapExtensions.cs SkiaSharp For macOS, Linux, iOS, Android and multi-platform projects SkiaSharp and SkiaSharp.NativeAssets.Linux (for Linux only) QrCodeBitmapExtensions.cs ImageSharp Currently in beta state SixLabors.ImageSharp.Drawing QrCodeBitmapExtensions.cs
上文大致意思就是根據自己的需要選擇對應的轉換方法,在 GitHub 中已經寫好了對應的 demo 擴充類別可以直接複製。
- 我這裡採用的是 SkiaSharp,需要先把上面的 qr 轉換成可以使用的 SKBitmap,方法直接從專案的 GitHub 上下載對應的擴充類別,我這裡直接放對應原始碼連結,可以自行下載: QrCode 轉 SkiaSharp (SKBitmap) 原始碼。
<param name="scale">The width and height, in pixels, of each module.(翻譯:每個模組的寬度和高度,以像素為單位)</param>
<param name="border">The number of border modules to add to each of the four sides.(翻譯:要加入四個邊的邊框模組數量)</param>
var bmp = qr.ToBitmap(10, 2);
- 拿到 bmp 以後,根據我的佈局設定,我以圖片的尺寸作為基底,1/10 即為字高
int h = bmp.Height / 10;
- 建立畫筆,參數比較常見就不解釋了
var paint = new SKPaint
{
    Color = SKColors.Black,
    IsAntialias = true,
    IsLinearText = true,
    TextEncoding = SKTextEncoding.Utf8,
    Typeface = SKTypeface.FromFamilyName("微軟正黑體"),
    TextSize = h,
    TextAlign = SKTextAlign.Left,
};
- 再建立一個兩倍字號的畫筆用於頂部區域
var tempPaint = paint.Clone();
tempPaint.TextSize = 2 * h;
- 建立畫桌(板)
SKSurface sKSurface = SKSurface.Create(
    new SKImageInfo(bmp.Width * 3, bmp.Height * 2));
- 建立畫布並填充白色
var canvas = sKSurface.Canvas;
canvas.DrawColor(SKColors.White);
- 畫頂部區域(正常來說應該是預先畫好的一張頂部圖案)
// 左邊縮進一個單位,然後向下偏移四個單位
canvas.DrawText(top,
    new SKPoint(01 * h, 04 * h),
    tempPaint);
// top 是 string 型別,內容是頂部區域的文字內容
// SKPoint 就是一個常規的 x,y 組成的 point
// 記住是左上角為 (0,0),右下角是 (∞,∞) 就對了
- 畫標題區域
// 首先根據自己寫的演算法把 string 轉換成 List<string>
// 目的是為了文字過長的時候能夠換行
var titles = GetTextLines(title, 28).ToList();
for (int i = 0; i < titles.Count; i++)
{
    canvas.DrawText(
        titles[i],
        new SKPoint(01 * h, (07 + i) * h),
        paint);
}
- 用的換行演算法原始碼如下
/// <summary>
/// 文字換行演算法
/// </summary>
/// <param name="text">原文</param>
/// <param name="maxLength">單行最大字數</param>
/// <returns>多行</returns>
private static IEnumerable<string> GetTextLines(
    string text, int maxLength)
{
    // 注意 maxLength 是字數不是實際寬度
    string[] words = text.Select(x => x.ToString()).ToArray(); //text.Split(' ');
    List<string> lines = new List<string>();
    string line = string.Empty;
    foreach (string word in words)
    {
        //if (!string.IsNullOrEmpty(line))
        //{
        //    line += " ";
        //}
        if (line.Length + word.Length <= maxLength)
        {
            line += word;
        }
        else
        {
            lines.Add(line);
            line = word;
        }
    }
    lines.Add(line);
    return lines;
}
注意:這是在網上找到的有部分修改,不是我從零開始寫的
- 左下角二維碼
// 因為二維碼自身就對周圍做了縮進處理,所以不需要再縮進
canvas.DrawBitmap(bmp, new SKPoint(00 * h, 10 * h));
- 右下角文字備註
int row = 1;
for (int i = 0; i < notes.Count; i++)
{
    var strs = GetTextLines(notes[i], 18);
    foreach (var str in strs)
    {
        // 右下角 10h 位置,並且左右各縮進 1h
        // row*h 文字下移位置
        canvas.DrawText(str,
        new SKPoint(10 * h, (10 + 1) * h + row * h),
        paint);

        row++;
    }
}
- 最後出圖
// filename 要儲存的檔案名稱,記得是 png 檔案
using (var image = sKSurface.Snapshot())
{
    using (var writeStream = File.OpenWrite(filename))
    {
        // 80 是品質,夠了
        image.Encode(
            SKEncodedImageFormat.Png,
            80)
            .SaveTo(writeStream);
    }
}
實際效果
- 測試程式碼
static void Main(string[] args)
{
    // 二維碼內容
    string mes = "https://www.dotnet9.com/";
    // 標題
    string title = "ThingsGateway 基於 net6/7+ ,跨平台邊緣採集(物聯網)閘道器";
    // 文字備註
    List<string> notes = new List<string>()
    {
        "Blazor Server 架構,開發部署更簡單",
        "採集/上傳設定完全支援 Excel 匯入匯出",
        "插件式驅動,方便驅動二次開發",
        "時序資料庫儲存",
        "即時/歷史警報(Sql 轉儲),支援布林/高低限值",
    };

    string filename =
        Path.Combine(Path.GetTempPath(), Guid.NewGuid() + ".png");
    // 頂部區域內容
    string top = "開源 .NET 7 和 Blazor 組合開發";

    // 封裝的方法
    QrCreate.HorizontalDraw(mes, title, notes, filename, top);


    Console.WriteLine(filename);
    Console.ReadLine();
}
- 測試結果
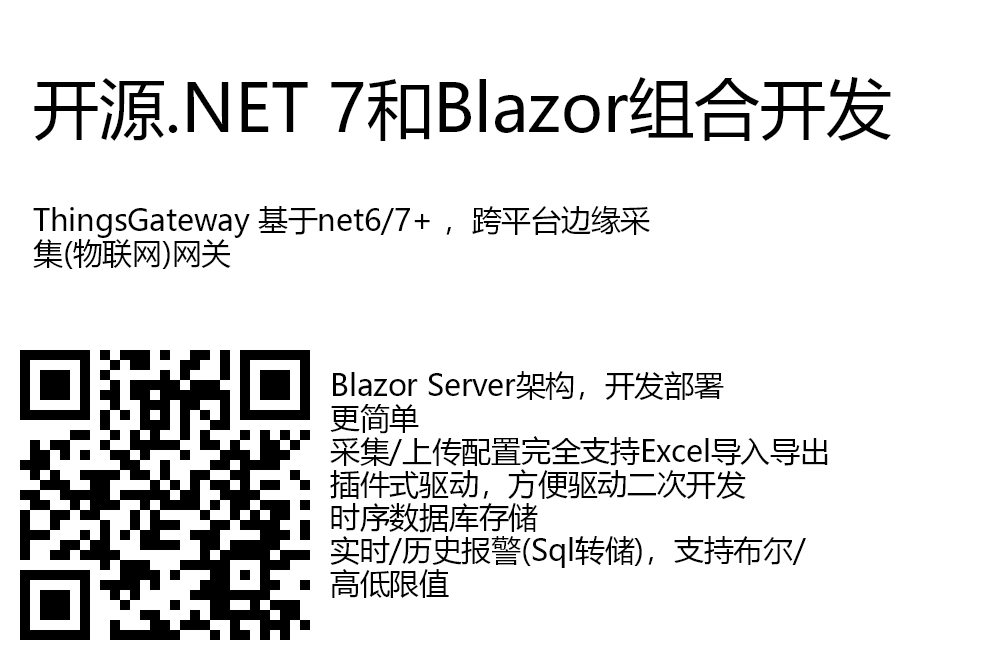
備註:圖片是白底的,如果目前頁面也是白底容易看不到圖片的邊緣,建議自行下載圖片觀看