
一、本文开始之前
上传文件时,一般是提供一个上传按钮,点击上传,弹出文件(或者目录选择对话框),选择文件(或者目录)后,从对话框对象中取得文件路径后,再进行上传操作。
对话框选择文件
选择对话框代码如下:
OpenFileDialog openFileDialog = new OpenFileDialog();
openFileDialog.Title = "选择Exe文件";
openFileDialog.Filter = "exe文件|*.exe";
openFileDialog.FileName = string.Empty;
openFileDialog.FilterIndex = 1;
openFileDialog.Multiselect = false;
openFileDialog.RestoreDirectory = true;
openFileDialog.DefaultExt = "exe";
if (openFileDialog.ShowDialog() == false)
{
    return;
}
string txtFile = openFileDialog.FileName;
但一般来说,对用户体验最好的,应该是直接鼠标拖拽文件了:
百度网盘拖拽上传文件
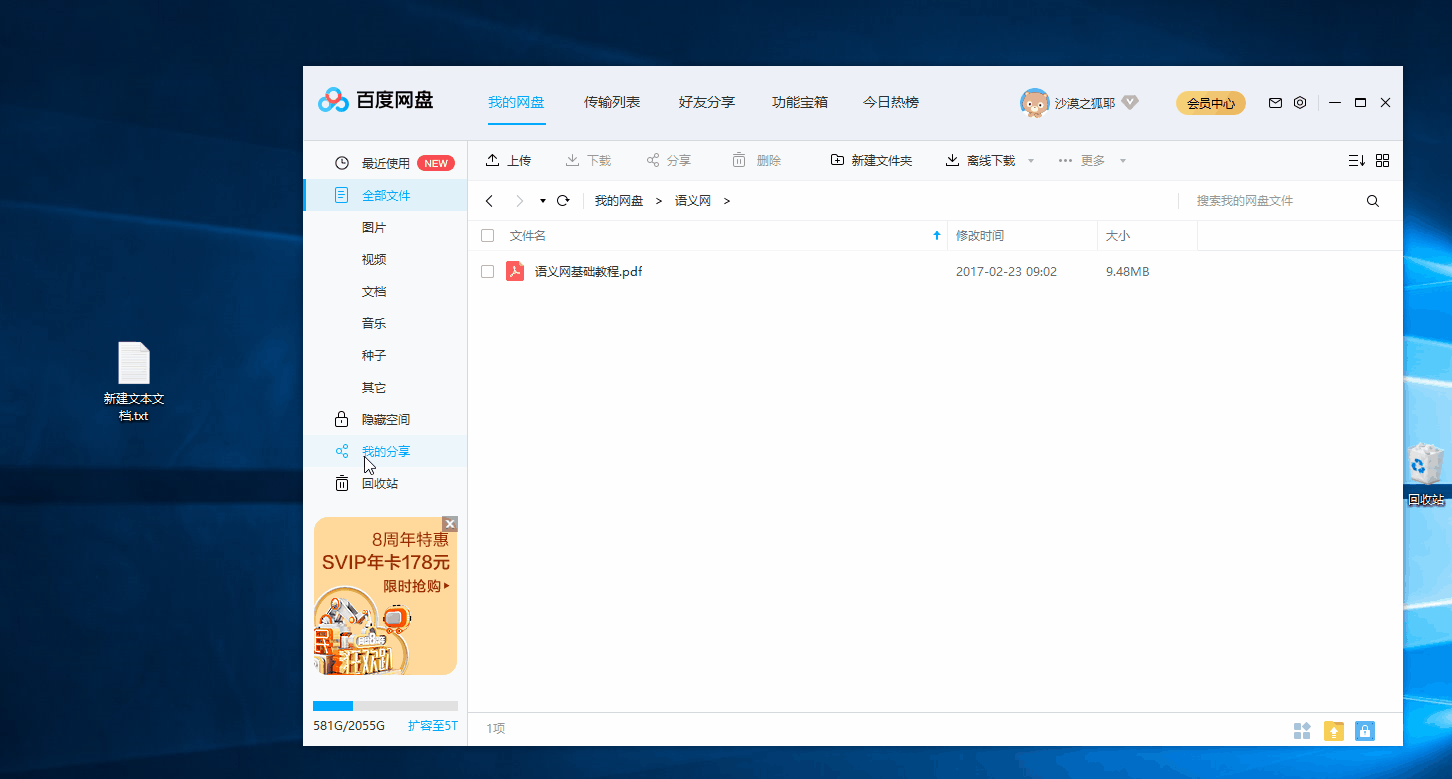
下面简单说说 WPF 中文件拖拽的实现方式。
二、WPF 中怎样拖拽文件呢?
其实很简单,只要拖拽接受控件(或容器)注册这两个事件即可:DragEnter、Drop。
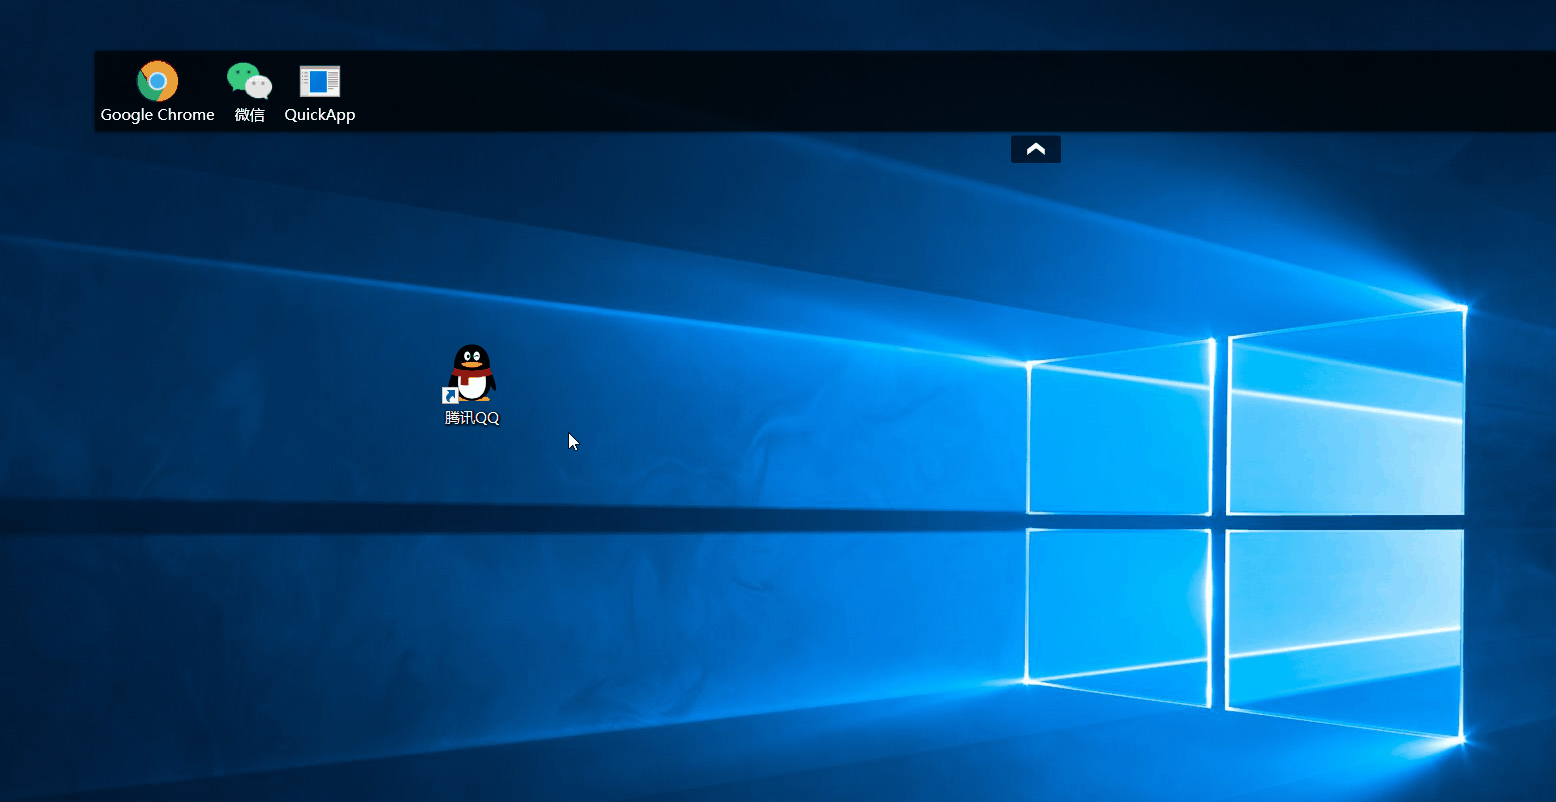
先看看我的实现效果:
拖拽文件进 QuickApp 中
Xaml 中注册事件
注册事件:
<Grid
  MouseMove="Grid_MouseMove"
  AllowDrop="True"
  Drop="Grid_Drop"
  DragEnter="Grid_DragEnter"
></Grid>
事件处理方法:
- Grid_DragEnter 处理方法
private void Grid_DragEnter(object sender, DragEventArgs e)
{
    if (e.Data.GetDataPresent(DataFormats.FileDrop))
    {
        e.Effects = DragDropEffects.Link;
    }
    else
    {
        e.Effects = DragDropEffects.None;
    }
}
DragDropEffects.Link:处理拖拽文件操作
- Grid_Drop 处理方法
这是处理实际拖拽操作的方法,得到拖拽的文件路径(如果是操作系统文件快捷方式(扩展名为 lnk),则需要使用 com 组件(不是本文讲解重点,具体看本文开源项目)取得实际文件路径)后,即可处理后续操作(比如文件上传)。
private void Grid_Drop(object sender, DragEventArgs e)
{
    try
    {
        var fileName = ((System.Array)e.Data.GetData(DataFormats.FileDrop)).GetValue(0).ToString();
        MenuItemInfo menuItem = new MenuItemInfo() { FilePath = fileName };

        // 快捷方式需要获取目标文件路径
        if (fileName.ToLower().EndsWith("lnk"))
        {
            WshShell shell = new WshShell();
            IWshShortcut wshShortcut = (IWshShortcut)shell.CreateShortcut(fileName);
            menuItem.FilePath = wshShortcut.TargetPath;
        }
        ImageSource imageSource = SystemIcon.GetImageSource(true, menuItem.FilePath);
        System.IO.FileInfo file = new System.IO.FileInfo(fileName);
        if (string.IsNullOrWhiteSpace(file.Extension))
        {
            menuItem.Name = file.Name;
        }
        else
        {
            menuItem.Name = file.Name.Substring(0, file.Name.Length - file.Extension.Length);
        }
        menuItem.Type = MenuItemType.Exe;

        if (ConfigHelper.AddNewMenuItem(menuItem))
        {
            AddNewMenuItem(menuItem);
        }
    }
    catch (Exception ex)
    {
        MessageBox.Show(ex.Message);
    }
}
三、本文 Over
功能很简单,不求精深,会用就行。