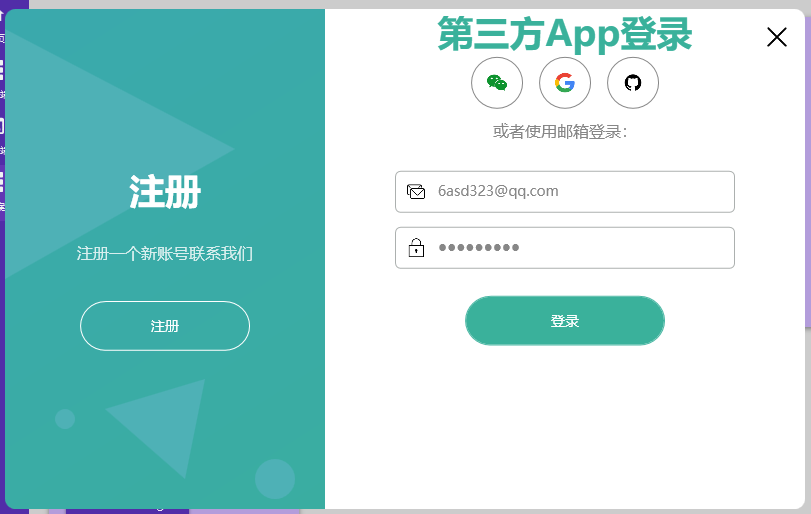
Share a login interface. First, take a look at the effect:
Preparation
Some icons are used in this article:
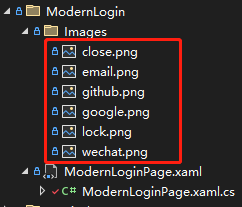
We can download them for free from iconfont:

Brief code explanation
Feel free to create a WPF project (.NET Framework, .NET 5\6\7 all work), and use the tree /f command to see the final file structure, which matches the screenshot above:
C:.
│  ModernLoginPage.xaml
│  ModernLoginPage.xaml.cs
│
└─Images
        close.png
        email.png
        github.png
        google.png
        lock.png
        wechat.png
Simple, right? One image folder stores the icons downloaded earlier, one xaml file handles the login interface design, and xaml.cs handles the event responses for interface buttons (in a real project, using MVVM is recommended).
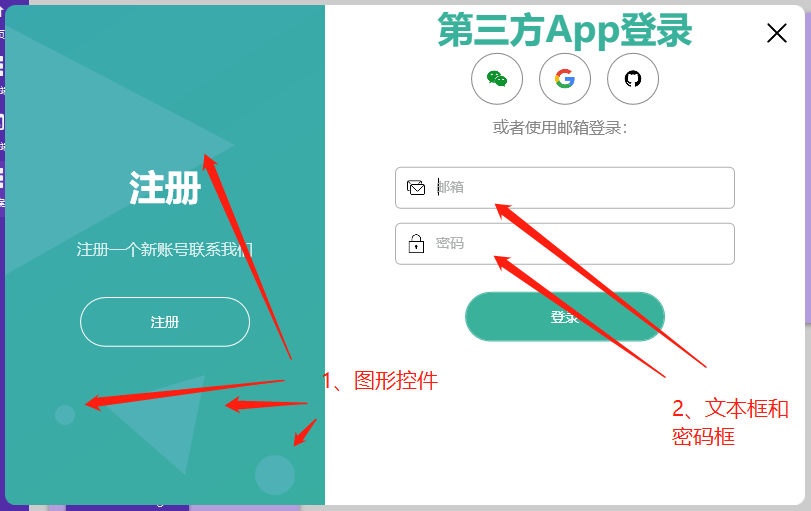
Looking at the screenshot above, let's focus on these two parts:
- The graphic controls on the left
When the company has a designer, creating such images is very simple. When there isn't one, you can use Polygon, Ellipse, etc. to achieve some simple effects and make the interface less monotonous:
<Canvas>
    <Polygon Points="0, 20 230,140 0,270" Fill="#4EB1B6" />
    <Polygon Points="100, 400 200,370 180,470" Fill="#4EB1B6" />
    <Ellipse Margin="250 450 0 0" Width="40" Height="40" Fill="#4EB1B6" />
    <Ellipse Margin="50 400 0 0" Width="20" Height="20" Fill="#4EB1B6" />
</Canvas>
- The account text box and password box on the right
For demonstration, the author used a combination of one image + one label control + one text box for the account input:
<Border Padding="10" BorderThickness="1" BorderBrush="#acb0af" Margin="70 7" CornerRadius="5">
    <Grid>
        <Grid.ColumnDefinitions>
            <ColumnDefinition Width="auto" />
            <ColumnDefinition Width="*" />
        </Grid.ColumnDefinitions>

        <Image Source="/TerminalMACS.TestDemo;component/Views/ModernLogin/Images/email.png" Height="20" />
        <TextBlock x:Name="textEmail" MouseDown="textEmail_MouseDown" Text="Email"
                    Style="{StaticResource textHint}" />
        <TextBox x:Name="txtEmail" TextChanged="txtEmail_TextChanged" Style="{StaticResource textBox}" />
    </Grid>
</Border>
private void textEmail_MouseDown(object sender, MouseButtonEventArgs e)
{
    txtEmail.Focus();
}

private void txtEmail_TextChanged(object sender, TextChangedEventArgs e)
{
    if (!string.IsNullOrEmpty(txtEmail.Text) && txtEmail.Text.Length > 0)
    {
        textEmail.Visibility = Visibility.Collapsed;
    }
    else
    {
        textEmail.Visibility = Visibility.Visible;
    }
}
The code is relatively simple. The .cs file code:
- When the mouse clicks on the label, set the account text box as the focused control to improve user experience.
- Show/hide the label when entering account information in the text box.
The password box logic is the same as the account text box:
<Border Padding="10" BorderThickness="1" BorderBrush="#acb0af" Margin="70 7" CornerRadius="5">
    <Grid>
        <Grid.ColumnDefinitions>
            <ColumnDefinition Width="auto" />
            <ColumnDefinition Width="*" />
        </Grid.ColumnDefinitions>

        <Image Source="/TerminalMACS.TestDemo;component/Views/ModernLogin/Images/lock.png" Height="20" />
        <TextBlock x:Name="textPassword" MouseDown="textPassword_MouseDown" Text="Password"
                    Style="{StaticResource textHint}" />
        <PasswordBox x:Name="txtPassword" PasswordChanged="txtPassword_TextChanged"
                        Style="{StaticResource textBox}" />
    </Grid>
</Border>
private void textPassword_MouseDown(object sender, MouseButtonEventArgs e)
{
    txtPassword.Focus();
}

private void txtPassword_TextChanged(object sender, RoutedEventArgs e)
{
    if (!string.IsNullOrEmpty(txtPassword.Password) && txtPassword.Password.Length > 0)
    {
        textPassword.Visibility = Visibility.Collapsed;
    }
    else
    {
        textPassword.Visibility = Visibility.Visible;
    }
}
References:
- YouTube video: C# WPF UI | How to Design Modern Login Page in WPF
- YouTube channel: C# WPF UI Academy
- Code for this article: ModernLogin