
如果公司交給你一個任務讓你寫一個 API 介面,那麼我們應該如何設計這個 API 介面來保證這個介面是對外看起來「高大上」、「羨慕崇拜」,並且使用起來和普通 API 介面無感,並且可以完美接入 aspnetcore 的認證授權體系呢,而不是自定義簽名來進行自定義過濾器實現呢(雖然也可以但是並不是最完美的),如何讓小白羨慕一眼就知道你是老鳥。
接下來我將給大家分享你不知道的自定義認證授體系。
我相信這可能是你面對 aspnetcore 下一個無論如何都要跨過去的坎,也是很多老鳥不熟悉的未知領域(很多人說能用就行,那麼你可以直接右上角或者左上角)
如何打造一個最最最安全的 API 介面
技術選型
在不考慮性能的影響下我們選擇非對稱加密可以選擇 SM 或者 RSA 加密,這邊我們選擇 RSA2048 位 PKCS8 金鑰來進行,HTTP 傳輸可以分為兩個一個是 Request 一個是 Response 兩個互動模式。
安全的互動方式在不使用 HTTPS 的前提下那麼就是我把明文資訊加密並且簽名後給你,你收到後自己解密然後把你響應給我的明文資訊加密後簽名在回給我,這樣就可以保證資料互動的安全性。
非對稱加密一般擁有兩個金鑰,一個被稱作為公鑰,一個被稱作為私鑰,公鑰是可以公開的哪怕放到網際網路上也是沒關係的,私鑰是自己保存的,一般而言永遠不會用到自己的私鑰。
私鑰簽名的結果只能被對應的公鑰校驗成功,公鑰加密的資料只能被對應的私鑰解密
實現原理
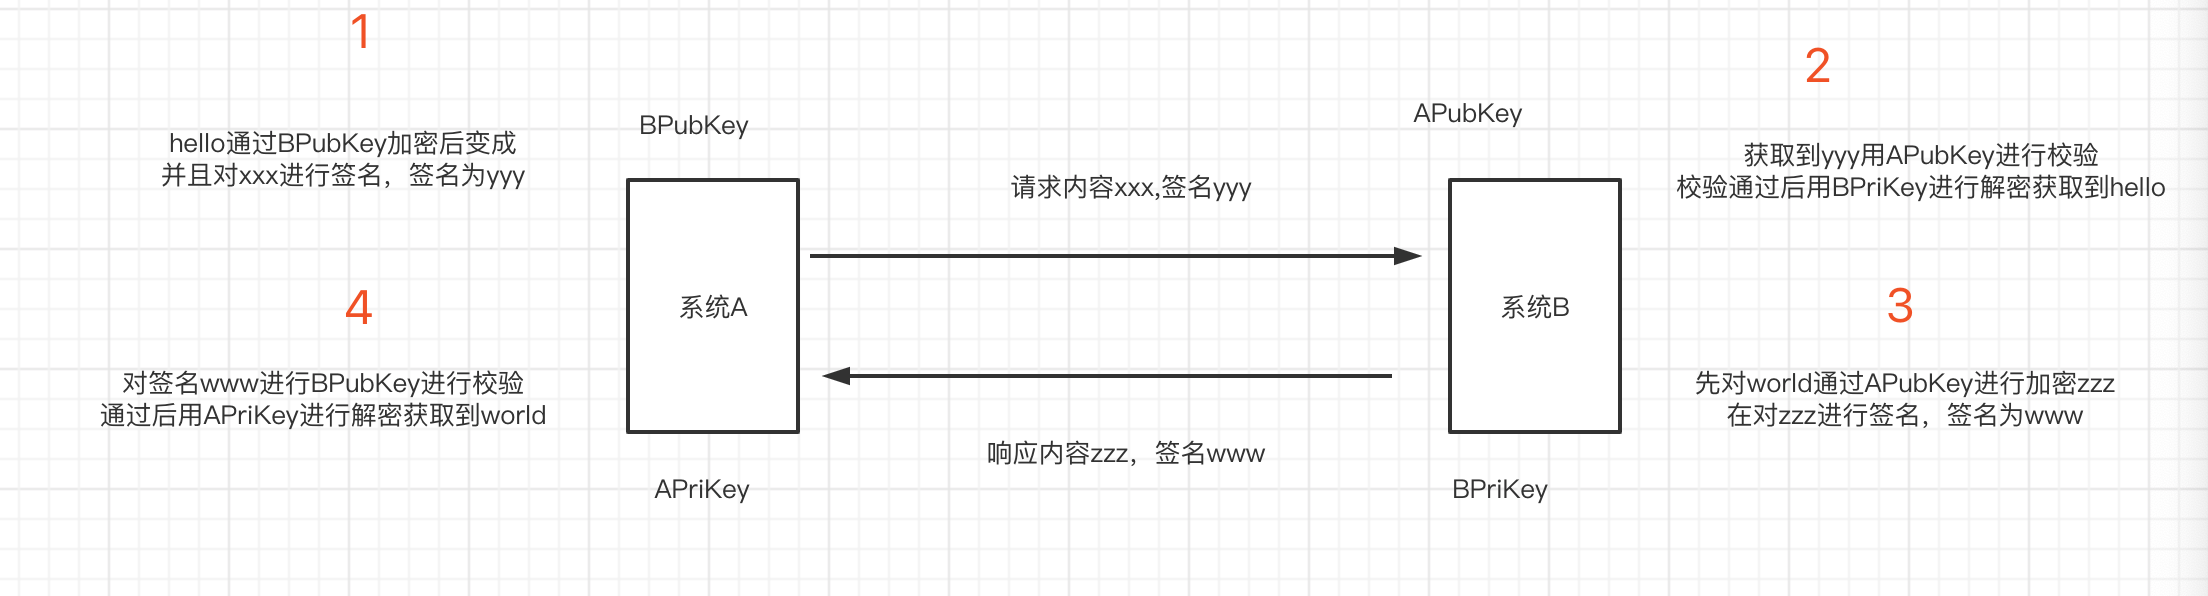
假設我們現在是兩個系統間的互動,系統 A,系統 B。系統 A 有一對 RSA 金鑰對我們稱之為公鑰 APubKey,私鑰 APriKey,系統 B 有一對 RSA 金鑰我們稱之為公鑰 BPubKey,私鑰 BPriKey。
私鑰是每個系統生成後自己內部保存的,私鑰的作用就是告訴發送方收到的人一定是我,公鑰的作用就是告訴接收到是不是我發送的,基於這兩條定理我們來設計程式。
首先我們系統 A 呼叫系統 B 的 Api1 介面假設我們傳遞一個 hello,然後系統 B 會回覆一個 world。那麼我們如何設計才可以保證安全呢。首先系統 A 傳送訊息如何讓系統 B 知道是系統 A 發過來的而不是別的中間人共計呢。這裡我們需要用到簽名,就是說系統 A 用 APriKey 進行對 hello 的加密後那麼如果發過去的資料如果簽名是 x 內容是 hello,系統 B 收到了就會對 hello 進行簽名的校驗,如果校驗出來的結果是用私鑰加密的那麼你用哪個公鑰進行的前面校驗就可以保證系統是由哪個系統傳送的。用 APriKey 進行簽名的資料只有用 APubKey 進行簽名校驗才能通過,所以系統 B 就可以確保是有系統 A 傳送的而不是別的系統,那麼我們到現在還是傳送的明文資訊,所以我們還需要將資料進行加密,加密一般我們選擇的是接收方的公鑰,因為只有用接收方的公鑰加密後才能由接收方的私鑰解密出來。
專案建立
首先我們建立一個簡單的 aspnetcore 的 webapi 專案

建立一個配置選項用來儲存私鑰公鑰
public class RsaOptions
{
    public string PrivateKey { get; set; }
}
建立一個 Scheme 選項類
public class AuthSecurityRsaOptions: AuthenticationSchemeOptions
{
}
定義一個常量
public class AuthSecurityRsaDefaults
{
    public const string AuthenticationScheme = "SecurityRsaAuth";
}
建立我們的認證處理器 AuthSecurityRsaAuthenticationHandler
public class AuthSecurityRsaAuthenticationHandler: AuthenticationHandler<AuthSecurityRsaOptions>
{
//正式替換成redis
    private readonly ConcurrentDictionary<string, object> _repeatRequestMap =
        new ConcurrentDictionary<string, object>();

    public AuthSecurityRsaAuthenticationHandler(IOptionsMonitor<AuthSecurityRsaOptions> options, ILoggerFactory logger, UrlEncoder encoder, ISystemClock clock) : base(options, logger, encoder, clock)
    {
    }

    protected override async Task<AuthenticateResult> HandleAuthenticateAsync()
    {
        try
        {
            string authorization = Request.Headers["AuthSecurity-Authorization"];
            // If no authorization header found, nothing to process further
            if (string.IsNullOrWhiteSpace(authorization))
                return AuthenticateResult.NoResult();

            var authorizationSplit = authorization.Split('.');
            if (authorizationSplit.Length != 4)
                return await AuthenticateResultFailAsync("簽名參數不正確");
            var reg = new Regex(@"[0-9a-zA-Z]{1,40}");


            var requestId = authorizationSplit[0];
            if (string.IsNullOrWhiteSpace(requestId) || !reg.IsMatch(requestId))
                return await AuthenticateResultFailAsync("請求Id不正確");


            var appid = authorizationSplit[1];
            if (string.IsNullOrWhiteSpace(appid) || !reg.IsMatch(appid))
                return await AuthenticateResultFailAsync("應用Id不正確");


            var timeStamp = authorizationSplit[2];
            if (string.IsNullOrWhiteSpace(timeStamp) || !long.TryParse(timeStamp, out var timestamp))
                return await AuthenticateResultFailAsync("請求時間不正確");
            //請求時間大於30分鐘的就拋棄
            if (Math.Abs(UtcTime.CurrentTimeMillis() - timestamp) > 30 * 60 * 1000)
                return await AuthenticateResultFailAsync("請求已過期");


            var sign = authorizationSplit[3];
            if (string.IsNullOrWhiteSpace(sign))
                return await AuthenticateResultFailAsync("簽名參數不正確");
            //資料庫獲取
            //Request.HttpContext.RequestServices.GetService<DbContext>()
            var app = AppCallerStorage.ApiCallers.FirstOrDefault(o=>o.Id==appid);
            if (app == null)
                return AuthenticateResult.Fail("未找到對應的應用資訊");
            //獲取請求體
            var body = await Request.RequestBodyAsync();

            //驗證簽名
            if (!RsaFunc.ValidateSignature(app.AppPublickKey, $"{requestId}{appid}{timeStamp}{body}", sign))
                return await AuthenticateResultFailAsync("簽名失敗");
            var repeatKey = $"AuthSecurityRequestDistinct:{appid}:{requestId}";
            //自行替換成快取或者redis本專案不帶刪除key功能沒有過期時間原則上需要設定1小時過期,前後30分鐘伺服器時間差
            if (_repeatRequestMap.ContainsKey(repeatKey) || !_repeatRequestMap.TryAdd(repeatKey,null))
            {
                return await AuthenticateResultFailAsync("請勿重複提交");
            }


            //給Identity賦值
            var identity = new ClaimsIdentity(AuthSecurityRsaDefaults.AuthenticationScheme);
            identity.AddClaim(new Claim("appid", appid));
            identity.AddClaim(new Claim("appname", app.Name));
            identity.AddClaim(new Claim("role", "app"));
            //......

            var principal = new ClaimsPrincipal(identity);
            return HandleRequestResult.Success(new AuthenticationTicket(principal, new AuthenticationProperties(), Scheme.Name));
        }
        catch (Exception ex)
        {
            Logger.LogError(ex, "RSA簽名失敗");
            return await AuthenticateResultFailAsync("認證失敗");
        }
    }

    private async Task<AuthenticateResult> AuthenticateResultFailAsync(string message)
    {
        Response.StatusCode = 401;
        await Response.WriteAsync(message);
        return AuthenticateResult.Fail(message);
    }
}
第三步我們新增擴充方法
public static class AuthSecurityRsaExtension
{
    public static AuthenticationBuilder AddAuthSecurityRsa(this AuthenticationBuilder builder)
        => builder.AddAuthSecurityRsa(AuthSecurityRsaDefaults.AuthenticationScheme, _ => { });

    public static AuthenticationBuilder AddAuthSecurityRsa(this AuthenticationBuilder builder, Action<AuthSecurityRsaOptions> configureOptions)
        => builder.AddAuthSecurityRsa(AuthSecurityRsaDefaults.AuthenticationScheme, configureOptions);

    public static AuthenticationBuilder AddAuthSecurityRsa(this AuthenticationBuilder builder, string authenticationScheme, Action<AuthSecurityRsaOptions> configureOptions)
        => builder.AddAuthSecurityRsa(authenticationScheme, displayName: null, configureOptions: configureOptions);

    public static AuthenticationBuilder AddAuthSecurityRsa(this AuthenticationBuilder builder, string authenticationScheme, string displayName, Action<AuthSecurityRsaOptions> configureOptions)
    {
        return builder.AddScheme<AuthSecurityRsaOptions, AuthSecurityRsaAuthenticationHandler>(authenticationScheme, displayName, configureOptions);
    }
}
新增返回結果加密解密 SafeResponseMiddleware
public class SafeResponseMiddleware
{
    private readonly RequestDelegate _next;

    public SafeResponseMiddleware(RequestDelegate next)
    {
        _next = next;
    }

    public async Task Invoke(HttpContext context)
    {

        //AuthSecurity-Authorization
        if ( context.Request.Headers.TryGetValue("AuthSecurity-Authorization", out var authorization) && !string.IsNullOrWhiteSpace(authorization))
        {
            //獲取Response.Body內容
            var originalBodyStream = context.Response.Body;
            await using (var newResponse = new MemoryStream())
            {
                //替換response流
                context.Response.Body = newResponse;
                await _next(context);
                string responseString = null;
                var identityIsAuthenticated = context.User?.Identity?.IsAuthenticated;
                if (identityIsAuthenticated.HasValue && identityIsAuthenticated.Value)
                {
                    var authorizationSplit = authorization.ToString().Split('.');
                    var requestId = authorizationSplit[0];
                    var appid = authorizationSplit[1];

                    using (var reader = new StreamReader(newResponse))
                    {
                        newResponse.Position = 0;
                        responseString = (await reader.ReadToEndAsync())??string.Empty;
                            var responseStr = JsonConvert.SerializeObject(responseString);
                            var app = AppCallerStorage.ApiCallers.FirstOrDefault(o => o.Id == appid);
                            var encryptBody = RsaFunc.Encrypt(app.AppPublickKey, responseStr);
                            var signature = RsaFunc.CreateSignature(app.MyPrivateKey, $"{requestId}{appid}{encryptBody}");
                            context.Response.Headers.Add("AuthSecurity-Signature", signature);
                            responseString = encryptBody;
                    }

                    await using (var writer = new StreamWriter(originalBodyStream))
                    {
                        await writer.WriteAsync(responseString);
                        await writer.FlushAsync();
                    }
                }
            }
        }
        else
        {
            await _next(context);
        }
    }
}
新增基礎基類來實現認證
[Authorize(AuthenticationSchemes =AuthSecurityRsaDefaults.AuthenticationScheme )]
public class RsaBaseController : ControllerBase
{
}
到這個時候我們的介面已經差不多寫完了,只是適配了微軟的框架,但是還是不能 happy coding,接下來我們要實現模型的解析和校驗
模型解析
首先我們要確保微軟是如何透過 request body 的字串到 model 的繫結的,透過原始碼解析我們可以發現 aspnetcore 是透過 IModelBinder。
首先實現模型繫結
public class EncryptBodyModelBinder : IModelBinder
{
    public async Task BindModelAsync(ModelBindingContext bindingContext)
    {
        var httpContext = bindingContext.HttpContext;
        //if (bindingContext.ModelType != typeof(string))
        //    return;
        string authorization = httpContext.Request.Headers["AuthSecurity-Authorization"];
        if (!string.IsNullOrWhiteSpace(authorization))
        {
            //有參數接收就反序列化並且進行校驗
            if (bindingContext.ModelType != null)
            {
                //獲取請求體
                var encryptBody = await httpContext.Request.RequestBodyAsync();
                if (string.IsNullOrWhiteSpace(encryptBody))
                    return;
                //解密
                var rsaOptions = httpContext.RequestServices.GetService<RsaOptions>();
                var body = RsaFunc.Decrypt(rsaOptions.PrivateKey, encryptBody);
                var request = JsonConvert.DeserializeObject(body, bindingContext.ModelType);
                if (request == null)
                {
                    return;
                }
                bindingContext.Result = ModelBindingResult.Success(request);

            }
        }
    }
}
新增 attribute 的特性解析
[AttributeUsage(AttributeTargets.Class | AttributeTargets.Struct | AttributeTargets.Enum | AttributeTargets.Property | AttributeTargets.Parameter, AllowMultiple = false, Inherited = true)]
public class RsaModelParseAttribute : Attribute, IBinderTypeProviderMetadata, IBindingSourceMetadata, IModelNameProvider
{
    private readonly ModelBinderAttribute modelBinderAttribute = new ModelBinderAttribute() { BinderType = typeof(EncryptBodyModelBinder) };

    public BindingSource BindingSource => modelBinderAttribute.BindingSource;

    public string Name => modelBinderAttribute.Name;

    public Type BinderType => modelBinderAttribute.BinderType;
}
新增測試 dto
[RsaModelParse]
public class TestModel
{
    [Display(Name = "id"),Required(ErrorMessage = "{0}不能為空")]
    public string Id { get; set; }
}
建立模型控制器
[Route("api/[controller]/[action]")]
[ApiController]
public class TestController: RsaBaseController
{
    [AllowAnonymous]
    public IActionResult Test()
    {
        return Ok();
    }

//正常測試
    public IActionResult Test1()
    {
        var appid = Request.HttpContext.User.Claims.FirstOrDefault(o=>o.Type== "appid").Value;
        var appname = Request.HttpContext.User.Claims.FirstOrDefault(o=>o.Type== "appname").Value;

        return Ok($"appid:{appid},appname:{appname}");
    }
///模型校驗
    public IActionResult Test2(TestModel request)
    {
        return Ok(JsonConvert.SerializeObject(request));
    }
//異常錯誤校驗
    public IActionResult Test3(TestModel request)
    {
        var x = 0;
        var a = 1 / x;
        return Ok("ok");
    }
}
新增異常全域性捕獲
public class HttpGlobalExceptionFilter : IExceptionFilter
{
    private readonly ILogger<HttpGlobalExceptionFilter> _logger;

    public HttpGlobalExceptionFilter(ILogger<HttpGlobalExceptionFilter> logger)
    {
        _logger = logger;
    }

    public void OnException(ExceptionContext context)
    {
        _logger.LogError(new EventId(context.Exception.HResult),
            context.Exception,
            context.Exception.Message);
        context.Result = new OkObjectResult("未知異常");
        context.HttpContext.Response.StatusCode = (int)HttpStatusCode.OK;
        context.ExceptionHandled = true;
    }
}
新增模型校驗
public class ValidateModelStateFilter : ActionFilterAttribute
{
    public override void OnActionExecuting(ActionExecutingContext context)
    {
        if (context.ModelState.IsValid)
        {
            return;
        }

        var validationErrors = context.ModelState
            .Keys
            .SelectMany(k => context.ModelState[k].Errors)
            .Select(e => e.ErrorMessage)
            .ToArray();

        context.Result = new OkObjectResult(string.Join(",", validationErrors));
        context.HttpContext.Response.StatusCode = (int)HttpStatusCode.OK;
    }

}
startup 配置
public void ConfigureServices(IServiceCollection services)
{
    services.Configure<ApiBehaviorOptions>(options =>
    {
        //忽略系統自帶校驗你[ApiController]
        options.SuppressModelStateInvalidFilter = true;
    });
    services.AddControllers(options =>
    {
        options.Filters.Add<HttpGlobalExceptionFilter>();
        options.Filters.Add<ValidateModelStateFilter>();
    });
    services.AddControllers();

    services.AddAuthentication().AddAuthSecurityRsa();
        services.AddSingleton(sp =>
        {
            return new RsaOptions()
            {
                PrivateKey = Configuration.GetSection("RsaConfig")["PrivateKey"],
            };
        });
}


public void Configure(IApplicationBuilder app, IWebHostEnvironment env)
{
    if (env.IsDevelopment())
    {
        app.UseDeveloperExceptionPage();
    }

    app.UseMiddleware<SafeResponseMiddleware>();
    app.UseRouting();
    app.UseAuthentication();
    app.UseAuthorization();

    app.UseEndpoints(endpoints =>
    {
        endpoints.MapControllers();
    });
}
到此為止我們服務端的所有 API 介面和配置都已經完成了接下來我們透過編寫客戶端介面和生成 RSA 金鑰對就可以開始使用 API 了
如何生成 RSA 祕鑰首先我們下載 openssl
下載地址 openssl
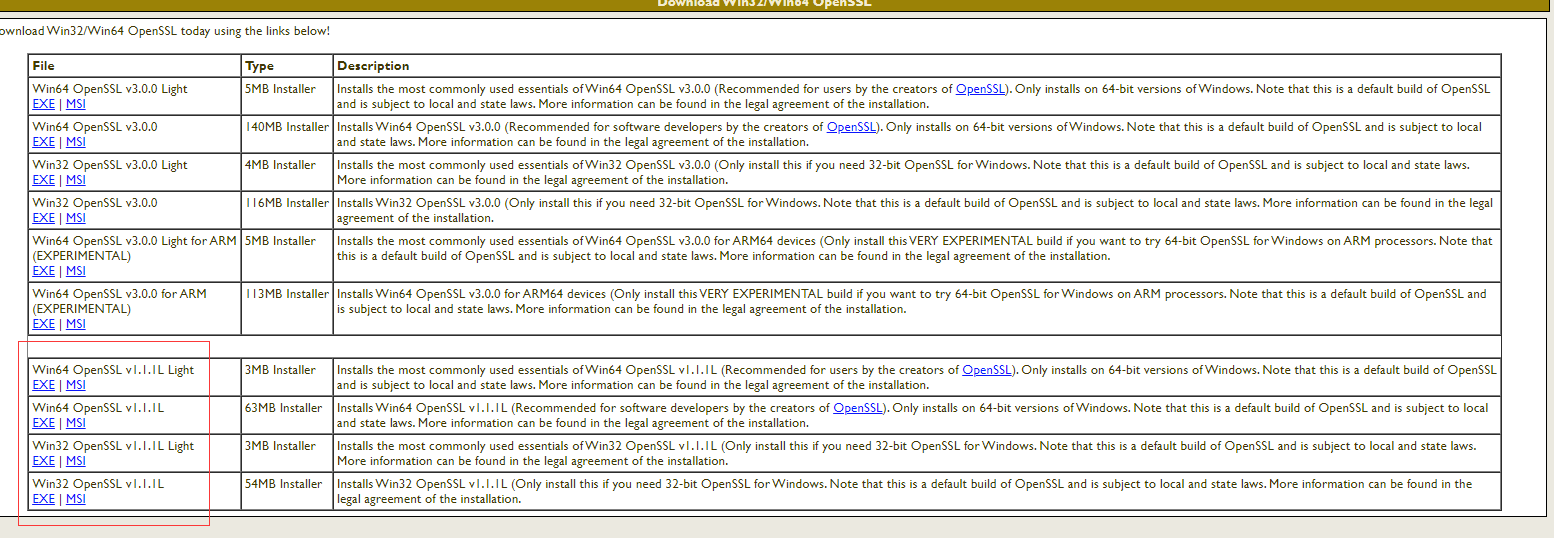
雙擊
輸入建立命令
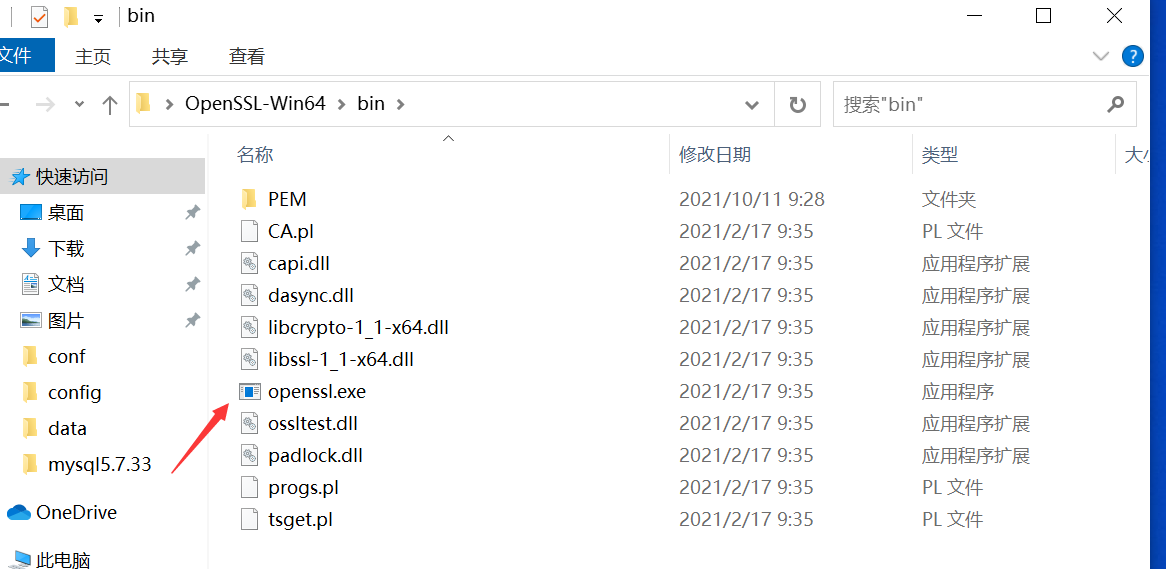
打開bin下openssl.exe
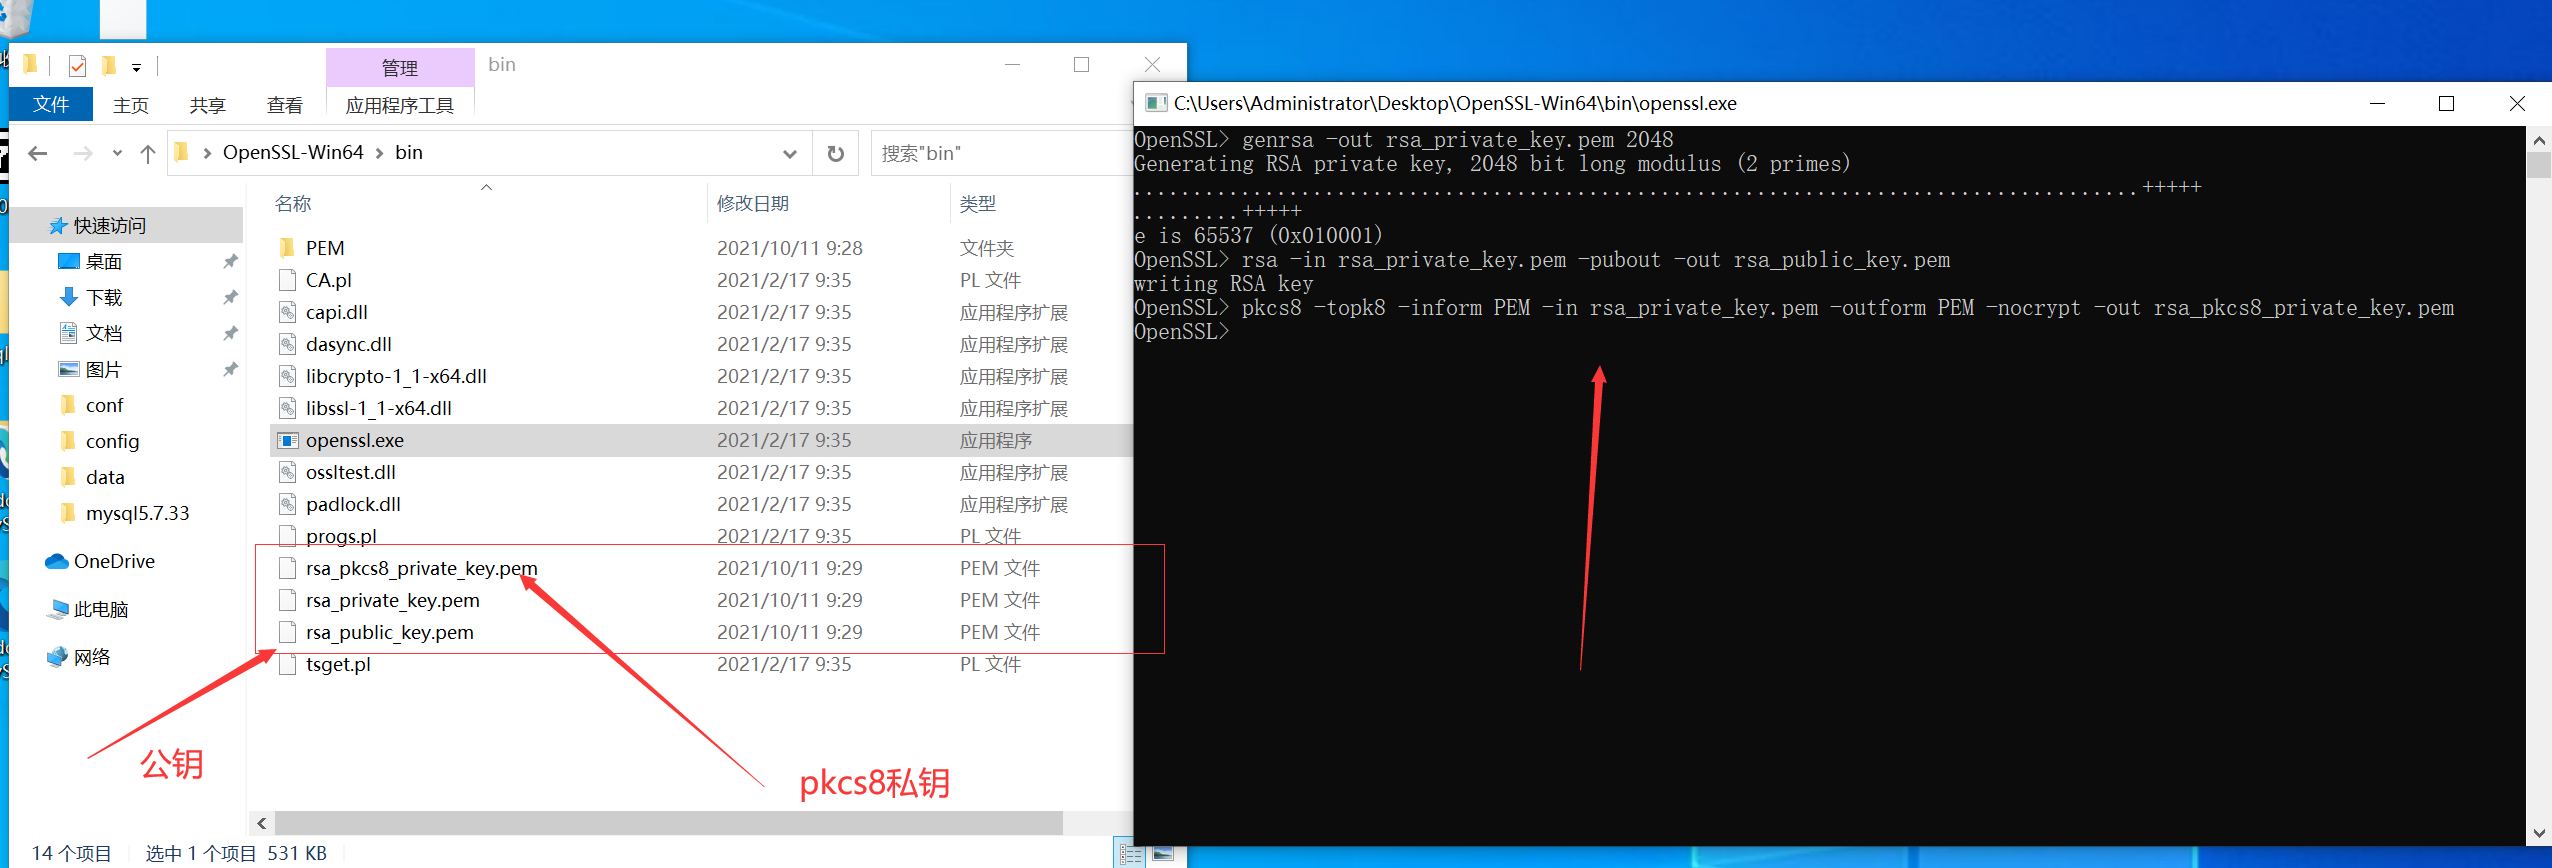
生成RSA私鑰
openssl>genrsa -out rsa_private_key.pem 2048
生成RSA公鑰
openssl>rsa -in rsa_private_key.pem -pubout -out rsa_public_key.pem
將RSA私鑰轉換成PKCS8格式
openssl>pkcs8 -topk8 -inform PEM -in rsa_private_key.pem -outform PEM -nocrypt -out rsa_pkcs8_private_key.pem
公鑰和私鑰不是 xml 格式的 C# 使用 rsa 需要 xml 格式的祕鑰,所以先轉換對應的祕鑰
首先 nuget 下載公鑰私鑰轉換工具
Install-Package BouncyCastle.NET Core -Version 1.8.8
public class RsaKeyConvert
{
    private RsaKeyConvert()
    {

    }
    public static string RsaPrivateKeyJava2DotNet(string privateKey)
    {
        RsaPrivateCrtKeyParameters privateKeyParam = (RsaPrivateCrtKeyParameters)PrivateKeyFactory.CreateKey(Convert.FromBase64String(TrimPrivatePrefixSuffix(privateKey)));

        return string.Format("<RSAKeyValue><Modulus>{0}</Modulus><Exponent>{1}</Exponent><P>{2}</P><Q>{3}</Q><DP>{4}</DP><DQ>{5}</DQ><InverseQ>{6}</InverseQ><D>{7}</D></RSAKeyValue>",
            Convert.ToBase64String(privateKeyParam.Modulus.ToByteArrayUnsigned()),
            Convert.ToBase64String(privateKeyParam.PublicExponent.ToByteArrayUnsigned()),
            Convert.ToBase64String(privateKeyParam.P.ToByteArrayUnsigned()),
            Convert.ToBase64String(privateKeyParam.Q.ToByteArrayUnsigned()),
            Convert.ToBase64String(privateKeyParam.DP.ToByteArrayUnsigned()),
            Convert.ToBase64String(privateKeyParam.DQ.ToByteArrayUnsigned()),
            Convert.ToBase64String(privateKeyParam.QInv.ToByteArrayUnsigned()),
            Convert.ToBase64String(privateKeyParam.Exponent.ToByteArrayUnsigned()));
    }

    public static string RsaPrivateKeyDotNet2Java(string privateKey)
    {
        XmlDocument doc = new XmlDocument();
        doc.LoadXml(TrimPrivatePrefixSuffix(privateKey));
        BigInteger m = new BigInteger(1, Convert.FromBase64String(doc.DocumentElement.GetElementsByTagName("Modulus")[0].InnerText));
        BigInteger exp = new BigInteger(1, Convert.FromBase64String(doc.DocumentElement.GetElementsByTagName("Exponent")[0].InnerText));
        BigInteger d = new BigInteger(1, Convert.FromBase64String(doc.DocumentElement.GetElementsByTagName("D")[0].InnerText));
        BigInteger p = new BigInteger(1, Convert.FromBase64String(doc.DocumentElement.GetElementsByTagName("P")[0].InnerText));
        BigInteger q = new BigInteger(1, Convert.FromBase64String(doc.DocumentElement.GetElementsByTagName("Q")[0].InnerText));
        BigInteger dp = new BigInteger(1, Convert.FromBase64String(doc.DocumentElement.GetElementsByTagName("DP")[0].InnerText));
        BigInteger dq = new BigInteger(1, Convert.FromBase64String(doc.DocumentElement.GetElementsByTagName("DQ")[0].InnerText));
        BigInteger qinv = new BigInteger(1, Convert.FromBase64String(doc.DocumentElement.GetElementsByTagName("InverseQ")[0].InnerText));

        RsaPrivateCrtKeyParameters privateKeyParam = new RsaPrivateCrtKeyParameters(m, exp, d, p, q, dp, dq, qinv);

        PrivateKeyInfo privateKeyInfo = PrivateKeyInfoFactory.CreatePrivateKeyInfo(privateKeyParam);
        byte[] serializedPrivateBytes = privateKeyInfo.ToAsn1Object().GetEncoded();
        return Convert.ToBase64String(serializedPrivateBytes);
    }

    public static string RsaPublicKeyJava2DotNet(string publicKey)
    {
        RsaKeyParameters publicKeyParam = (RsaKeyParameters)PublicKeyFactory.CreateKey(Convert.FromBase64String(TrimPublicPrefixSuffix(publicKey)));
        return string.Format("<RSAKeyValue><Modulus>{0}</Modulus><Exponent>{1}</Exponent></RSAKeyValue>",
            Convert.ToBase64String(publicKeyParam.Modulus.ToByteArrayUnsigned()),
            Convert.ToBase64String(publicKeyParam.Exponent.ToByteArrayUnsigned()));
    }

    public static string RsaPublicKeyDotNet2Java(string publicKey)
    {
        XmlDocument doc = new XmlDocument();
        doc.LoadXml(TrimPublicPrefixSuffix(publicKey));
        BigInteger m = new BigInteger(1, Convert.FromBase64String(doc.DocumentElement.GetElementsByTagName("Modulus")[0].InnerText));
        BigInteger p = new BigInteger(1, Convert.FromBase64String(doc.DocumentElement.GetElementsByTagName("Exponent")[0].InnerText));
        RsaKeyParameters pub = new RsaKeyParameters(false, m, p);

        SubjectPublicKeyInfo publicKeyInfo = SubjectPublicKeyInfoFactory.CreateSubjectPublicKeyInfo(pub);
        byte[] serializedPublicBytes = publicKeyInfo.ToAsn1Object().GetDerEncoded();
        return Convert.ToBase64String(serializedPublicBytes);
    }

    public static string TrimPublicPrefixSuffix(string publicKey)
    {
        return publicKey
            .Replace("-----BEGIN PUBLIC KEY-----", string.Empty)
            .Replace("-----END PUBLIC KEY-----", string.Empty)
            .Replace("\r\n", "");
    }
    public static string TrimPrivatePrefixSuffix(string privateKey)
    {
        return privateKey
            .Replace("-----BEGIN PRIVATE KEY-----", string.Empty)
            .Replace("-----END PRIVATE KEY-----", string.Empty)
            .Replace("\r\n", "");
    }
}
寫好 client 後開始呼叫
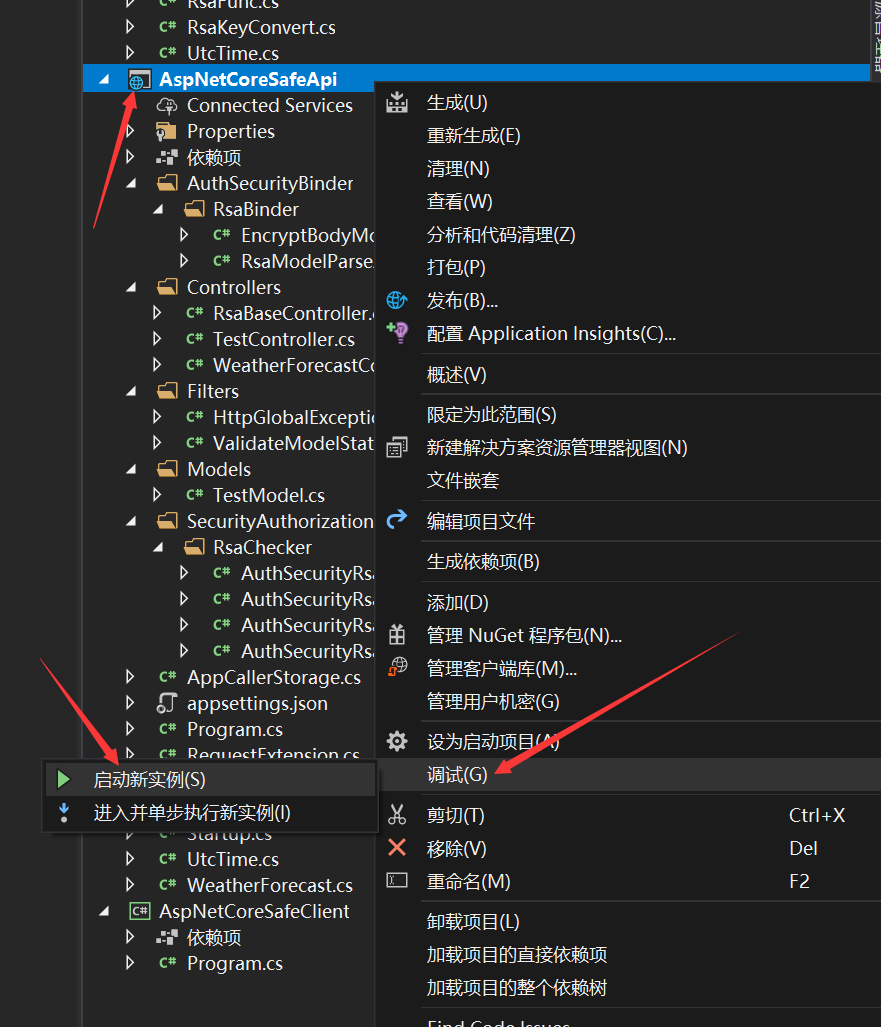
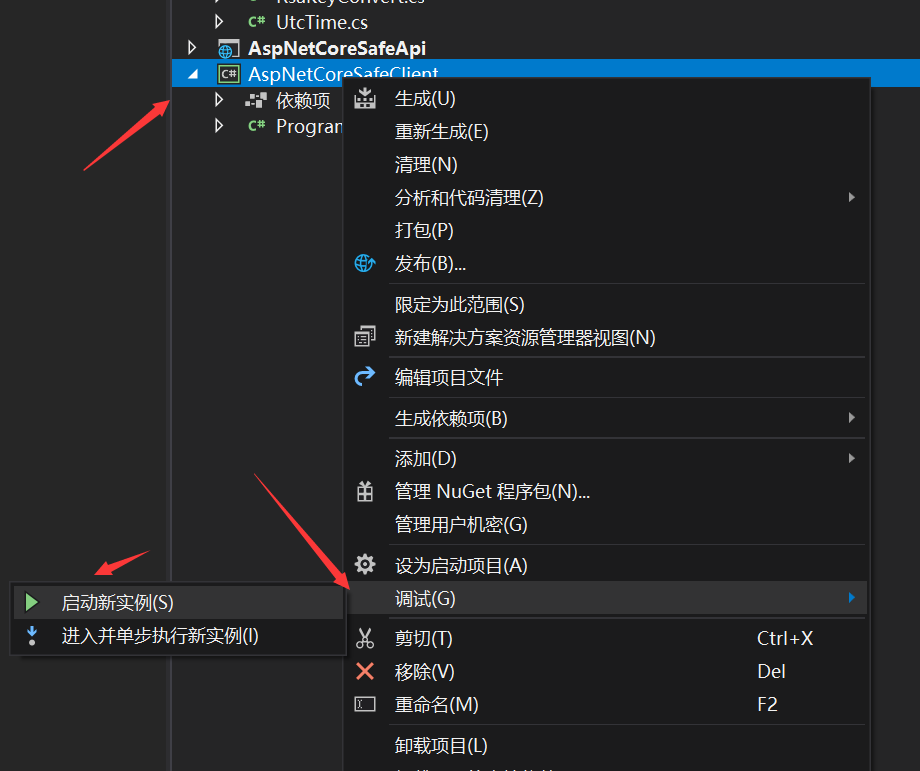
依次啟動兩個專案就可以看到我們呼叫成功了,
本專案採用 RSA 雙向簽名和加密來接入 aspnetcore 的許可權系統並且可以獲取到系統呼叫方使用者
完美接入 aspnetcore 認證系統和許可權系統(後續會出一篇如何設計許可權)
系統互動採用雙向加密和簽名認證
完美接入模型校驗
完美處理響應結果
注意本專案僅僅只是一個學習 demo,而且根據實踐得出的結論 RSA 加密僅僅是滿足了最最最安全的 API 這個條件,但是效能上而言會隨著 body 的變大效能急劇下降,所以並不是一個很好的抉擇當然可以用在雙方互動的時候設定祕鑰提供 API 介面,實際情況下可以選擇使用對稱加密比如:AES 或者 DES 進行 body 體的加密解密,但是在簽名方面完全沒問題可以選擇 RSA,本次使用的是 rsa2(rsa 2048 位的祕鑰)祕鑰位數越大加密等級越高但是解密效能越低
當然你可以直接上 HTTPS,本文章也不是說一定要雙向處理更多的是分享如何接入 aspnetcore 的認證體系中和模型校驗,而不用貼一大堆的 attribute
demo:AspNetCoreSafeApi
最後
分享本人開發的 efcore 分表分庫讀寫分離元件,希望為 .net 生態做一份共享,如果喜歡或者覺得有用請點下 star 或者讚讓更多的人看到
Gitee Star 助力 dotnet 生態 GitHub Star