
HttpReports 基於 .NET Core 開發的 APM 監控系統,使用 MIT 開源協議,主要功能包括統計、分析、可視化、監控、追蹤等,適合在微服務環境中使用。
官方地址:https://www.yuque.com/httpreports/docs/uyaiil
主要功能
- 介面調用指標分析
- 多服務節點資料聚合分析
- 慢請求、錯誤請求分析
- 介面調用日誌查詢
- 多類型預警監控
- HTTP、Grpc 調用分析
- 分散式追蹤
- 多資料庫支援,整合方便
- 程式效能監控
第一步
開啟 VS 新增 .NET 專案,我這裡用的是 .NET Core Web API 進行示範。
第二步
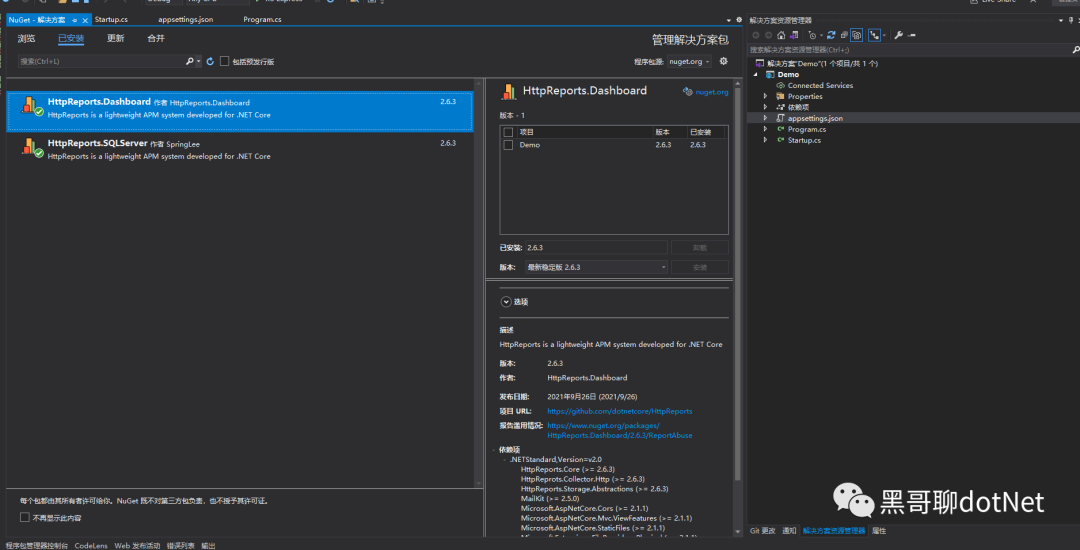
使用 NuGet 安裝 MHttpReports.Dashboard 套件和 HttpReports.SqlServer
第三步
設定 appsetting.json
{
  "HttpReportsDashboard": {
    "ExpireDay": 3,
    "Storage": {
      "ConnectionString": "Server=10.1.30.252;Database=GEISDB;user id=sa;password=Mg2021;",
      "DeferSecond": 10,
      "DeferThreshold": 100
    },
    "Check": {
      "Mode": "Self",
      "Switch": true,
      "Endpoint": "",
      "Range": "500,2000"
    },
    "Mail": {
      "Server": "smtp.163.com",
      "Port": 465,
      "Account": "HttpReports@qq.com",
      "Password": "*******",
      "EnableSsL": true,
      "Switch": true
    }
  }
}
參數介紹:
- ExpireDay - 資料過期天數,預設 3 天,HttpReports 會自動清除過期的資料
- Storage - 儲存資訊
- DeferSecond - 批次資料入庫的秒數,建議值 5-60
- DeferThreshold - 批次資料入庫的數量,建議值 100-1000
- Mail - 郵箱資訊,設定監控的話,可以發送告警郵件
- Check - 健康檢查設定,具體請看 健康檢查 頁面
第四步
設定 Startup
// For more information on how to configure your application, visit https://go.microsoft.com/fwlink/?LinkID=398940
public void ConfigureServices(IServiceCollection services)
{
services.AddHttpReportsDashboard().AddSQLServerStorage();
}
// This method gets called by the runtime. Use this method to configure the HTTP request pipeline.
public void Configure(IApplicationBuilder app, IWebHostEnvironment env)
{
app.UseHttpReportsDashboard();
}
把 Dashboard 程式啟動起來,如果沒有問題的話,會跳轉到 Dashboard 的登入頁面
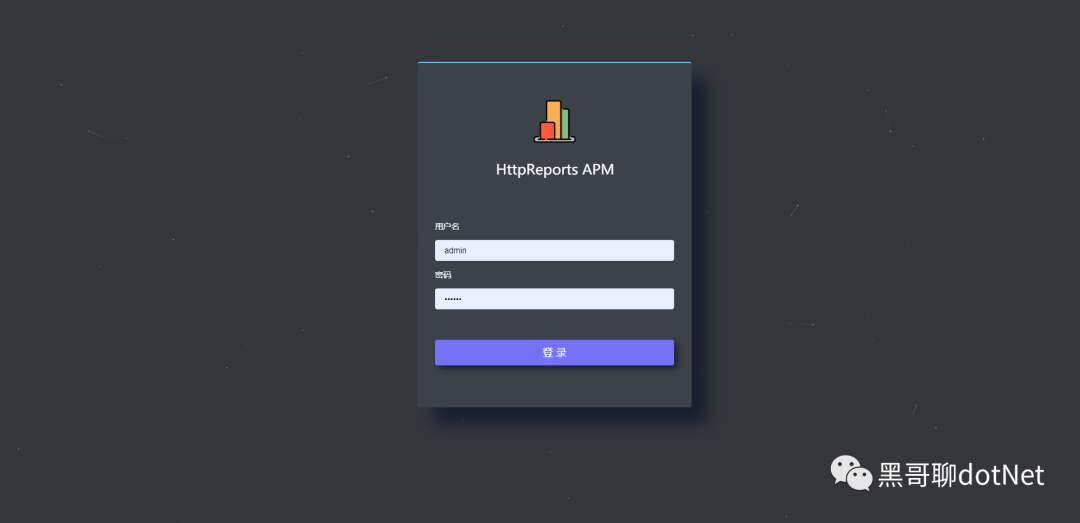
預設帳號:admin
密碼: 123456
現在 Dashboard 可視化有了,但是沒有資料,我們還需要給服務端程式新增 HttpReports 來收集資訊。
第五步
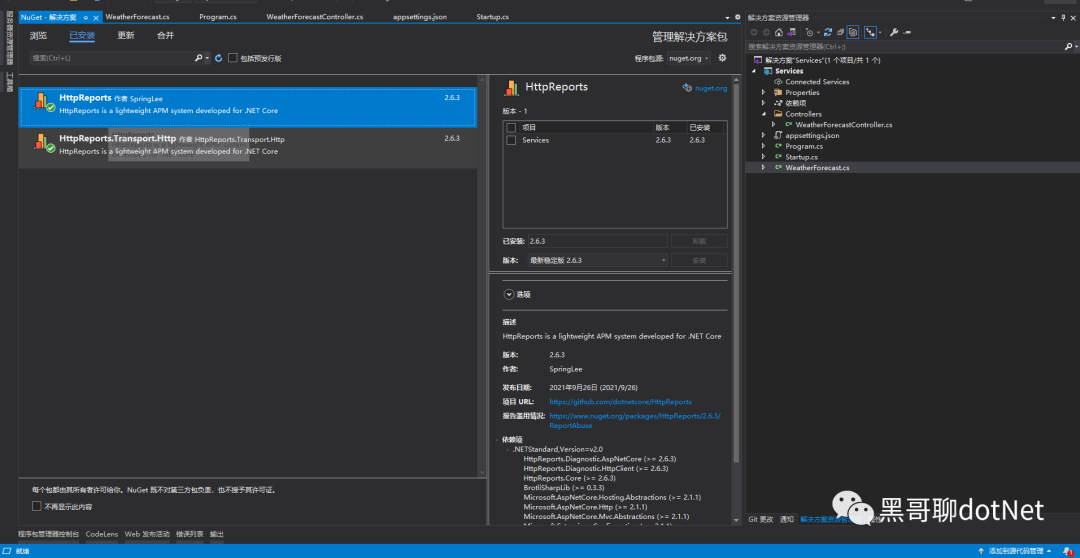
我新增一個 WebAPI 專案 UserService,來充當使用者服務,然後安裝 HttpReports、HttpReports.Transport.Http
第六步
修改 Services 的 Appsettings.json 簡單設定一下
{
  "HttpReports": {
    "Transport": {
      "CollectorAddress": "http://localhost:5000/",
      "DeferSecond": 10,
      "DeferThreshold": 100
    },
    "Server": "http://localhost:7000",
    "Service": "User",
    "Switch": true,
    "RequestFilter": ["/api/health/*", "/HttpReports*"],
    "WithRequest": true,
    "WithResponse": true,
    "WithCookie": true,
    "WithHeader": true
  }
}
參數介紹:
Transport -
CollectorAddress - 資料發送的地址,設定 Dashboard 的專案地址即可
DeferSecond - 批次資料入庫的秒數,建議值 5-60
DeferThreshold - 批次資料入庫的數量,建議值 100-300
Server - 服務的地址
Service - 服務的名稱
Switch - 是否開啟收集資料
RequestFilter - 資料過濾,用 * 來模糊匹配
WithRequest - 是否記錄介面的入參
WithResponse - 是否記錄介面的出參
WithCookie - 是否記錄 Cookie 資訊
WithHeader - 是否記錄請求 Header 資訊
最後一步
我們接著修改 UserService 專案的 Startup.cs 檔案
app.UseHttpReports(); 這一行最好放到 Configure 方法最上面
public void ConfigureServices(IServiceCollection services)
{
    services.AddHttpReports().AddHttpTransport();
    services.AddControllers();
}
// This method gets called by the runtime. Use this method to configure the HTTP request pipeline.
public void Configure(IApplicationBuilder app, IWebHostEnvironment env)
{
app.UseHttpReports();
if (env.IsDevelopment())
{
app.UseDeveloperExceptionPage();
}
app.UseRouting();
app.UseAuthorization();
app.UseEndpoints(endpoints =>
{
endpoints.MapControllers();
});
}
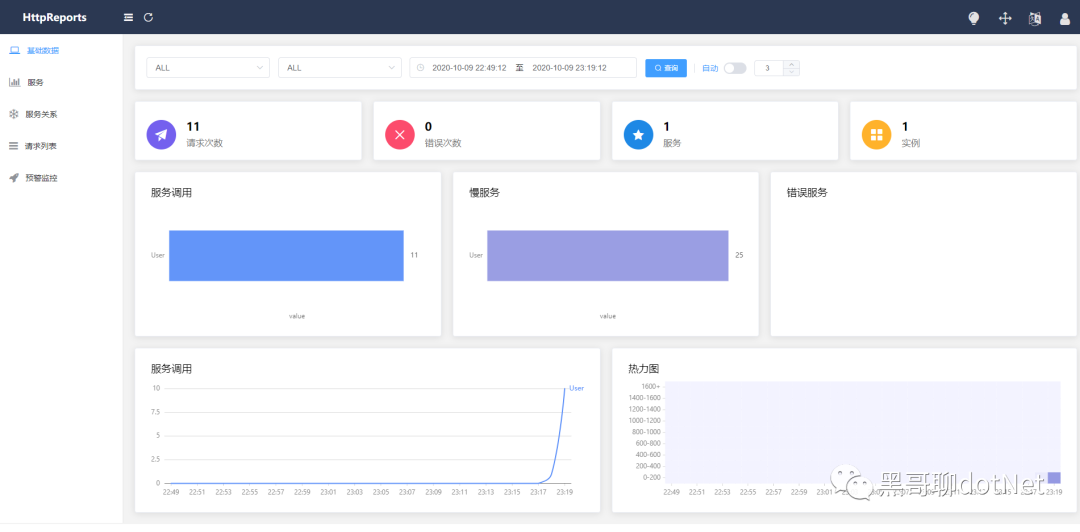
重新整理下 UserService 的介面,再回到 Dashboard 的頁面上,已經可以看到資料了
總結
本篇部落格描述了使用 HttpReports 進行介面統計、分析、可視化、監控、追蹤等,如果覺得還不錯,請給個關注。