

上一篇有简单介绍主工程的国际化,使用的资源字典(XAML)实现的。这几天我添加了几个 Prism 模块(Module),发现子模块使用资源字典的方式实现国际化和本地化不好做,没有找到比较好的参考文章,所以换了一种方式,使用资源文件实现了。

一. 本文概述
子模块的国际化和本地化要求:
- 各模块需要有自己单独的语言文件。
- 在主工程中动态切换语言时,子模块也需要跟着切换。
- 使用了 Prism 实现模块化框架,即要求主工程与各子模块不能有引用关系,即松耦合,不能直接在主工程中切换子模块的语言文件。
基于上面的要求,我尝试在各模块(Module)中也定义了语言文件(XAML),主窗体切换语言时,加载模块语言文件老是提示不存在对应的资源字典文件,我恼火呀,后面还是参考“Accelerider.Windows”国际化的方式,使用资源文件实现本地化和国际化了,不纠结 Xaml 的方式了,唉。

下面是修改后的效果:
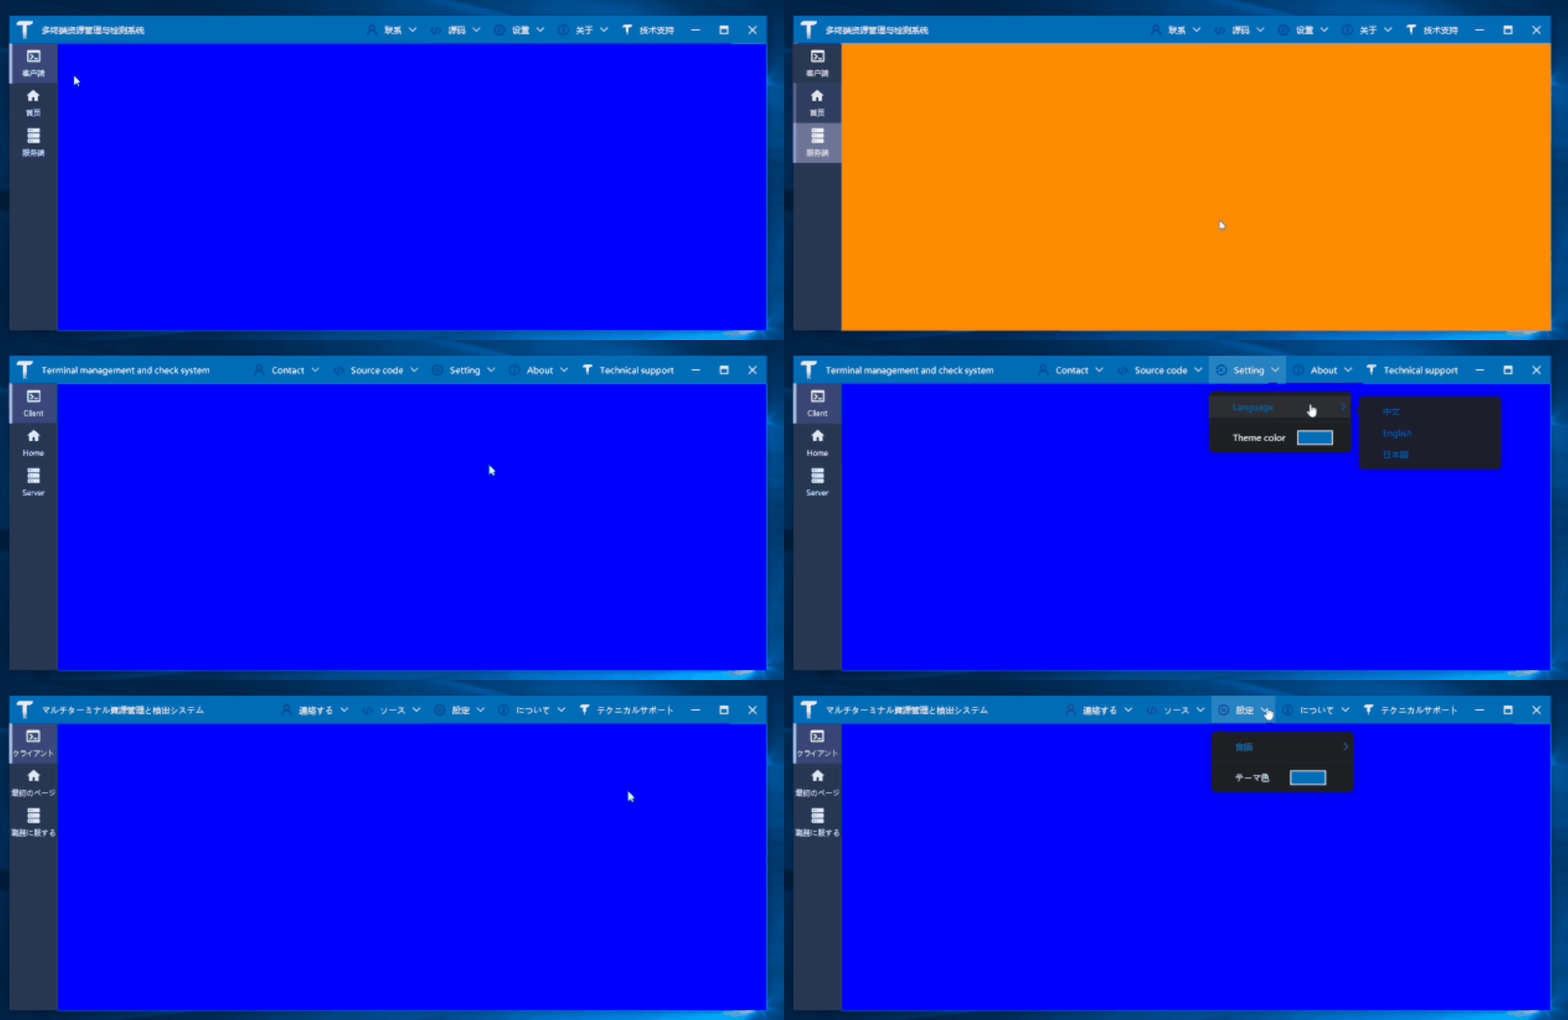
和上一版异同:
标题栏国际化无变化,只是文字绑定换了种方式,实现效果一致。
左侧添加了三个子模块(Home\Client\Server),使用 Prism 动态加载的,并且跟随主工程主窗体语言切换而切换语言。
下面简单介绍怎么创建模块,以及主窗体和模块国际化怎么做的,真的是很简单的介绍,具体的实现可以拉代码看看。

二. 添加三个 Prism 模块(Module)
可安装 Prism 模板,快速创建模块工程,当然手工创建.NET Core 工程也是可以的,就是多了几个步骤而已(需要用 NuGet 安装 Prism.Wpf 包(7.2.0.1422)),我使用得的 Prism 模板快速创建的。
2.1 创建模块之前的准备工作
下载上图搜索到的 Prism 模板,重启 VS,它会自动安装,新建项目时,就有 Prism 模块模板选择了:
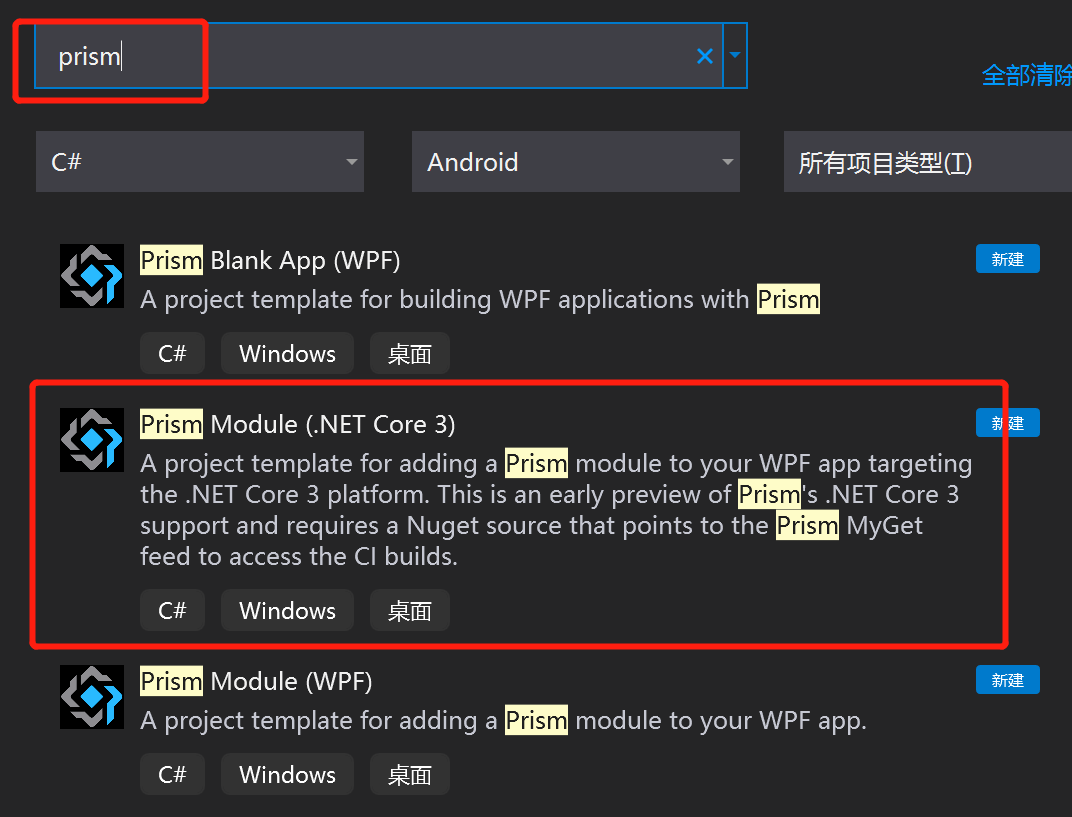
注意要选择.NET Core 3 的版本,因为我是使用.NET Core 创建的 WPF 项目。
2.2 创建模块
下面是已经创建好的三个模块工程截图:

目前三个模块文件组织结构类似:
- I18nResources:资源文件夹,放 3 个语言资源文件和一个 T4 模板文件(用于引用语言 Key),其中 T4 模板文件在 3 个模块和主工程中定义是一样的,具体可从 github 下载源码查看。
- Views 放置视图文件,现在只使用到了主工程主窗体中显示的 TabItem 视图,即 MainTabItem.xaml,继承自 TabItem。
- xxxxModule.cs:prism 模板定义文件,prism 发现模块使用。
三个模块关键点需要注意:
- 编辑模块工程文件,修改模块文件输出目录:
// 省略部分代码,下面这一行设置为False,代表输出目录不带.NET Core版本信息
<AppendTargetFrameworkToOutputPath>Flase</AppendTargetFrameworkToOutputPath>
// 省略部分代码,修改Debug与Release编译输出目录,方便主工程统一加载模块
<PropertyGroup Condition="'$(Configuration)|$(Platform)'=='Debug|AnyCPU'">
  <OutputPath>..\Build\Debug\Modules</OutputPath>
</PropertyGroup>
<PropertyGroup Condition="'$(Configuration)|$(Platform)'=='Release|AnyCPU'">
  <OutputPath>..\Build\Release\Modules</OutputPath>
</PropertyGroup>
// 省略部分代码
- XXXModule 中需要将资源文件的 ResourceManager 引用添加到另一个库中保存,待切换语言时需要使用,如在 HomeModule 的构造函数中添加代码如下,只添加这一句代码就好,模块的国际化及本地化就算完事了:
I18nManager.Instance.Add(TerminalMACS.Home.I18nResources.UiResource.ResourceManager);
- XXXModule 的 RegisterTypes 方法中注册视图"MainTabItem"到"RegionNames.MainTabRegion",主窗体使用"RegionNames.MainTabRegion"关联模块视图显示加载。
_regionManager.RegisterViewWithRegion(RegionNames.MainTabRegion, typeof(MainTabItem));
- UI 控件国际化文字绑定,其中 markup 使用的一个开源库命名空间,后面会给出链接,本项目直接将该库加载进了解决方案中;i18NResources:Language 即 T4 模板文件生成的类,关联文字翻译的 Key。绑定文字部分代码如下:
<TextBlock Grid.Row="2" Text="{markup:I18n {x:Static i18NResources:Language.MainTabItm_Header}}"
三. 主工程
主工程目录组织结构如下:
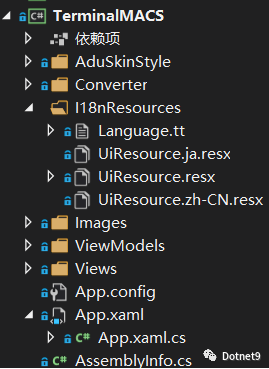
3.1 动态加载 Prism 模块
配置加载 3 个模块的关键代码在 App.xaml.cs 文件中,看上面的代码,我将三个模块输出到了 Modules 目录下,主工程直接加载此目录即可,其他加载方式还有使用配置文件等,可以参考 Prism 官方例子,文末给出链接:
protected override IModuleCatalog CreateModuleCatalog()
{
    string modulePath = @".\Modules";
    if (!Directory.Exists(modulePath))
    {
        Directory.CreateDirectory(modulePath);
    }
    return new DirectoryModuleCatalog() { ModulePath = modulePath };
}
主窗体显示子模块注册的 TabItem 视图,prism:RegionManager.RegionName 即在各子模块中注册过的区域字符串,他与模块对应的 TabItem 视图关联,代码如下:
<TabControl Grid.ColumnSpan="2" SelectedIndex="0"
    Style="{StaticResource MainTabControlStyle}"
    ItemContainerStyle="{StaticResource MainTabItemStyle}"
    prism:RegionManager.RegionName="{x:Static ui:RegionNames.MainTabRegion}"/>
主窗体以 TabControl 的控件形式展示子模块视图:

主工程要能正常加载子模块,主工程的工程文件也需要修改其输出目录:
// 省略部分代码,下面这一行设置为False,代表输出目录不带.NET Core版本信息
<AppendTargetFrameworkToOutputPath>Flase</AppendTargetFrameworkToOutputPath>
// 省略部分代码,修改Debug与Release编译输出目录,方便主工程统一加载模块
<PropertyGroup Condition="'$(Configuration)|$(Platform)'=='Debug|AnyCPU'">
  <OutputPath>..\Build\Debug</OutputPath>
</PropertyGroup>
<PropertyGroup Condition="'$(Configuration)|$(Platform)'=='Release|AnyCPU'">
  <OutputPath>..\Build\Release</OutputPath>
</PropertyGroup>
// 省略部分代码
3.2 修改语言文件格式
删除了原有的 XAML 语言文件,替换为 resx 的资源文件,和三个模块的资源文件类型类似,下面是主工程的资源文件:

替换成资源文件,编辑是要比 XAML 文件要方便点,起初是有考虑使用资源文件实现国际化的,作死想尝试 XAML 文件。
3.3 语言切换核心代码
动态切换语言的关键代码改为:
public static void SetLanguage(string language = "")
{
    if (string.IsNullOrWhiteSpace(language))
    {
        language = ConfigHelper.ReadKey(KEY_OF_LANGUAGE);
        if (string.IsNullOrWhiteSpace(language))
        {
            language = System.Globalization.CultureInfo.CurrentCulture.ToString();
        }
    }

    ConfigHelper.SetKey(KEY_OF_LANGUAGE, language);
    _lastLanguage = language;

    var culture = new System.Globalization.CultureInfo(language);
    I18nManager.Instance.CurrentUICulture = culture;
}
核心的语言切换代码是最后一句,不详细说了,解决方案中有库、有源码:
I18nManager.Instance.CurrentUICulture = culture;
四. 源码
- 源码地址,欢迎 star:https://github.com/dotnet9/TerminalMACS/tree/master/src/TerminalMACS.Manager/TerminalMACS.ManagerForWPF
五. 参考资料
- Prism Template Pack(Prism 模板):https://marketplace.visualstudio.com/items?itemName=BrianLagunas.PrismTemplatePack
- WPF 国际化开源辅助库:https://github.com/DingpingZhang/WpfExtensions
- Accelerider.Windows(子模块加载参考开源项目):https://github.com/Accelerider/Accelerider.Windows
- Prism-Samples-Wpf(官方 Demo): https://github.com/PrismLibrary/Prism-Samples-Wpf