
分享一下之前學習的一個登入小案例,程式碼有不足之處歡迎指正!!!
工具:採用 VS Code 及其擴充套件開發,輕量化的同時減少命令列的敲寫,使用 VS 沒有衝突哈
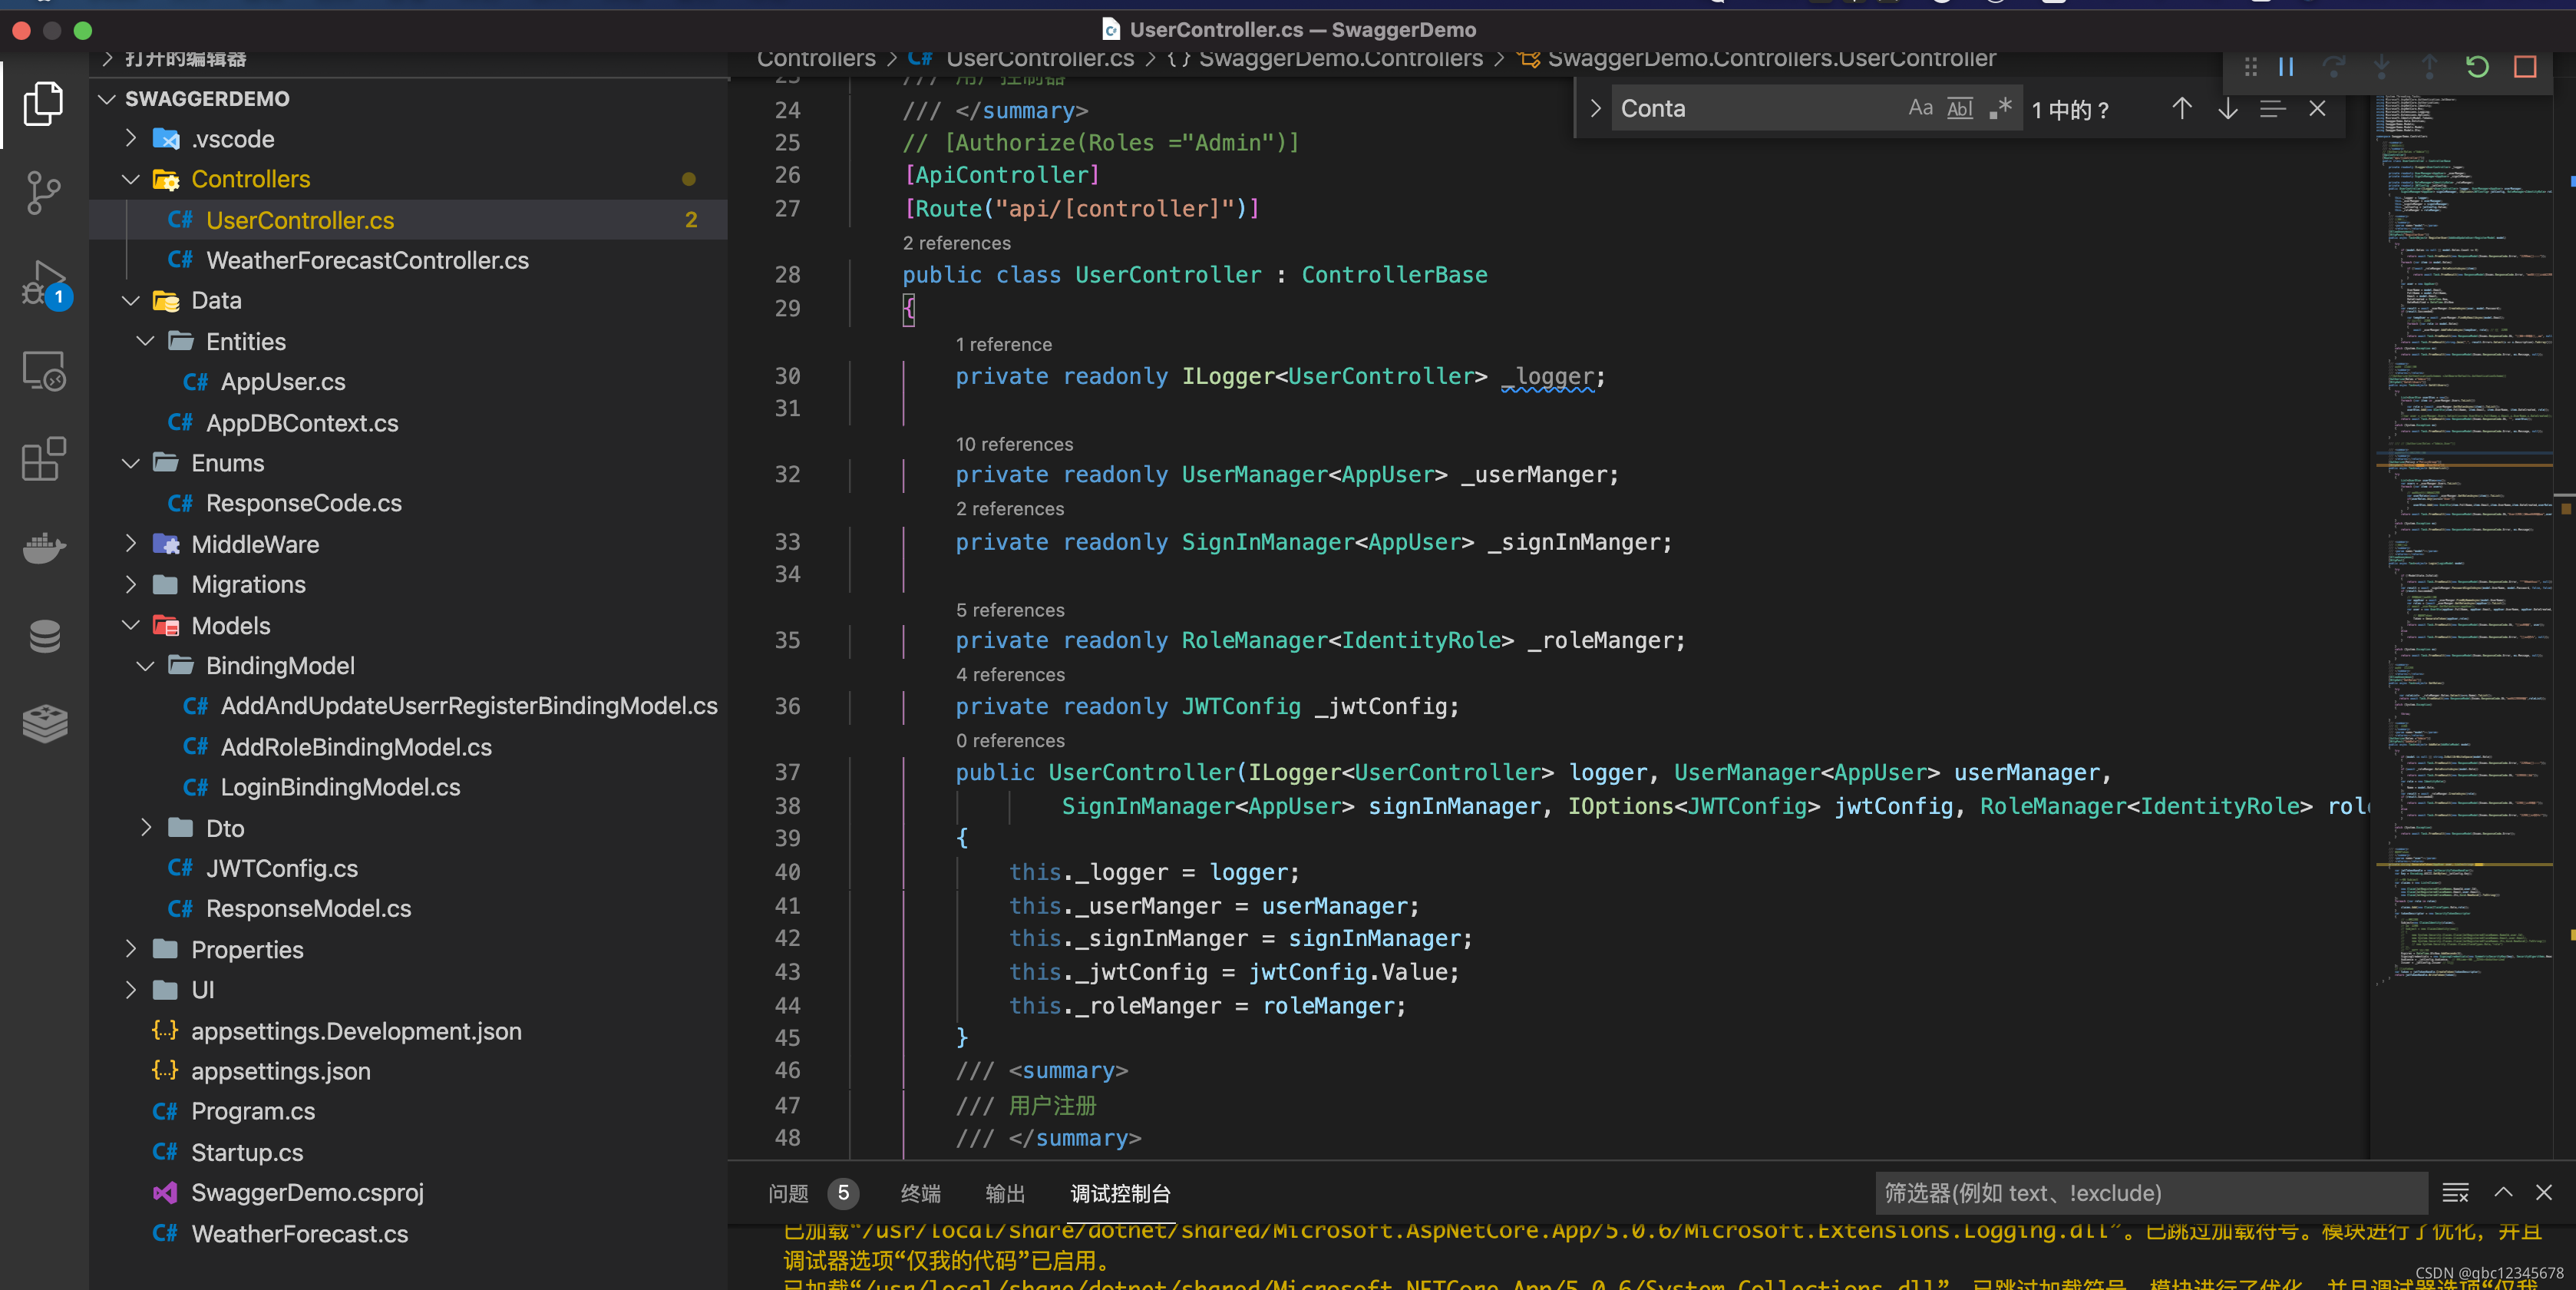
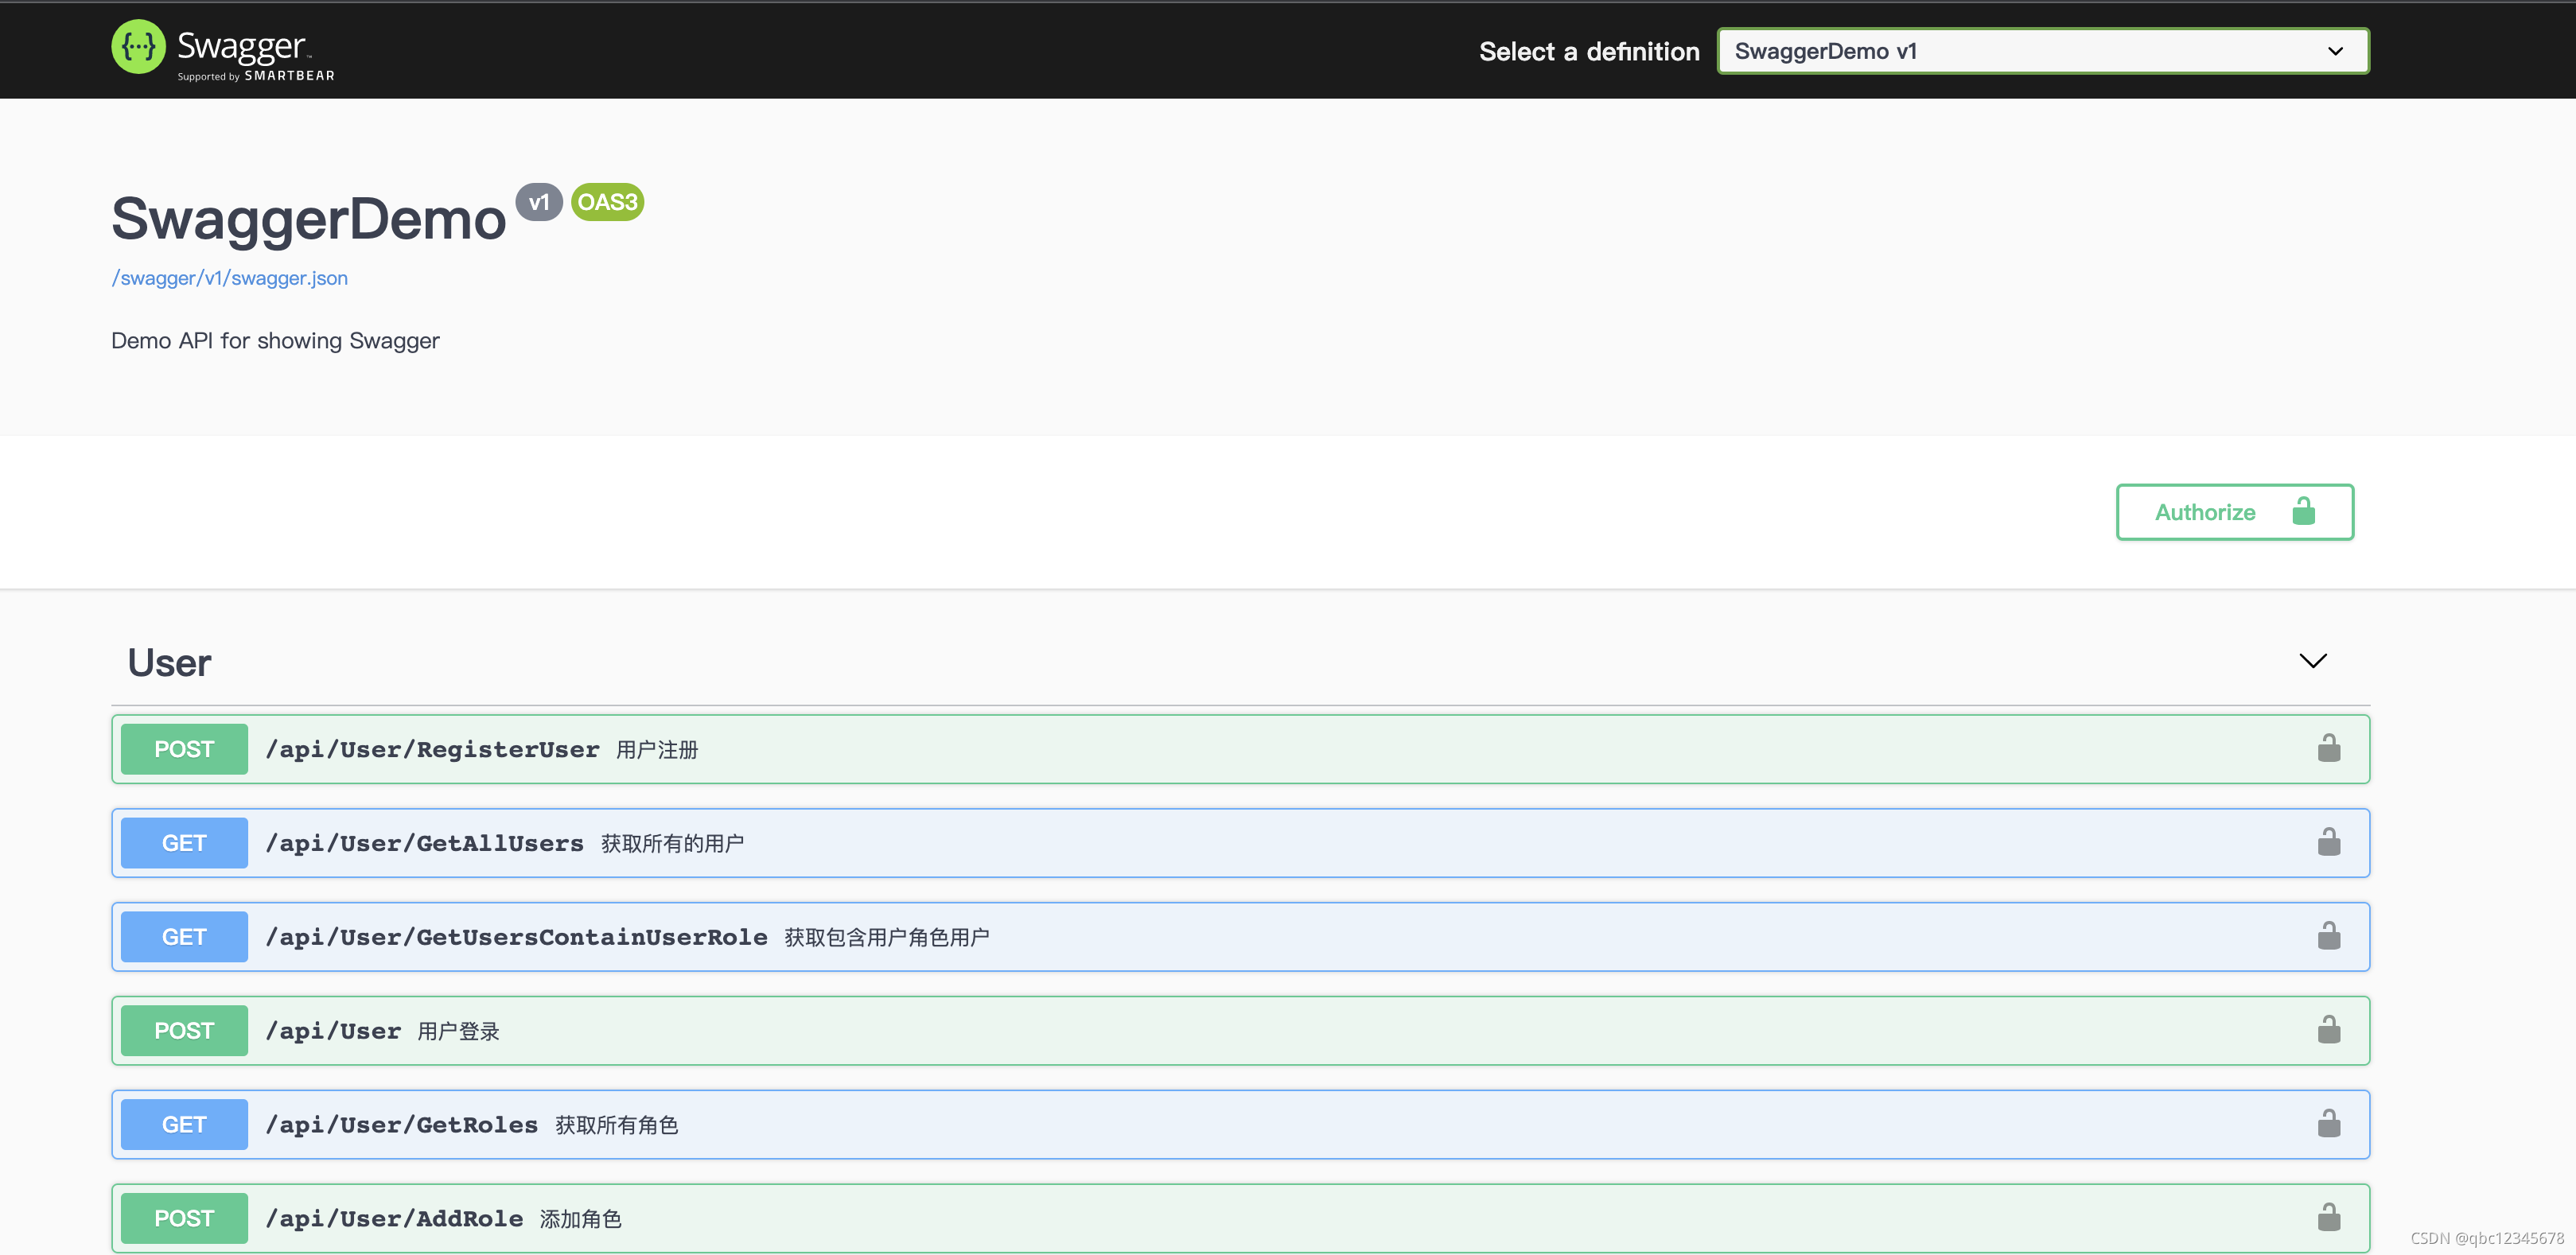
一、透過擴充套件建立 WebApi 專案
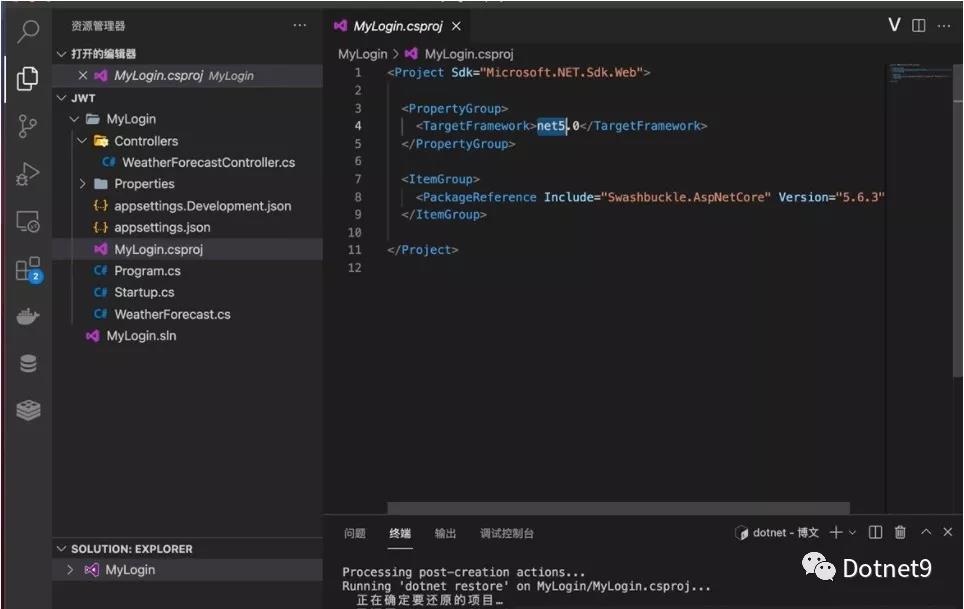
二、利用擴充套件下載專案所需的 NuGet 套件
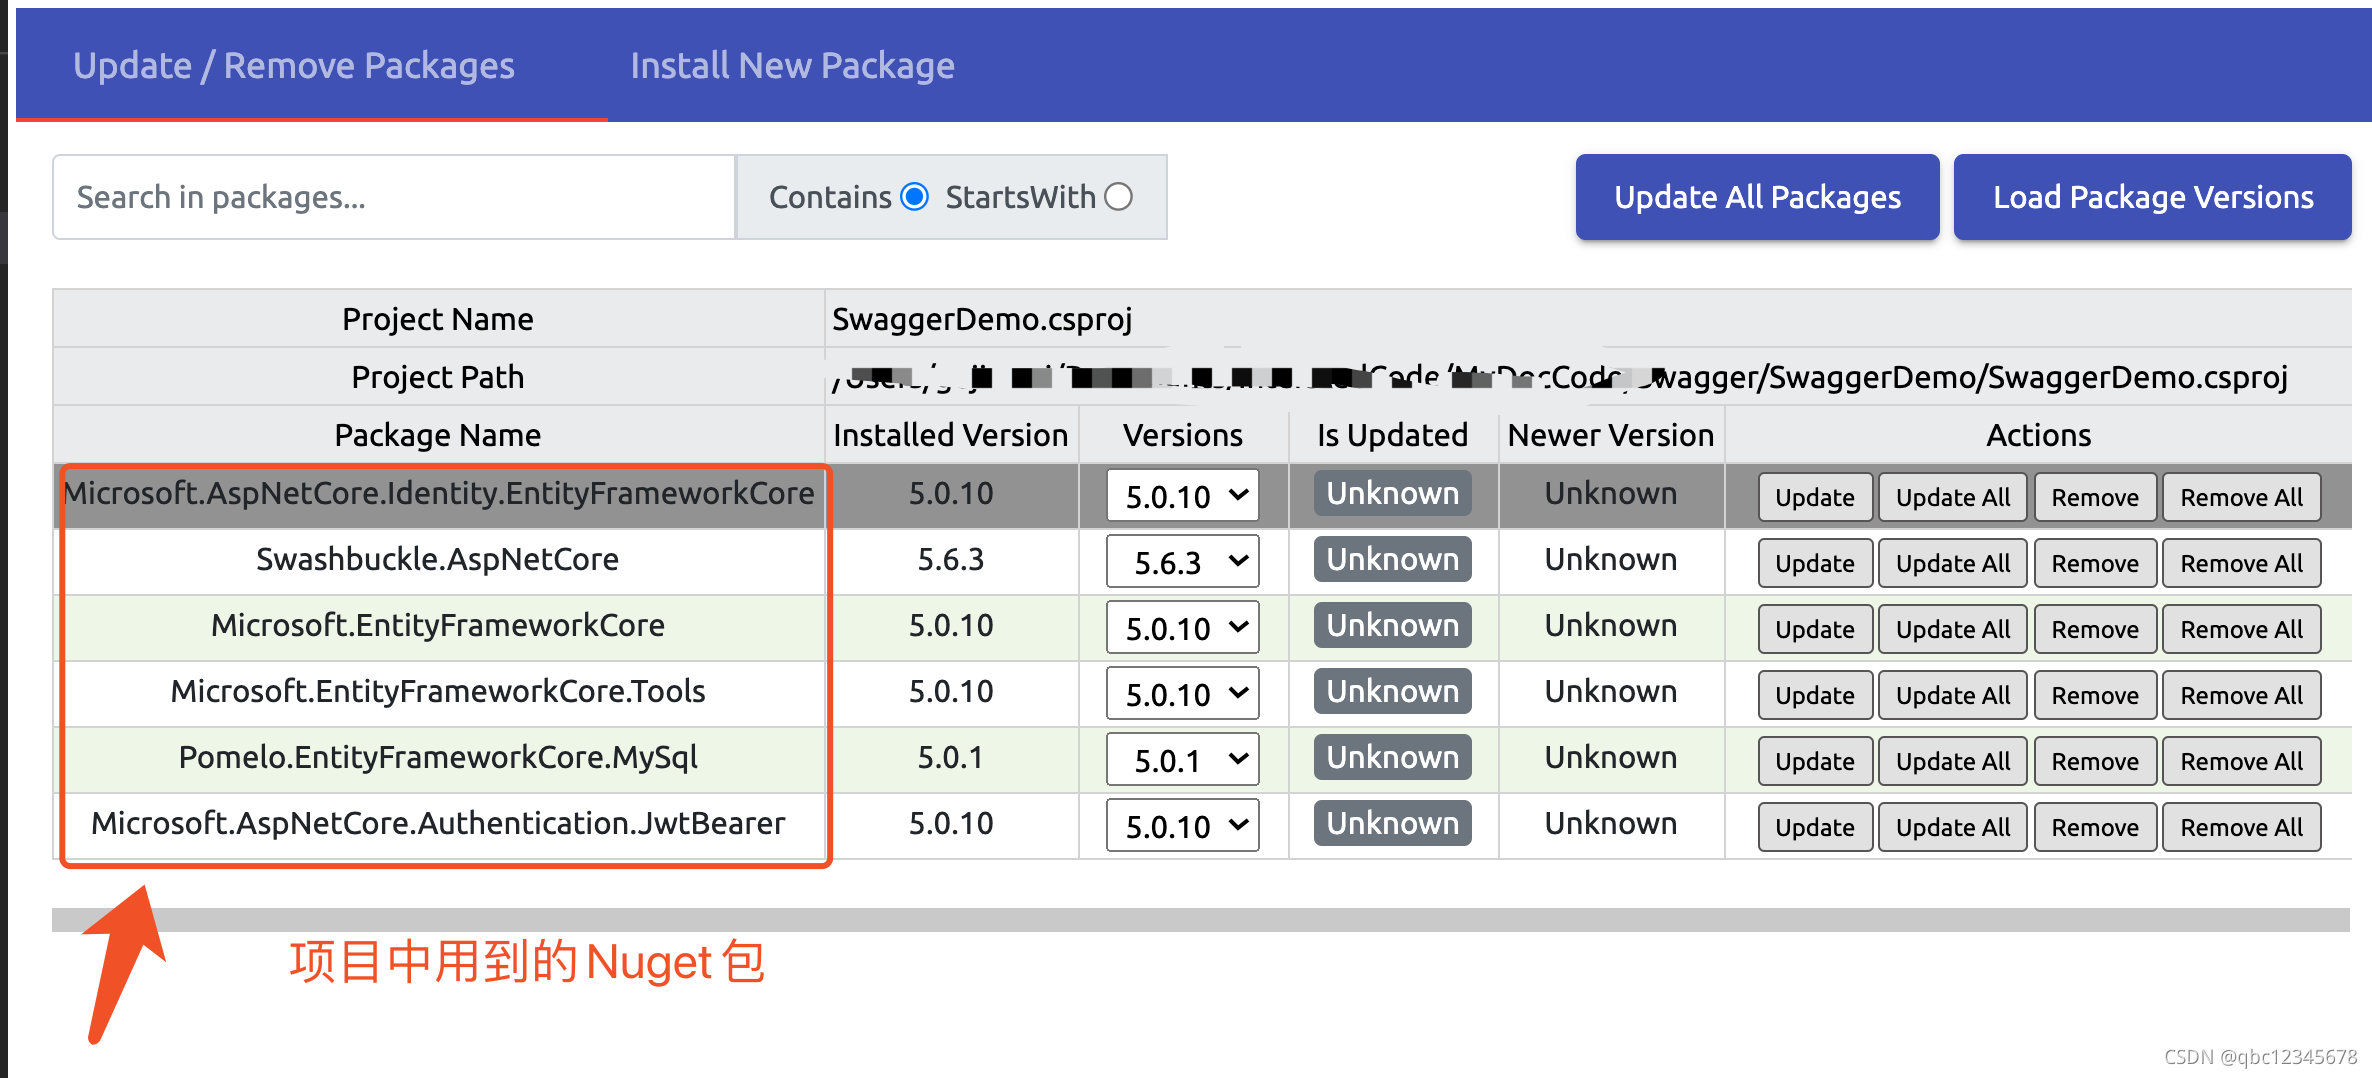
三、程式碼編寫
① 新建 User 實體
/// <summary>
/// 登入使用者實體類  繼承Identiy框架提供的 IdentityUser類
/// </summary>
public class AppUser:IdentityUser
{
    // 自己再擴充三個欄位
    public DateTime DateCreated { get; set; }
    public DateTime DateModified { get; set; }

    public string FullName { get; set; }
}
② 新建一個上下文類
public class AppDBContext : IdentityDbContext<AppUser, IdentityRole, string>
{
    public AppDBContext(DbContextOptions options) : base(options)
    {
    }
}
③ 在 Startup 依賴注入上下文類
services.AddDbContext<AppDBContext>(options =>
{
    options.UseMySql(Configuration.GetConnectionString("DefaultConnection"), MySqlServerVersion.LatestSupportedServerVersion);
});
// AddEntityFrameworkStores 用來建立 使用者和密碼之間的服務
services.AddIdentity<AppUser, IdentityRole>(opt => { }).AddEntityFrameworkStores<AppDBContext>();
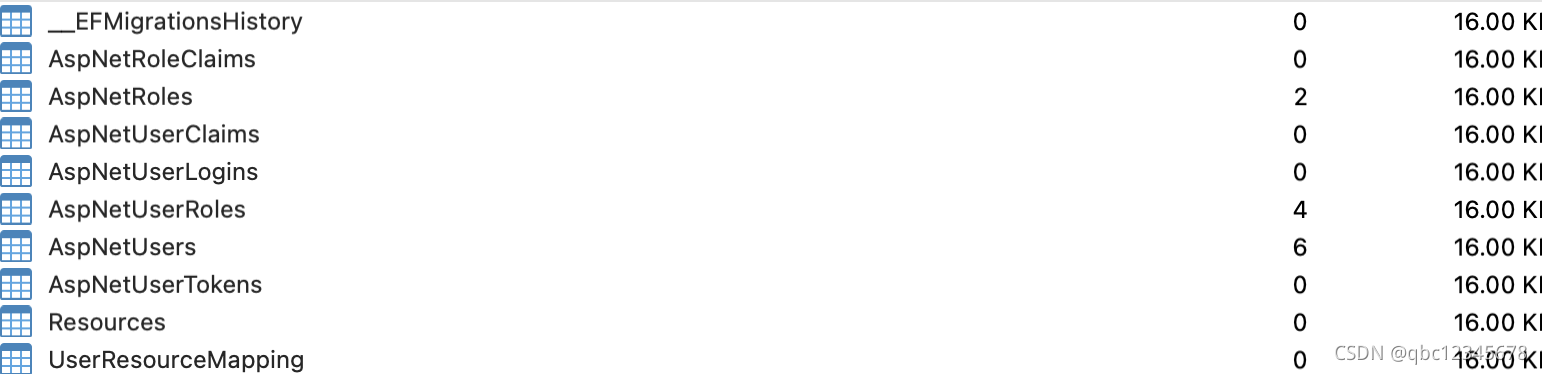
④ 在終端機 codefirst 產生資料表
dotnet ef migrations add init
dotnet ef  database update
⑤ 設定 JWT
ConfigureServices 方法裡面設定服務
services.AddAuthentication(x =>
{
    x.DefaultAuthenticateScheme = JwtBearerDefaults.AuthenticationScheme;
    x.DefaultChallengeScheme = JwtBearerDefaults.AuthenticationScheme;
})
    .AddJwtBearer(options =>
    {
        // jwt 的 key 需要設定複雜點
        var key = Encoding.ASCII.GetBytes(Configuration["JWTConfig:Key"]);
        var issure = Configuration["JWTConfig:Issuer"];   // 發行人
        var audience = Configuration["JWTConfig:Audience"];  // 受眾
        options.TokenValidationParameters = new TokenValidationParameters()
        {
            ValidateIssuerSigningKey = true,
            IssuerSigningKey = new SymmetricSecurityKey(key),
            ValidateIssuer = true, // 設定為 True 時 ValidIssure 屬性設定下,不然 jwt 驗證不會通過
            ValidateAudience = true, // 同上 ValidAudience 屬性設定下
            RequireExpirationTime = true,
            ValidateLifetime=true,   //  token 失效緩衝時間,預設是五分鐘,失效時間需要加上這五分鐘緩衝
            //  如果 上面 ValidateIssuer  設定為 false,則不需要下面兩個屬性
            ValidIssuer = issure,
            ValidAudience = audience,

        };
    });
// 多角色時可以這樣設定  [Authorize(Policy ="PolicyGroup")] 動作方法上可以簡寫
services.AddAuthorization(options =>
{
    options.AddPolicy("PolicyGroup", policy => policy.RequireRole("Admin", "User"));
});
Configure 方法裡面使用服務
public void Configure(IApplicationBuilder app, IWebHostEnvironment env)
{
    if (env.IsDevelopment())
    {
        app.UseDeveloperExceptionPage();
        app.UseSwagger();
        app.UseSwaggerUI(c => c.SwaggerEndpoint("/swagger/v1/swagger.json", "SwaggerDemo v1"));
    }

    app.UseHttpsRedirection();
    app.UseCors("any");
    app.UseRouting();
    // 注意順序
    app.UseAuthentication();
    app.UseAuthorization();

    app.UseEndpoints(endpoints =>
    {
        endpoints.MapControllers();
    });
}
⑥swagger 設定
ConfigureServices 方法裡面設定服務
services.AddSwaggerGen(c =>
{
    c.SwaggerDoc("v1", new OpenApiInfo { Title = "SwaggerDemo", Version = "v1", Description = "Demo API for showing Swagger" });

    // 下面兩步設定 實現 swagger 上面的「鎖」
    c.AddSecurityDefinition("Bearer", new OpenApiSecurityScheme
    {
        In = ParameterLocation.Header,  // 位於 Header
        Description = "請於此處直接填寫 token,無需 Bearer 然後再加空格的形式",
        Name = "Authorization",
        Type = SecuritySchemeType.Http,
        BearerFormat = "JWT",
        Scheme = "bearer"
    });
    c.AddSecurityRequirement(new OpenApiSecurityRequirement{
        {
            new OpenApiSecurityScheme{
                Reference=new OpenApiReference{
                    Type=ReferenceType.SecurityScheme,
                    Id="Bearer"
                }
            },Array.Empty<string>()
        }
    });

    // swagger 介面註解顯示
    // 注意 vscode 使用者需要在專案的 csproj 檔案裡面手動設定產生註解文件的屬性
    // 具體參見專案檔案裡的 PropertyGroup
    var fileName = $"{Assembly.GetExecutingAssembly().GetName().Name}.xml";
    var filePath = Path.Combine(AppContext.BaseDirectory, fileName);
    c.IncludeXmlComments(filePath);
});
Configure 方法裡面使用服務
public void Configure(IApplicationBuilder app, IWebHostEnvironment env)
{
    if (env.IsDevelopment())
    {
        app.UseDeveloperExceptionPage();
        // swagger 中介軟體使用
        app.UseSwagger();
        // 此處的 v1 必須與上面 c.SwaggerDoc("v1") 裡的一致
        app.UseSwaggerUI(c => c.SwaggerEndpoint("/swagger/v1/swagger.json", "SwaggerDemo v1"));
    }

    app.UseHttpsRedirection();
    app.UseCors("any");
    app.UseRouting();
    // 注意順序
    app.UseAuthentication();
    app.UseAuthorization();

    app.UseEndpoints(endpoints =>
    {
        endpoints.MapControllers();
    });
}
⑦ 建立 UserController,並透過建構函式注入登入服務
private readonly UserManager<AppUser> _userManger;  // 使用者服務
private readonly SignInManager<AppUser> _signInManger;  // 登入服務

private readonly RoleManager<IdentityRole> _roleManger; // 角色服務
private readonly JWTConfig _jwtConfig;  // 設定框架將設定檔注入實體類
public UserController(ILogger<UserController> logger, UserManager<AppUser> userManager,
        SignInManager<AppUser> signInManager, IOptions<JWTConfig> jwtConfig, RoleManager<IdentityRole> roleManger)
{
    this._logger = logger;
    this._userManger = userManager;
    this._signInManger = signInManager;
    this._jwtConfig = jwtConfig.Value;
    this._roleManger = roleManger;
}
註冊使用者
/// <summary>
/// 使用者註冊
/// AddAndUpdateUserrRegisterModel 是一個 Dto 接收物件
/// AllowAnonymous 不需要權限驗證
/// 作者 xxxx
/// </summary>
/// <param name="model"></param>
/// <returns></returns>
[AllowAnonymous]
[HttpPost("RegisterUser")]
public async Task<Object> RegisterUser(AddAndUpdateUserrRegisterModel model)
{
    try
    {
        // check  註冊的時候是否包含角色
        if (model.Roles is null || model.Roles.Count <= 0)
        {
            return await Task.FromResult(new ResponseModel(Enums.ResponseCode.Error, "角色不能為空"));
        }
        // 迴圈判斷使用者所註冊的角色是否存在 建立角色的方法  AddRole()
        foreach (var item in model.Roles)
        {
            if (!await _roleManger.RoleExistsAsync(item))
            {
                return await Task.FromResult(new ResponseModel(Enums.ResponseCode.Error, "不存在的角色"));
            }
        }
        // 產生一個使用者類
        var user = new AppUser()
        {
            UserName = model.Email,
            FullName = model.FullName,
            Email = model.Email,
            DateCreated = DateTime.Now,
            DateModified = DateTime.UtcNow
        };
        // 註冊使用者
        var result = await _userManger.CreateAsync(user, model.Password);
        if (result.Succeeded)
        {
            // 註冊成功後 獲取臨時剛剛建立的使用者
            var tempUser = await _userManger.FindByEmailAsync(model.Email);
            // 迴圈給建立的使用者新增角色
            foreach (var role in model.Roles)
            {
                await _userManger.AddToRoleAsync(tempUser, role); // 新增角色
            }
            return await Task.FromResult(new ResponseModel(Enums.ResponseCode.Ok, "使用者已成功註冊!", null));
        }
        // 建立使用者失敗返回
        return await Task.FromResult(string.Join(",", result.Errors.Select(x => x.Description).ToArray()));
    }
    catch (System.Exception ex)
    {
        // 異常返回
        return await Task.FromResult(new ResponseModel(Enums.ResponseCode.Error, ex.Message, null));
    }
}
登入
/// <summary>
/// 產生 Token
/// 作者 xxxx
/// </summary>
/// <param name="user"></param>
/// <returns></returns>
private string GenarateToken(AppUser user, List<string> roles)
{
    var jwtTokenHandle = new JwtSecurityTokenHandler();
    var key = Encoding.ASCII.GetBytes(_jwtConfig.Key);

    // 設定 Subject
    var claims = new List<Claim>()
    {
        new Claim(JwtRegisteredClaimNames.NameId,user.Id),
        new Claim(JwtRegisteredClaimNames.Email,user.Email),
        new Claim(JwtRegisteredClaimNames.Jti,Guid.NewGuid().ToString())
    };
    foreach (var role in roles)
    {
        claims.Add(new Claim(ClaimTypes.Role,role));
    }
    var tokenDescriptor = new SecurityTokenDescriptor
    {
        // 多重角色
        Subject=new ClaimsIdentity(claims),

        // 單一角色
        // Subject = new ClaimsIdentity(new[]
        // {
        //     new System.Security.Claims.Claim(JwtRegisteredClaimNames.NameId,user.Id),
        //     new System.Security.Claims.Claim(JwtRegisteredClaimNames.Email,user.Email),
        //     new System.Security.Claims.Claim(JwtRegisteredClaimNames.Jti,Guid.NewGuid().ToString())
        //     // new System.Security.Claims.Claim(ClaimTypes.Role,"role")
        // }),

        // 過期時間 12 小時
        Expires = DateTime.UtcNow.AddSeconds(6),
        SigningCredentials = new SigningCredentials(new SymmetricSecurityKey(key), SecurityAlgorithms.HmacSha256Signature),
        Audience = _jwtConfig.Audience,  // 這裡不設定也會返回 UnAuthorized
        Issuer = _jwtConfig.Issuer // 同上
    };
    // 建立 token
    var token = jwtTokenHandle.CreateToken(tokenDescriptor);
    return jwtTokenHandle.WriteToken(token);
}
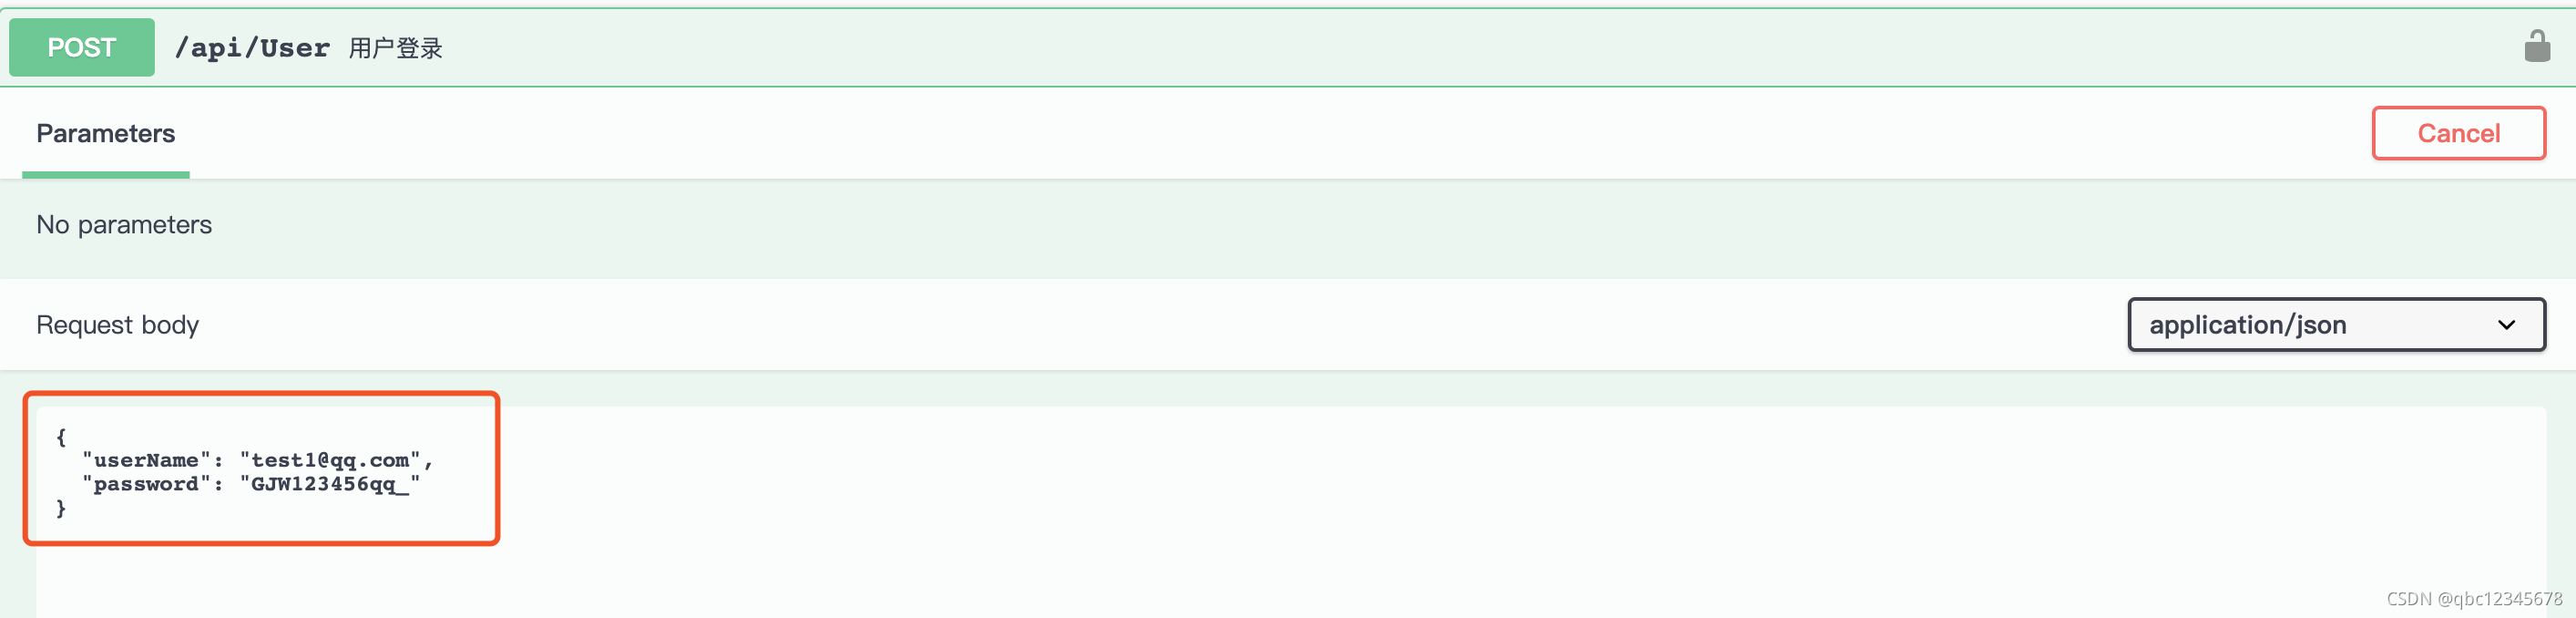
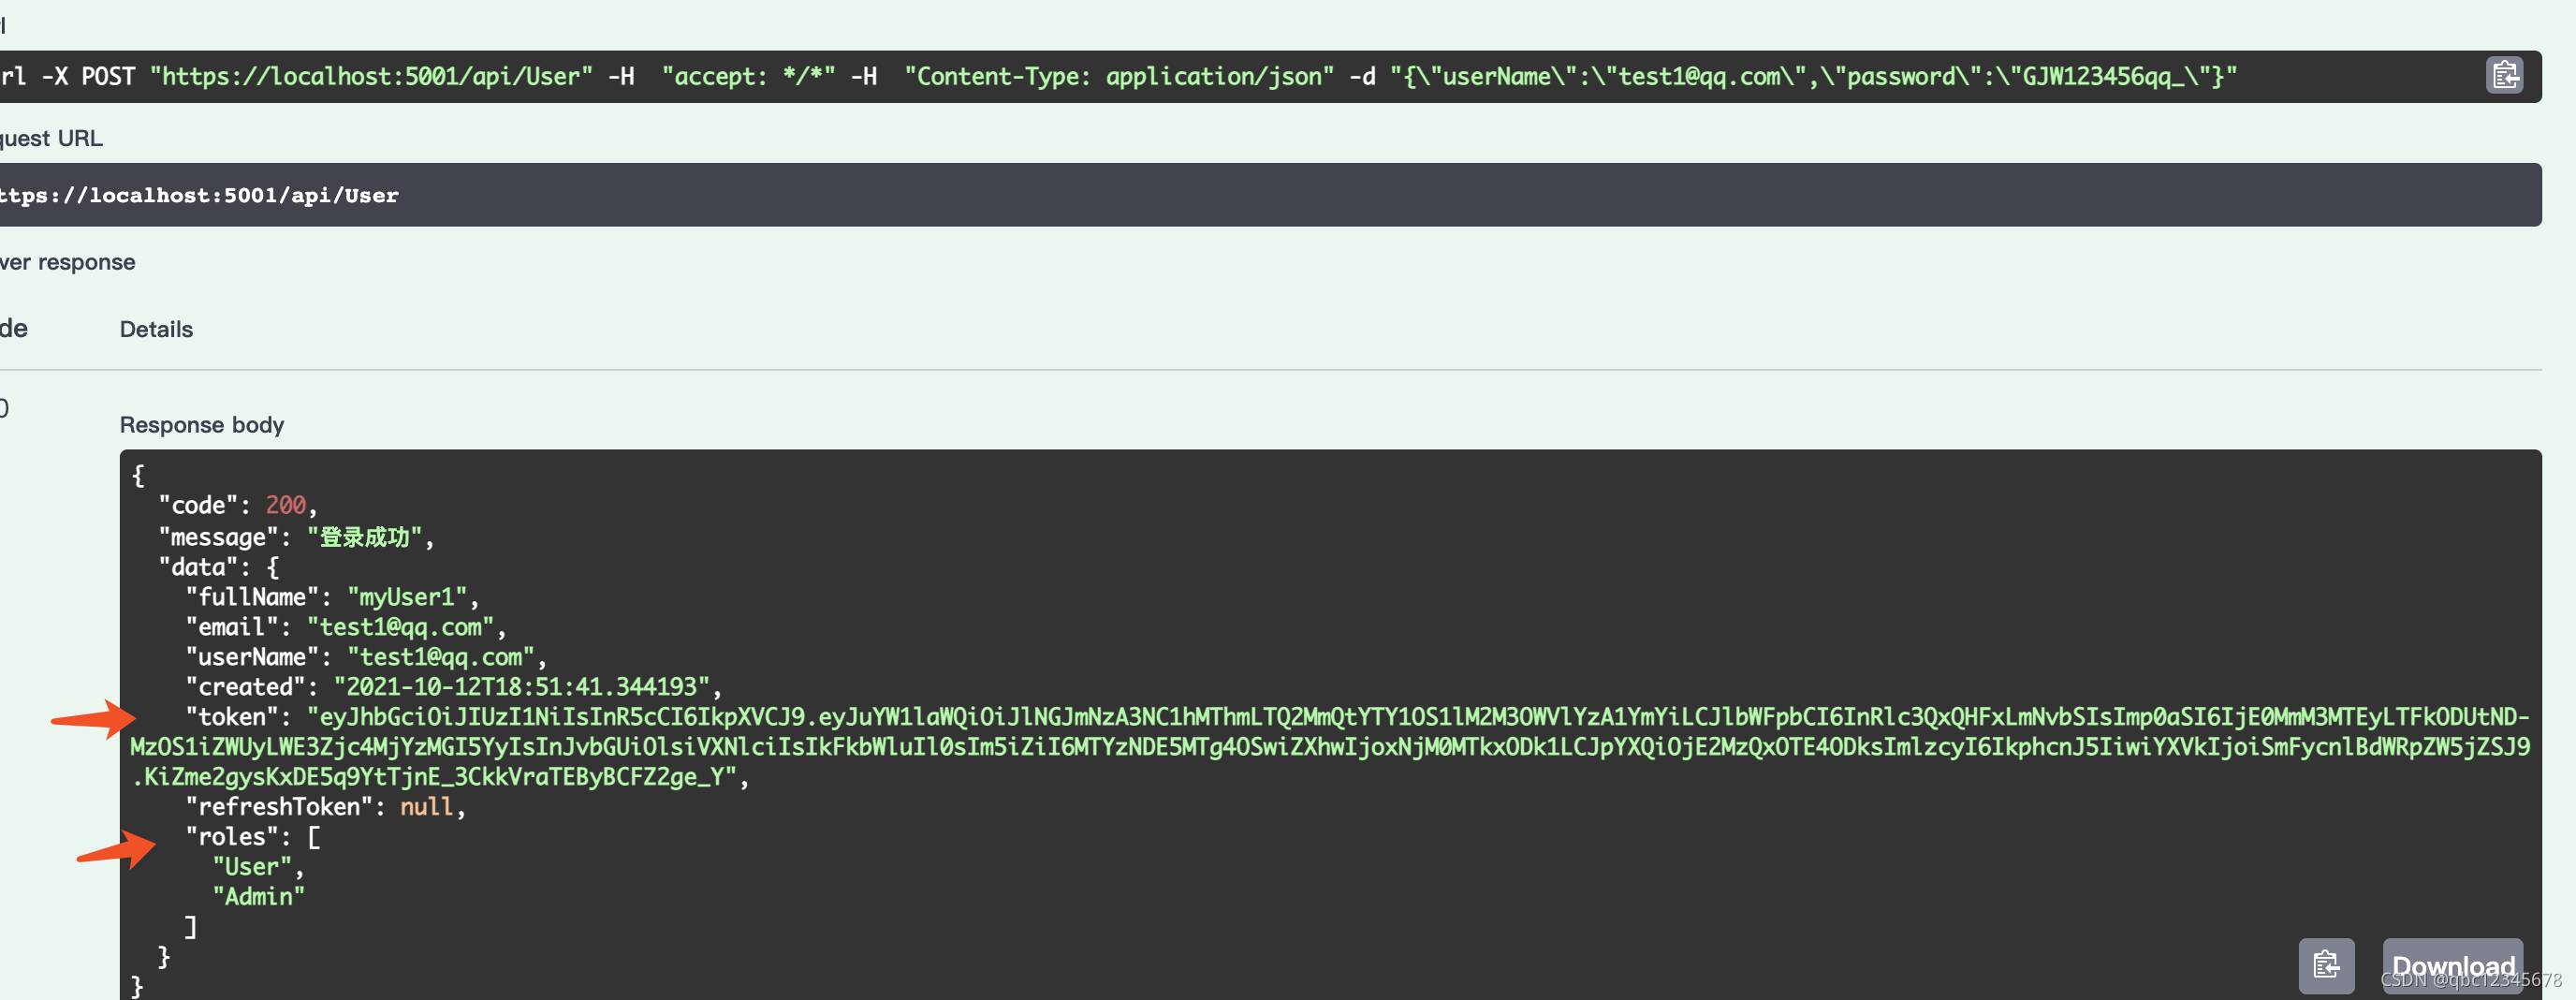
/// <summary>
/// 使用者登入
/// LoginModel 登入 Dto 接收
/// 作者 xxxx
/// </summary>
/// <param name="model"></param>
/// <returns></returns>
[AllowAnonymous]
[HttpPost]
public async Task<object> Login(LoginModel model)
{
    try
    {
        if (!ModelState.IsValid)
        {
            return await Task.FromResult(new ResponseModel(Enums.ResponseCode.Error, "參數不合法!", null));
        }
        var result = await _signInManger.PasswordSignInAsync(model.UserName, model.Password, false, false);
        if (result.Succeeded)
        {
            // 成功的話獲取使用者
            var appUser = await _userManger.FindByNameAsync(model.UserName);
            var roles = (await _userManger.GetRolesAsync(appUser)).ToList();
            // await _userManger.GetRolesAsync(appUser);
            var user = new UserDto(appUser.FullName, appUser.Email, appUser.UserName, appUser.DateCreated, roles)
            {
                // 產生 Token
                Token = GenarateToken(appUser,roles)
            };
            return await Task.FromResult(new ResponseModel(Enums.ResponseCode.Ok, "登入成功", user));
        }
        else
        {
            return await Task.FromResult(new ResponseModel(Enums.ResponseCode.Error, "登入失敗", null));
        }

    }
    catch (System.Exception ex)
    {
        return await Task.FromResult(new ResponseModel(Enums.ResponseCode.Error, ex.Message, null));
    }
}
新增角色
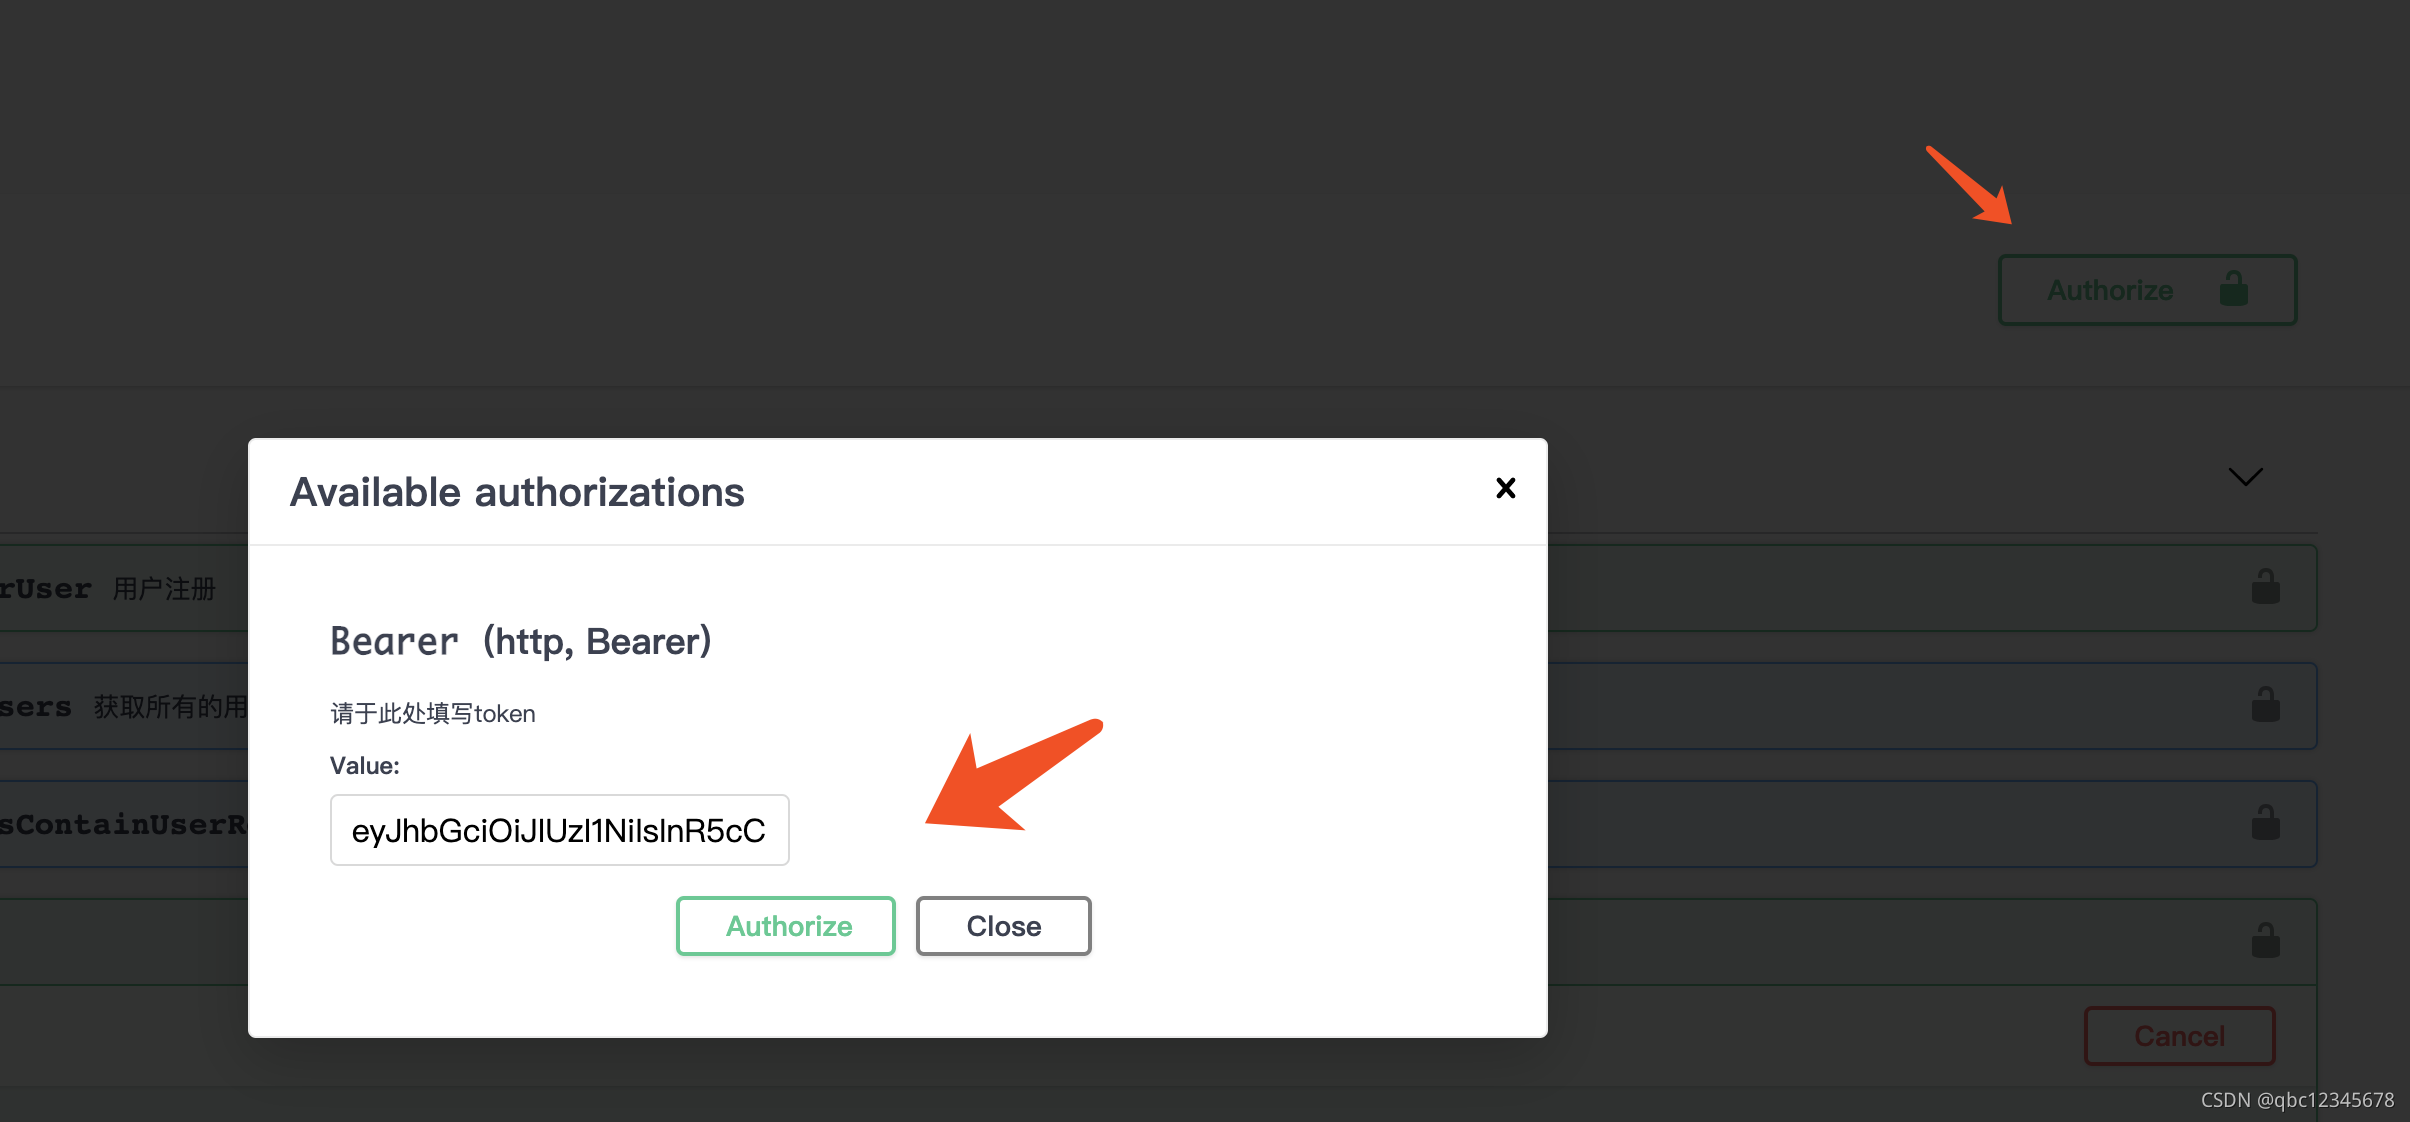
先將上文使用者登入產生的 token 設定到 swagger 裡面,然後訪問只有 Admin 角色可以訪問的介面
/// <summary>
/// 新增角色
/// [Authorize(Roles ="Admin")]  只有 Admin 角色的使用者可以訪問
/// 作者 xxx
/// </summary>
/// <param name="model"></param>
/// <returns></returns>
[Authorize(Roles ="Admin")]
[HttpPost("AddRole")]
public async Task<object> AddRole(AddRoleModel model)
{
    try
    {
        if (model is null || string.IsNullOrWhiteSpace(model.Role))
        {
            return await Task.FromResult(new ResponseModel(Enums.ResponseCode.Error, "角色不能為空"));
        }
        // 判斷【AspNetRoles】 表裡  角色是否存在
        if (await _roleManger.RoleExistsAsync(model.Role))
        {
            return await Task.FromResult(new ResponseModel(Enums.ResponseCode.Ok, "角色已存在"));
        }
        var role = new IdentityRole()
        {
            Name = model.Role,
        };
        // 建立角色
        var result = await _roleManger.CreateAsync(role);
        if (result.Succeeded)
        {
            return await Task.FromResult(new ResponseModel(Enums.ResponseCode.Ok, "角色建立成功!"));
        }
        else
        {
            return await Task.FromResult(new ResponseModel(Enums.ResponseCode.Error, "角色建立失敗!"));
        }

    }
    catch (System.Exception)
    {
        return await Task.FromResult(new ResponseModel(Enums.ResponseCode.Error));
    }

}
關於我們 token 權限在校驗時出現失敗怎麼辦? 這裡 ASP.NET Core 5.0 新增一個介面【IAuthorizationMiddlewareResultHandler】可以處理權限驗證 看下文程式碼展示!
/// <summary>
/// 這個是 ASP.NET Core 5 新增的授權處理失敗  可以直接暴露出請求上下文 省事很多啦!!!
/// 作者 xxx
/// </summary>
public class AuthorizationHandleMiddleWare : IAuthorizationMiddlewareResultHandler
{
    private readonly AuthorizationMiddlewareResultHandler authorizationHandleMiddleWare =new();
    public async Task HandleAsync(RequestDelegate next, HttpContext context, AuthorizationPolicy policy, PolicyAuthorizationResult authorizeResult)
    {
        // 當 token 失效或者 token 不存在的時候 authorizeResult.Challenged 為 True
        if(authorizeResult.Challenged)
        {
            // todo 拿到上下文 user 物件後 此處可以 check token  區分 token 是否是過期了
            var a=context.Request.Headers["Authorization"];
            context.Response.StatusCode=(int)HttpStatusCode.OK;
            await context.Response.WriteAsJsonAsync(new ResponseModel(Enums.ResponseCode.UnAuthorized,"您未授權,請檢查 Token 是否有效!"));
            return ;
        }
        // 此時 token 校驗通過  但是訪問的資源沒有權限的話 authorizeResult.Forbidden 為 true
        if(authorizeResult.Forbidden)
        {
            context.Response.StatusCode=(int)HttpStatusCode.OK;
            await context.Response.WriteAsJsonAsync(new ResponseModel(Enums.ResponseCode.ForBidden,"您無此權限訪問哦!"));
            return ;
        }
        await authorizationHandleMiddleWare.HandleAsync(next,context,policy,authorizeResult);
    }
}
另外還需要在 ConfigureService 裡面註冊下服務
// .net 5 新增的權限驗證中介軟體  在此處依賴注入一下  詳見 AuthorizationHandleMiddleWare.cs 檔案
services.AddSingleton<IAuthorizationMiddlewareResultHandler,AuthorizationHandleMiddleWare>();
以上就是一個登入的簡單 demo,詳細程式碼請訪問碼雲:https://gitee.com/holyace/together/tree/JarryGu_develop/framework/JwtLoginDemo