

- 原文链接:https://github.com/ControlzEx/ControlzEx
- 翻译:沙漠尽头的狼(谷歌及百度提供翻译支持)
Shared Controlz for WPF
支持 .NET Framework(4.5.2、4.6.2 及更高版本)、.NET Core (3.1) 和 .NET 5(在 Windows 上)


Let's get started
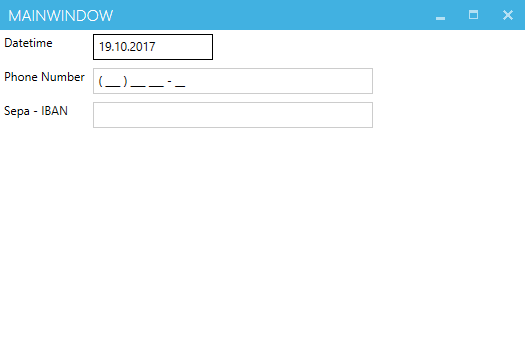
TextBoxInputMaskBehavior
TextBoxInputMaskBehavior可用于显示文本框内的掩码。
注意:它只是一个掩码,不会验证您的文本。
<TextBlock Grid.Row="0" Grid.Column="0" Margin="4" Text="Datetime" />
<TextBox Grid.Row="0" Grid.Column="1" Margin="4">
  <behaviors:Interaction.Behaviors>
    <controlzEx:TextBoxInputMaskBehavior InputMask="00/00/0000" />
  </behaviors:Interaction.Behaviors>
</TextBox>

<TextBlock Grid.Row="1" Grid.Column="0" Margin="4" Text="Phone Number" />
<TextBox Grid.Row="1" Grid.Column="1" Margin="4">
  <behaviors:Interaction.Behaviors>
    <controlzEx:TextBoxInputMaskBehavior
      InputMask="( 999 ) 000 000 - 00"
      PromptChar="_"
    />
  </behaviors:Interaction.Behaviors>
</TextBox>
原始 TextBoxInputMaskBehavior 取自 Blindmeis 的博客。
- https://blindmeis.wordpress.com/2015/01/20/wpf-textbox-input-behavior/
- https://blindmeis.wordpress.com/2010/06/01/wpf-masked-textbox-behavior/
KeyboardNavigationEx
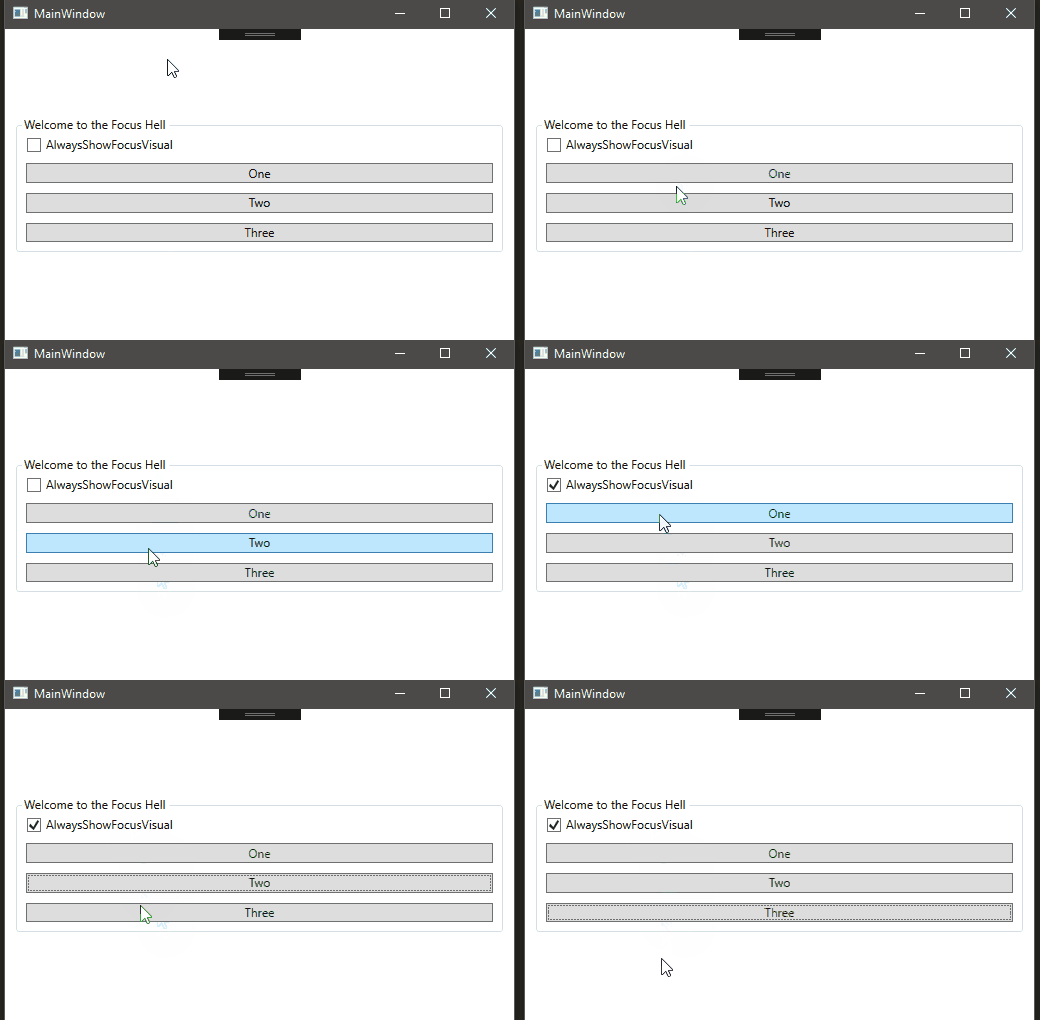
KeyboardNavigationEx是一个常见聚焦问题的辅助类。UI 元素本身的焦点不是问题。但是如果我们使用常见的对焦方法,控件获得了焦点,但没有获得焦点视觉样式。
仅当控件从键盘设备获得焦点或 SystemParameters.KeyboardCues 为 true 时,原KeyboardNavigation类才处理视觉样式。
使用KeyboardNavigationEx您可以通过两种简单的方式解决此问题。
后台代码:
public partial class MainWindow : Window
{
    public MainWindow()
    {
        InitializeComponent();
        this.Loaded += (s, e) => { KeyboardNavigationEx.Focus(this.TheElementWhichShouldGetTheFocus); };
    }
}
或在 XAML 中:
<button controlzex:KeyboardNavigationEx.AlwaysShowFocusVisual="True">
  Hey, I get the focus visual style on mouse click!
</button>
自动移动 ToolTip
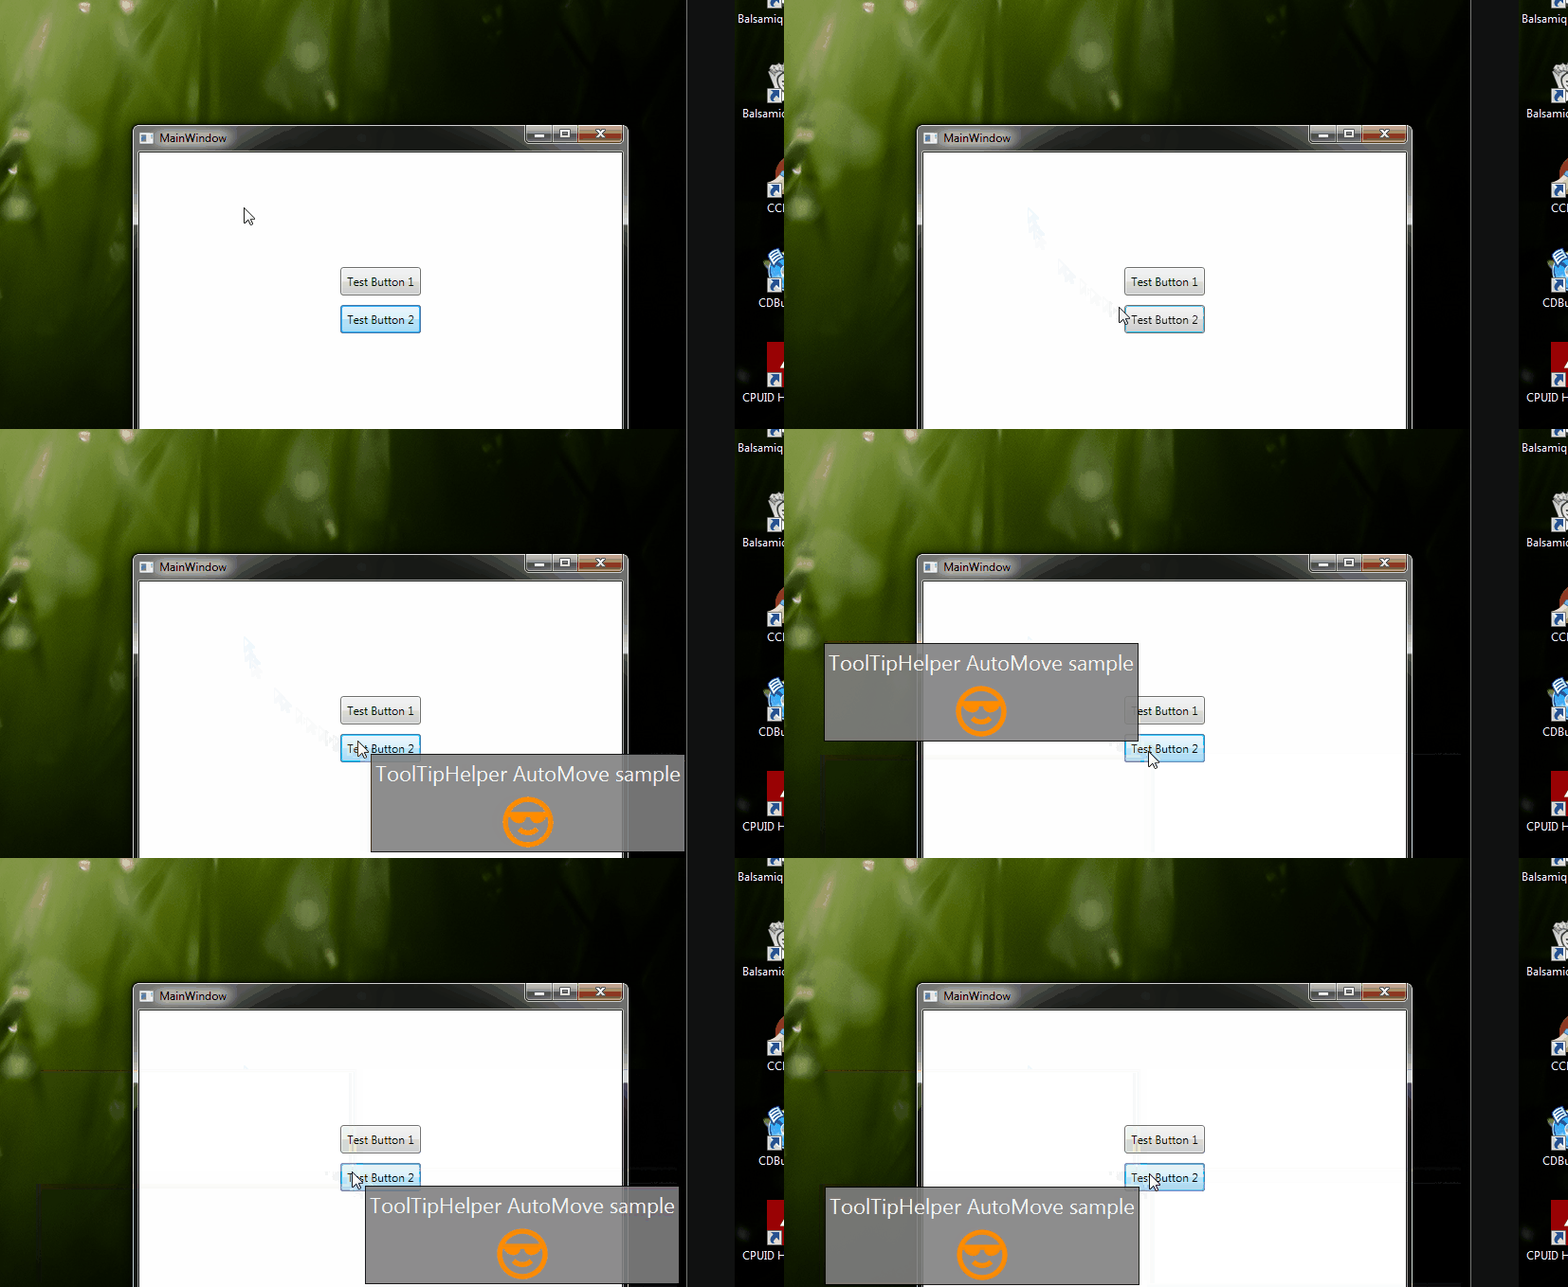
一个自动移动的 ToolTip。更多信息。
<button
  Margin="5"
  Padding="5"
  Content="Test Button 2"
  ToolTipService.ShowDuration="20000"
>
  <Button.ToolTip>
    <ToolTip local:ToolTipAssist.AutoMove="True">
      <ToolTip.Template>
        <ControlTemplate>
          <Grid>
            <Border
              Background="Gray"
              BorderBrush="Black"
              BorderThickness="1"
              Opacity="0.9"
              SnapsToDevicePixels="True"
            />
            <TextBlock
              Margin="5"
              Foreground="WhiteSmoke"
              FontSize="22"
              Text="ToolTipHelper AutoMove sample"
              TextOptions.TextFormattingMode="Display"
              TextOptions.TextRenderingMode="ClearType"
            />
          </Grid>
        </ControlTemplate>
      </ToolTip.Template>
    </ToolTip>
  </Button.ToolTip>
</button>

GlowWindowBehavior
GlowWindowBehavior在窗口周围添加一个光晕。
WindowChromeBehavior
ControlzEx 为 WPF 窗口提供了自定义镶边,并为其提供了一些其他更深层次的修复。
大多数修复和改进来自MahApps.Metro和Fluent.Ribbon。
具体的技术实现描述在这:
http://blogs.msdn.com/b/wpfsdk/archive/2008/09/08/custom-window-chrome-in-wpf.aspx
它是原始 Microsoft WPF Shell 集成库的一个分支。目前的 Microsoft 实现在这里找到:
PopupEx
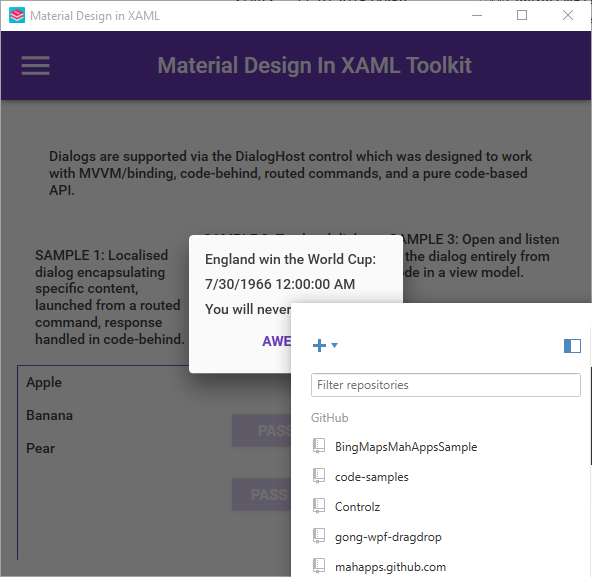
自定义的Popup窗口,可用于验证错误模板或其他类似MaterialDesignInXamlToolkit或MahApps.Metro中的其他内容。
PopupEx 提供了一些额外的不错的功能:
- 如果主机窗口大小或位置发生变化,则重新定位
- 如果主机窗口最大化,则重新定位,反之亦然
- 如果主机窗口被激活,它只能是最顶层
TabControlEx
自定义TabControl,在取消选择时将TabItem内容保留在 VisualTree 中,因此在再次选择TabItem后不会重新创建。visibility 行为可以通过ChildContentVisibility依赖属性设置。
用法:
<controlz:TabControlEx>
  <TabItem Header="Lorem">
    <TextBlock
      Text="Lorem ipsum dolor sit amet, consetetur sadipscing"
      HorizontalAlignment="Center"
      FontSize="30"
    />
  </TabItem>
  <TabItem Header="ipsum">
    <TextBox
      Text="Lorem ipsum dolor sit amet, consetetur sadipscing"
      HorizontalAlignment="Center"
      Margin="5"
    />
  </TabItem>
</controlz:TabControlEx>
PackIconBase
一个用于在 WPF 中创建图标包的帮助类。
要创建新的图标包,请按照下列步骤操作:
定义一个键(通常是一个枚举):
public enum PackIconKind
{
    Happy,
    Sad
}
子类PackIconBase,添加
- 默认 style key
- 为每个 key 提供 Path 数据的工厂
public class PackIcon : PackIconBase<PackIconKind>
{
    static PackIcon()
    {
        DefaultStyleKeyProperty.OverrideMetadata(typeof(PackIcon), new FrameworkPropertyMetadata(typeof(PackIcon)));
    }

    public PackIcon() : base(CreateIconData)
    { }

    private static IDictionary<PackIconKind, string> CreateIconData()
    {
        return new Dictionary<PackIconKind, string>
        {
            {PackIconKind.Happy, "M20,12A8,8 0 0,0 12,4A8,8 0 0,0 4,12A8,8 0 0,0 12,20A8,8 0 0,0 20,12M22,12A10,10 0 0,1 12,22A10,10 0 0,1 2,12A10,10 0 0,1 12,2A10,10 0 0,1 22,12M10,9.5C10,10.3 9.3,11 8.5,11C7.7,11 7,10.3 7,9.5C7,8.7 7.7,8 8.5,8C9.3,8 10,8.7 10,9.5M17,9.5C17,10.3 16.3,11 15.5,11C14.7,11 14,10.3 14,9.5C14,8.7 14.7,8 15.5,8C16.3,8 17,8.7 17,9.5M12,17.23C10.25,17.23 8.71,16.5 7.81,15.42L9.23,14C9.68,14.72 10.75,15.23 12,15.23C13.25,15.23 14.32,14.72 14.77,14L16.19,15.42C15.29,16.5 13.75,17.23 12,17.23Z"},
            {PackIconKind.Sad, "M20,12A8,8 0 0,0 12,4A8,8 0 0,0 4,12A8,8 0 0,0 12,20A8,8 0 0,0 20,12M22,12A10,10 0 0,1 12,22A10,10 0 0,1 2,12A10,10 0 0,1 12,2A10,10 0 0,1 22,12M15.5,8C16.3,8 17,8.7 17,9.5C17,10.3 16.3,11 15.5,11C14.7,11 14,10.3 14,9.5C14,8.7 14.7,8 15.5,8M10,9.5C10,10.3 9.3,11 8.5,11C7.7,11 7,10.3 7,9.5C7,8.7 7.7,8 8.5,8C9.3,8 10,8.7 10,9.5M12,14C13.75,14 15.29,14.72 16.19,15.81L14.77,17.23C14.32,16.5 13.25,16 12,16C10.75,16 9.68,16.5 9.23,17.23L7.81,15.81C8.71,14.72 10.25,14 12,14Z"}
        };
    }
}
提供默认样式(通常在您的 Generic.xaml 中,例如:
<style TargetType="{x:Type local:PackIcon}">
  <Setter Property="Height" Value="16" />
  <Setter Property="Width" Value="16" />
  <Setter Property="HorizontalAlignment" Value="Left" />
  <Setter Property="VerticalAlignment" Value="Top" />
  <Setter Property="IsTabStop" Value="False" />
  <Setter Property="Template">
      <Setter.Value>
          <ControlTemplate TargetType="{x:Type local:PackIcon}">
              <Viewbox>
                  <Canvas Width="24" Height="24">
                      <Path Data="{Binding Data, RelativeSource={RelativeSource TemplatedParent}}"
                            Fill="{TemplateBinding Foreground}" />
                  </Canvas>
              </Viewbox>
          </ControlTemplate>
      </Setter.Value>
  </Setter>
</style>
您的用户现在应该可以通过一种简单的方式在他们的应用程序中使用您的图标包:
<ns:PackIcon Kind="HappyIcon" />
Theming
ControlzEx 提供ThemeManager帮助您为应用程序提供主题管理支持。有关更多信息,请参阅该节。
Licence
MIT