
首先添加承载角色数据的ViewModel,因为接下来的权限会以角色判断,ASP.NET Core Identity 承载角色的Model 为IdentityRole,里面有太多不该让用户看到的信息,通常会自己写新的ViewModel 以过滤多余信息,这边只呈现Role的Id、Name 跟Role 底下所有用户的名称。
using System.ComponentModel.DataAnnotations;

namespace BlazorServer.ViewModels;

public class CustomRoleViewModel
{
	public string? Id { get; set; }

	[Required(ErrorMessage = "角色名称为必填")]
	public string? Name { get; set; }

	public List<string>? Users { get; set; }
}
添加IRolesRepository.cs跟RolesRepository.cs,这是专门处理角色的Service,把基本的角色CRUD(Create, Read, Update, Delete) 功能实现,再去Program.cs注册。
接口IRolesRepository.cs
using BlazorServer.Models;
using BlazorServer.ViewModels;

namespace BlazorServer.Repository;

public interface IRolesRepository
{
	Task<CustomRoleViewModel> GetRoleAsync(string roleId);
	Task<List<CustomRoleViewModel>> GetRolesAsync();
	Task<ResultViewModel> CreateRoleAsync(CustomRoleViewModel model);
	Task<ResultViewModel> EditRoleAsync(CustomRoleViewModel model);
	Task<ResultViewModel> DeleteRoleAsync(string roleId);
	Task<List<CustomUserRoleViewModel>> EditUsersInRoleAsync(string roleId);
	Task<ResultViewModel> EditUsersInRoleAsync(List<CustomUserRoleViewModel> model, string roleId);
}
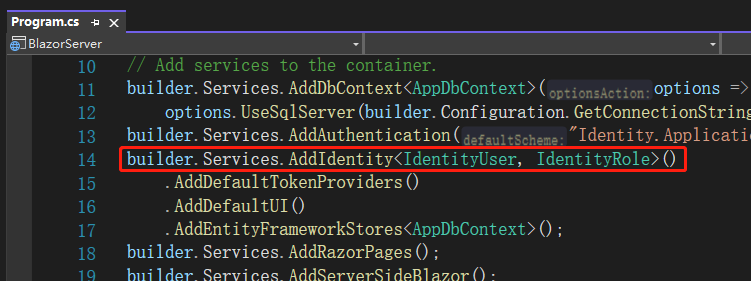
实现RolesRepository.cs,这边注入的RoleManager跟UserManager是ASP.NET Core Identity 预置处理角色跟用户的Service,之前在Program.cs写的builder.Services.AddIdentity<IdentityUser, IdentityRole>()…就注册了该功能,底下有各种Role、User 相关API可以调用。
using BlazorServer.Models;
using BlazorServer.ViewModels;
using Microsoft.AspNetCore.Identity;

namespace BlazorServer.Repository.Implement;

public class RolesRepository : IRolesRepository
{
	private readonly RoleManager<IdentityRole> _roleManager;
	private readonly UserManager<IdentityUser> _userManager;

	public RolesRepository(
		RoleManager<IdentityRole> roleManager,
		UserManager<IdentityUser> userManager)
	{
		_roleManager = roleManager;
		_userManager = userManager;
	}

	#region Roles

	public async Task<CustomRoleViewModel> GetRoleAsync(string roleId)
	{
		var role = await _roleManager.FindByIdAsync(roleId);
		var users = await _userManager.GetUsersInRoleAsync(role.Name);
		var result = new CustomRoleViewModel
		{
			Id = role.Id,
			Name = role.Name,
			Users = users.Select(u => u.UserName).ToList()
		};
		return result;
	}

	public async Task<List<CustomRoleViewModel>> GetRolesAsync()
	{
		var roles = _roleManager.Roles;
		var customRoles = new List<CustomRoleViewModel>();
		foreach (var role in roles)
		{
			customRoles.Add(new CustomRoleViewModel { Id = role.Id, Name = role.Name });
		}

		return await Task.Run(() => customRoles);
	}

	public async Task<ResultViewModel> CreateRoleAsync(CustomRoleViewModel model)
	{
		var identityRole = new IdentityRole
		{
			Name = model.Name
		};
		var result = await _roleManager.CreateAsync(identityRole);
		if (result.Succeeded)
		{
			return new ResultViewModel
			{
				Message = "角色创建成功!",
				IsSuccess = true
			};
		}

		return new ResultViewModel
		{
			Message = "角色创建失敗!",
			IsSuccess = false
		};
	}

	public async Task<ResultViewModel> EditRoleAsync(CustomRoleViewModel model)
	{
		var role = await _roleManager.FindByIdAsync(model.Id);

		if (role == null)
		{
			return new ResultViewModel
			{
				Message = $"找不到 Id 为 {model.Id} 的角色",
				IsSuccess = false
			};
		}

		role.Name = model.Name;
		var result = await _roleManager.UpdateAsync(role);
		if (result.Succeeded)
		{
			return new ResultViewModel
			{
				Message = "角色更新成功!",
				IsSuccess = true
			};
		}

		return new ResultViewModel
		{
			Message = "角色更新失败!",
			IsSuccess = false
		};
	}

	public async Task<ResultViewModel> DeleteRoleAsync(string roleId)
	{
		var role = await _roleManager.FindByIdAsync(roleId);

		if (role == null)
		{
			return new ResultViewModel
			{
				Message = $"找不到 Id 为 {roleId} 的角色",
				IsSuccess = false
			};
		}

		var result = await _roleManager.DeleteAsync(role);
		if (result.Succeeded)
		{
			return new ResultViewModel
			{
				Message = "角色刪除成功!",
				IsSuccess = true
			};
		}

		return new ResultViewModel
		{
			Message = "角色刪除失败!",
			IsSuccess = false
		};
	}

	#endregion
}
上面有两个方法后面再实现。
Program.cs添加注册
builder.Services.AddScoped<IRolesRepository, RolesRepository>();
现在有处理数据的功能了,接下来要添加页面。
RolesManagement.razor.cs
using BlazorServer.Repository;
using BlazorServer.Shared;
using BlazorServer.ViewModels;
using Microsoft.AspNetCore.Components;
using Microsoft.JSInterop;
using System.Text.Json;

namespace BlazorServer.Pages.RolesManagement;

public partial class RolesManagement
{
	[Inject] protected IRolesRepository? RolesRepository { get; set; }
	[Inject] protected IJSRuntime? Js { get; set; }
	[Inject] private NavigationManager? NavigationManager { get; set; }
	private JsInteropClasses? _jsClass;
	public List<CustomRoleViewModel> Roles { get; set; } = new();

	protected override async Task OnInitializedAsync()
	{
		await LoadData();
		_jsClass = new JsInteropClasses(Js!);
	}

	private async Task LoadData()
	{
		Roles = await RolesRepository!.GetRolesAsync();
	}

	private void EditRole(string id)
	{
		NavigationManager!.NavigateTo($"RolesManagement/EditRole/{id}");
	}

	private async Task DeleteRole(string id)
	{
		var sweetConfirm = new SweetConfirmViewModel()
		{
			RequestTitle = $"是否确定刪除角色{id}?",
			RequestText = "这个动作不可恢复",
			ResponseTitle = "刪除成功",
			ResponseText = "角色被刪除了",
		};
		var jsonString = JsonSerializer.Serialize(sweetConfirm);
		var result = await _jsClass!.Confirm(jsonString);
		if (result)
		{
			var deleted = await RolesRepository!.DeleteRoleAsync(id);
			if (deleted.IsSuccess)
			{
				await LoadData();
			}
			else
			{
				await _jsClass.Alert(deleted.Message!);
			}
		}
	}
}
RolesManagement.razor
@page "/RolesManagement/RolesList" @attribute [Authorize]

<h1>所有角色</h1>

@if (Roles.Any()) {
<NavLink
  class="btn btn-primary mb-3"
  href="RolesManagement/CreateRole"
  Match="NavLinkMatch.All"
>
  新增角色
</NavLink>

foreach (var role in Roles) {
<div class="card mb-3 w-25">
  <div class="card-header">Role Id : @role.Id</div>
  <div class="card-body">
    <h5 class="card-title">@role.Name</h5>
  </div>
  <div class="card-footer">
    <button
      type="button"
      class="btn btn-primary"
      @onclick="() => EditRole(role.Id!)"
    >
      编辑角色
    </button>
    <button
      type="button"
      class="btn btn-danger"
      @onclick="() => DeleteRole(role.Id!)"
    >
      刪除角色
    </button>
  </div>
</div>
} } else {
<div class="card w-25">
  <div class="card-header">还沒有角色</div>
  <div class="card-body">
    <h5 class="card-title">点击底下的按钮添加角色</h5>
    <NavLink
      class="btn btn-primary mb-3"
      href="RolesManagement/CreateRole"
      Match="NavLinkMatch.All"
    >
      新增角色
    </NavLink>
  </div>
</div>
}
然后去NavMenu.razor添加 NavLink 跳转角色管理。
<div class="nav-item px-3">
  <NavLink
    class="nav-link"
    href="RolesManagement/RolesList"
    Match="NavLinkMatch.All"
  >
    <span class="bi bi-kanban-fill h4 p-2 mb-0" aria-hidden="true"></span> Roles
  </NavLink>
</div>
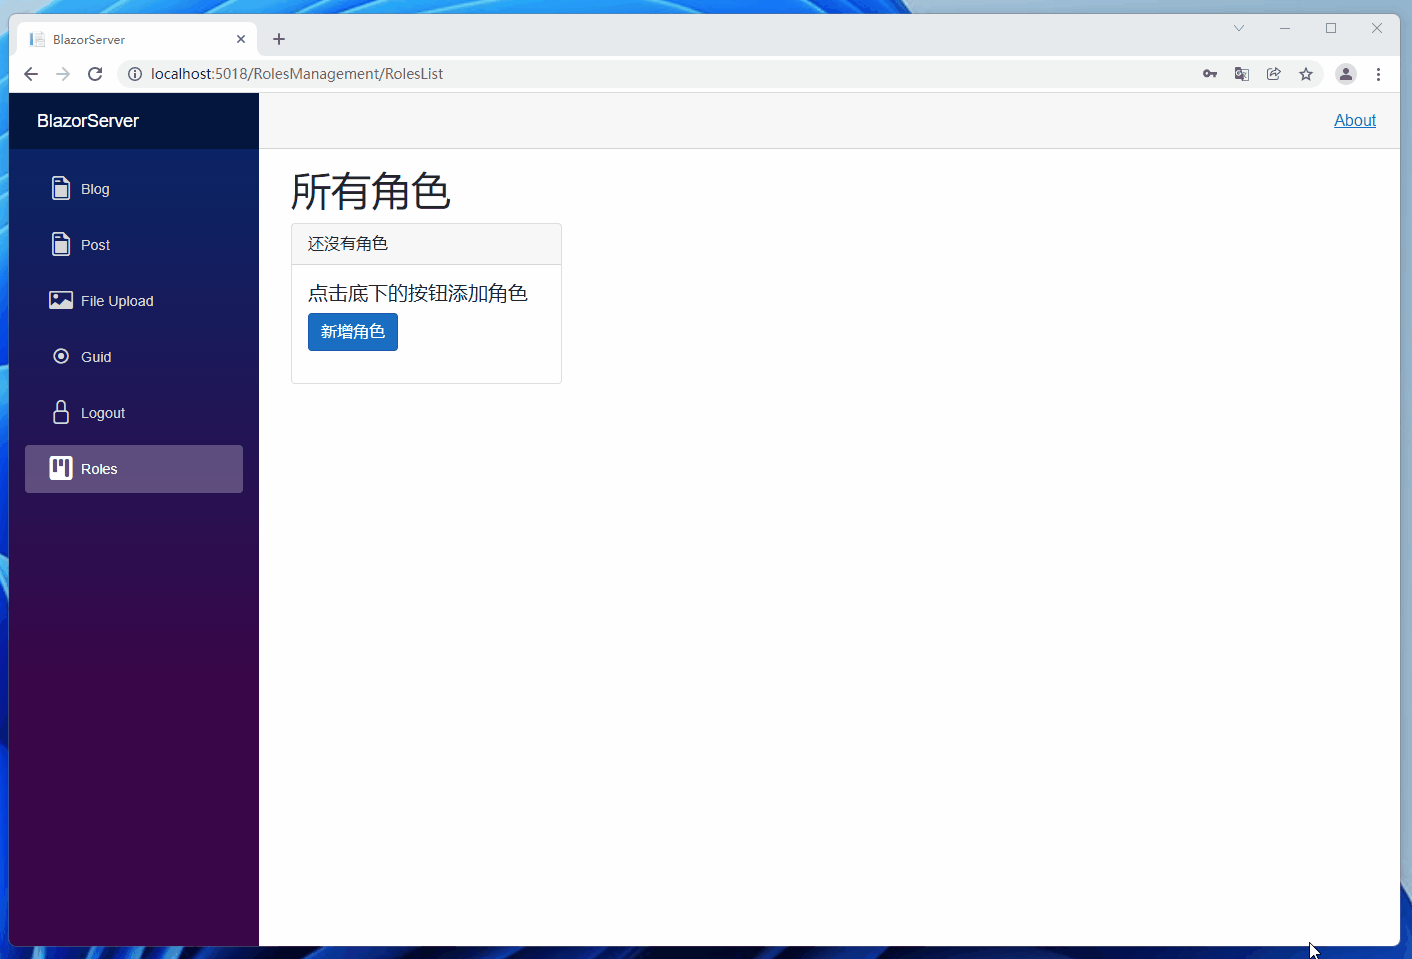
这时打开网站可以看到这样的页面,我们来加上新增角色的页面并新增一个角色 Admin。
CreateRole.razor.cs
using BlazorServer.Repository;
using BlazorServer.ViewModels;
using Microsoft.AspNetCore.Components;

namespace BlazorServer.Pages.RolesManagement;

public partial class CreateRole
{
	[Inject] protected IRolesRepository? RolesRepository { get; set; }
	[Inject] protected NavigationManager? NavigationManager { get; set; }
	public CustomRoleViewModel Role { get; set; } = new();

	private async Task CreateRoleInfo()
	{
		await RolesRepository!.CreateRoleAsync(Role);
		NavigationManager!.NavigateTo("/RolesManagement/RolesList");
	}
}
CreateRole.razor
@page "/RolesManagement/CreateRole" @attribute [Authorize]

<EditForm class="mt-3" Model="Role" OnValidSubmit="CreateRoleInfo">
  <DataAnnotationsValidator />
  <ValidationSummary />
  <div class="form-group row">
    <label for="RoleName" class="col-sm-1 col-form-label">角色名称</label>
    <div class="col-sm-3">
      <InputText
        @bind-Value="Role.Name"
        id="RoleName"
        class="form-control"
        placeholder="角色名称"
      ></InputText>
    </div>
  </div>

  <div class="form-group row">
    <div class="col-sm-10">
      <button type="submit" class="btn btn-primary">添加角色</button>
    </div>
  </div>
</EditForm>
有了添加功能就要有编辑功能,编辑完成或取消都直接跳转回角色列表。
EditRole.razor.cs
using BlazorServer.Repository;
using BlazorServer.ViewModels;
using Microsoft.AspNetCore.Components;

namespace BlazorServer.Pages.RolesManagement;

public partial class EditRole
{
	[Inject] protected IRolesRepository? RolesRepository { get; set; }
	[Inject] protected NavigationManager? NavigationManager { get; set; }
	public CustomRoleViewModel Role { get; set; } = new();
	[Parameter] public string? Id { get; set; }

	protected override async Task OnInitializedAsync()
	{
		var result = await RolesRepository!.GetRoleAsync(Id!);
		Role = new CustomRoleViewModel
		{
			Id = result.Id,
			Name = result.Name,
			Users = result.Users
		};
	}

	private async Task EditRoleInfo()
	{
		await RolesRepository!.EditRoleAsync(Role);
		NavigationManager!.NavigateTo("/RolesManagement/RolesList");
	}

	public void Cancel()
	{
		NavigationManager!.NavigateTo($"/RolesManagement/RolesList");
	}
}
EditRole.razor
@page "/RolesManagement/EditRole/{Id}" @attribute [Authorize]
<EditForm class="mt-3" Model="Role" OnValidSubmit="EditRoleInfo">
<DataAnnotationsValidator />
<ValidationSummary />
<div class="form-group row">
<label for="RoleName" class="col-sm-1 col-form-label">角色名称</label>
<div class="col-sm-3">
<InputText
@bind-Value="Role.Name"
id="RoleName"
class="form-control"
placeholder="角色名称"
></InputText>
</div>
</div>
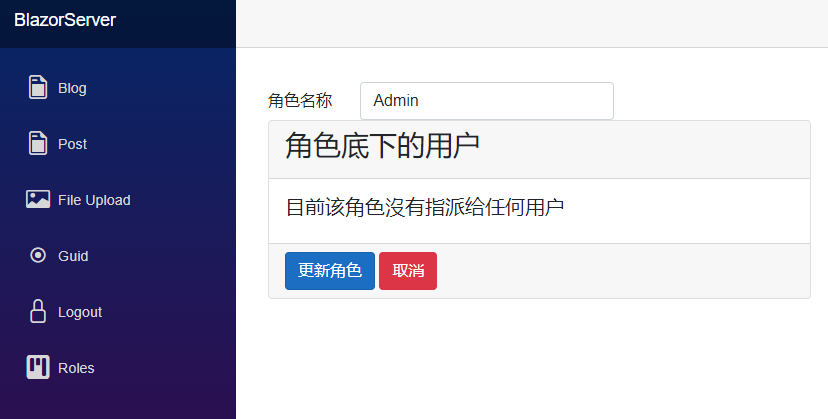
<div class="card mb-3 w-50">
<div class="card-header">
<h3>角色底下的用户</h3>
</div>
<div class="card-body">
@if (Role.Users != null && Role.Users.Any()) { foreach (var user in
Role.Users) {
<h5 class="card-title">@user</h5>
} } else {
<h5 class="card-title">目前该角色沒有指派给任何用户</h5>
}
</div>
<div class="card-footer">
<button type="submit" class="btn btn-primary">更新角色</button>
<button type="button" class="btn btn-danger" @onclick="Cancel">
取消
</button>
</div>
</div>
</EditForm>
角色 CRUD 功能大概就是这些,笔者只是用最简单的方式处理,不过项目通常不会这么简单,还有其他细微功能要调整,明天来说明如何管理角色底下的用户,以及如何套用角色授权。
引用:
注:本文代码通过 .NET 6 + Visual Studio 2022 重构,可点击原文链接与重构后代码比较学习,谢谢阅读,支持原作者