
C/S 客户端开发完成,需要将程序交付给用户,直接压缩发给用户是可以的(只是有点不专业),如果能有一个比较好看的安装界面,那档次就不一样了。
本文介绍怎么使用 Adanced Installer 17.9 制作专业的 Windows 客户端安装包,其他软件或者本软件其他版本制作步骤也是类似的,下面是软件安装包制作完成后的安装演示:
软件安装演示

本文提供打包的程序源码下载及制作好的软件安装包体验,欢迎浏览下载:
下面介绍安装包制作步骤:
1、下载 Adanced Installer 17.9
首先下载软件安装包制作软件,安装包从 360 软件管家下载,其他途径亦可:
下载安装包制作软件
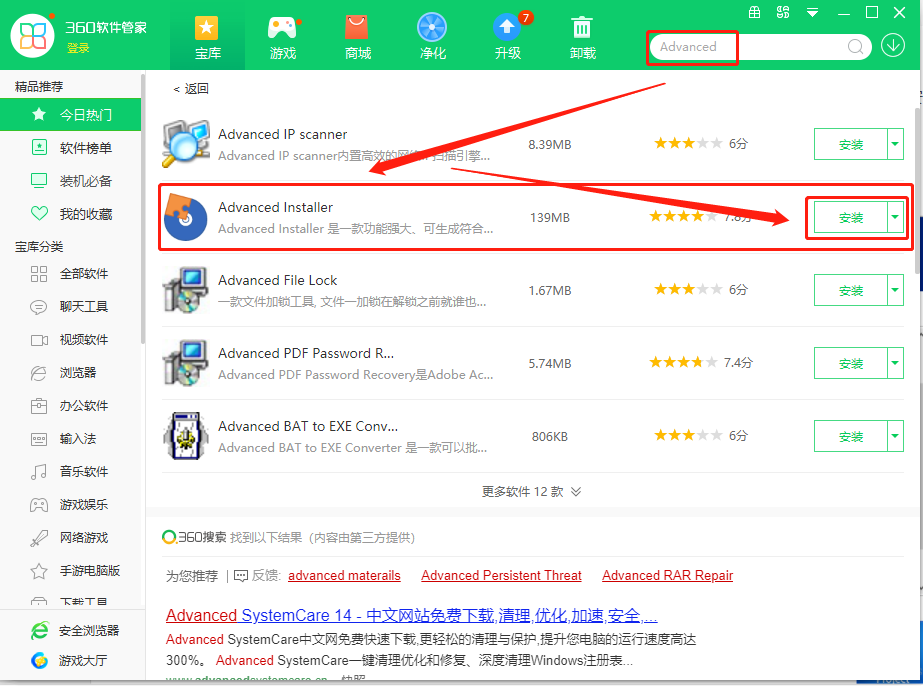
下载后,按默认步骤安装即可。
2、创建安装包制作工程
制作软件安装包与软件开发一样,我们先创建一个安装包制作工程,相当于保存安装包配置的过程,方便以后再次修改、打包:

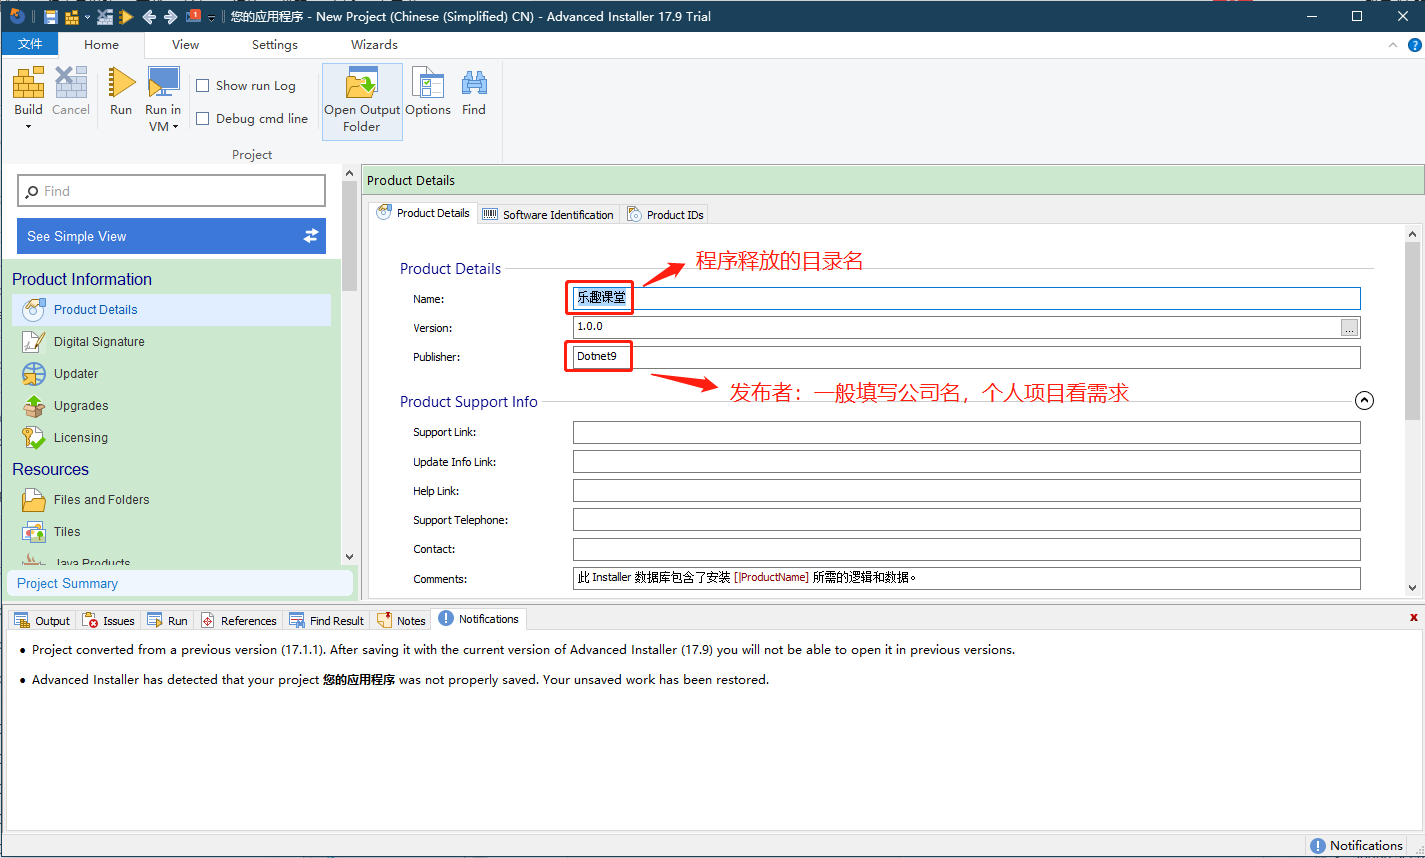
3、安装包产品信息
- 填写程序释放的目录名称:乐趣课堂
- 填写公司名称,和程序释放的目录名称组成安装路径:Dotnet9
比如默认安装后的路径为:C:\Program Files (x86)\Dotnet9\乐趣课堂,安装的时候路径是可以修改。
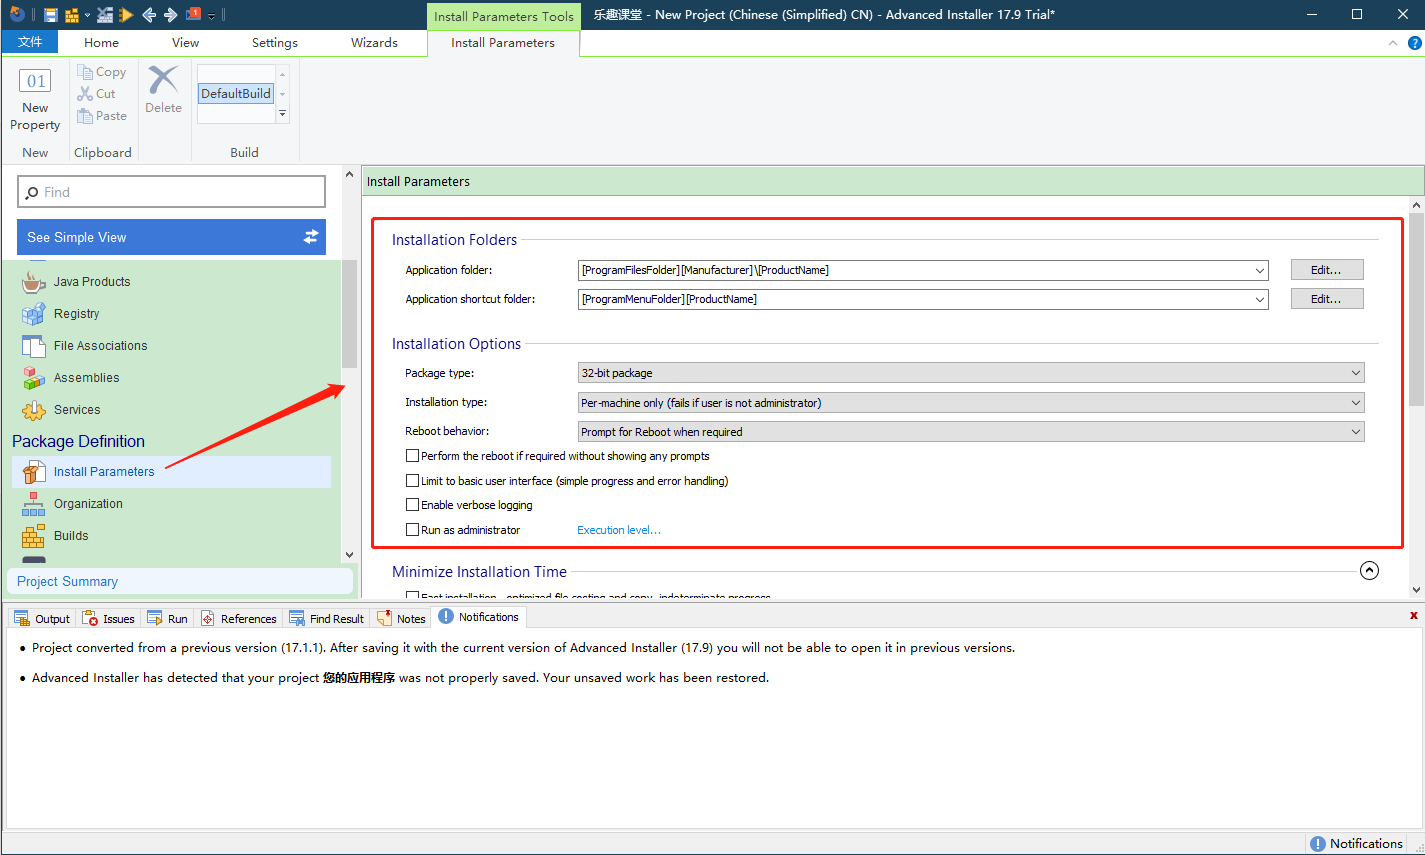
4、输入安装参数
应用程序的文件夹,可以不用修改,默认即可:
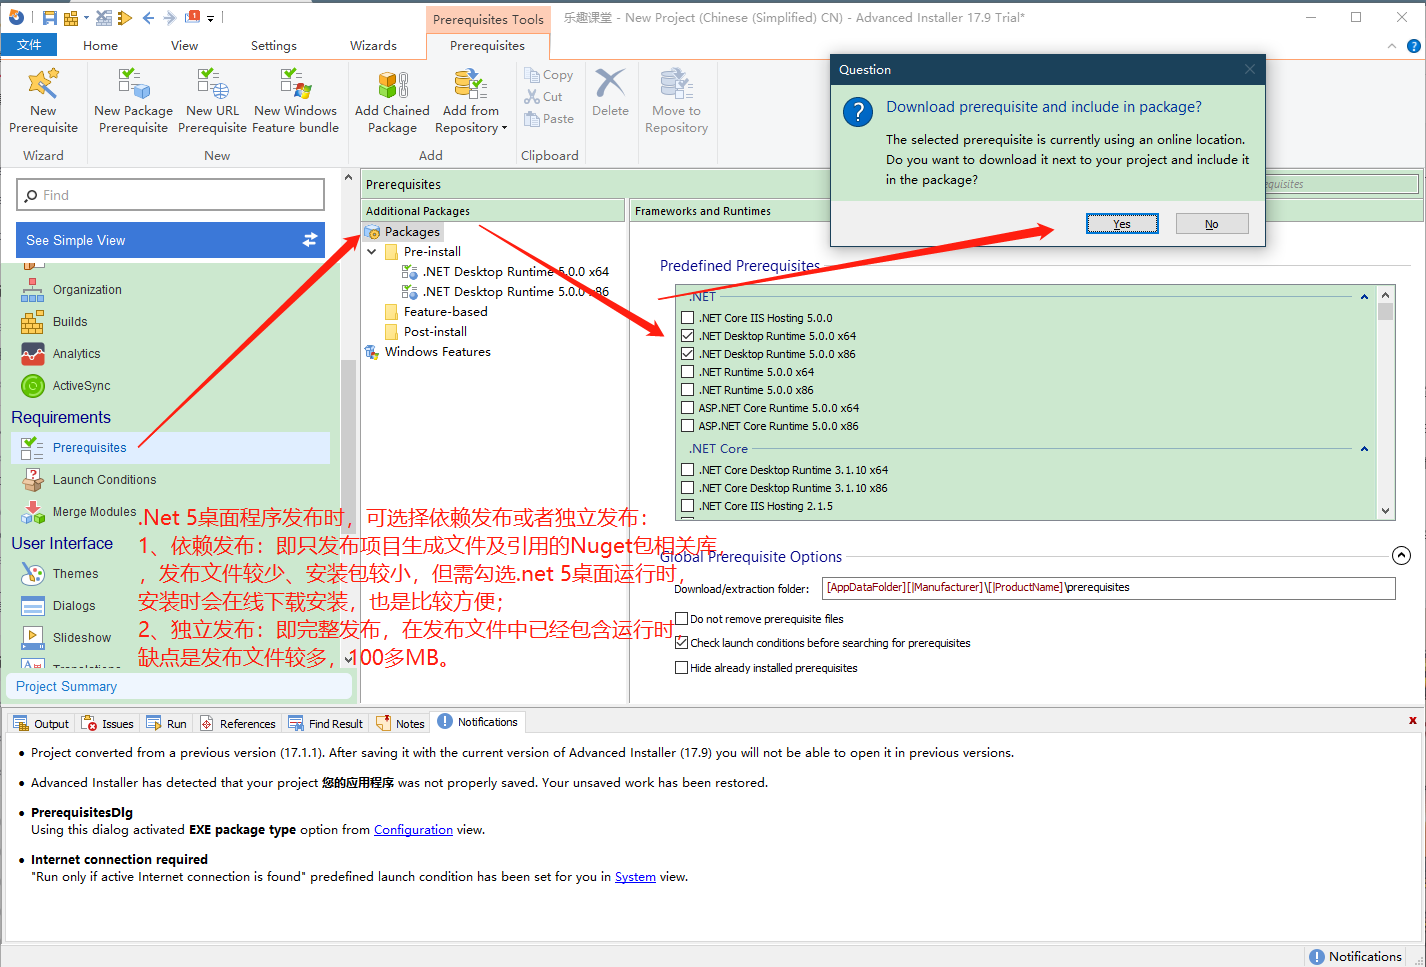
5、选择程序运行环境
打包的测试程序(访问乐趣课堂源码仓库)依赖.NET 5 运行时(发布时选择的依赖于环境),所以在下面的配置里可以选择安装时下载、安装.NET 5 运行时(独立发布可以忽略这个步骤):
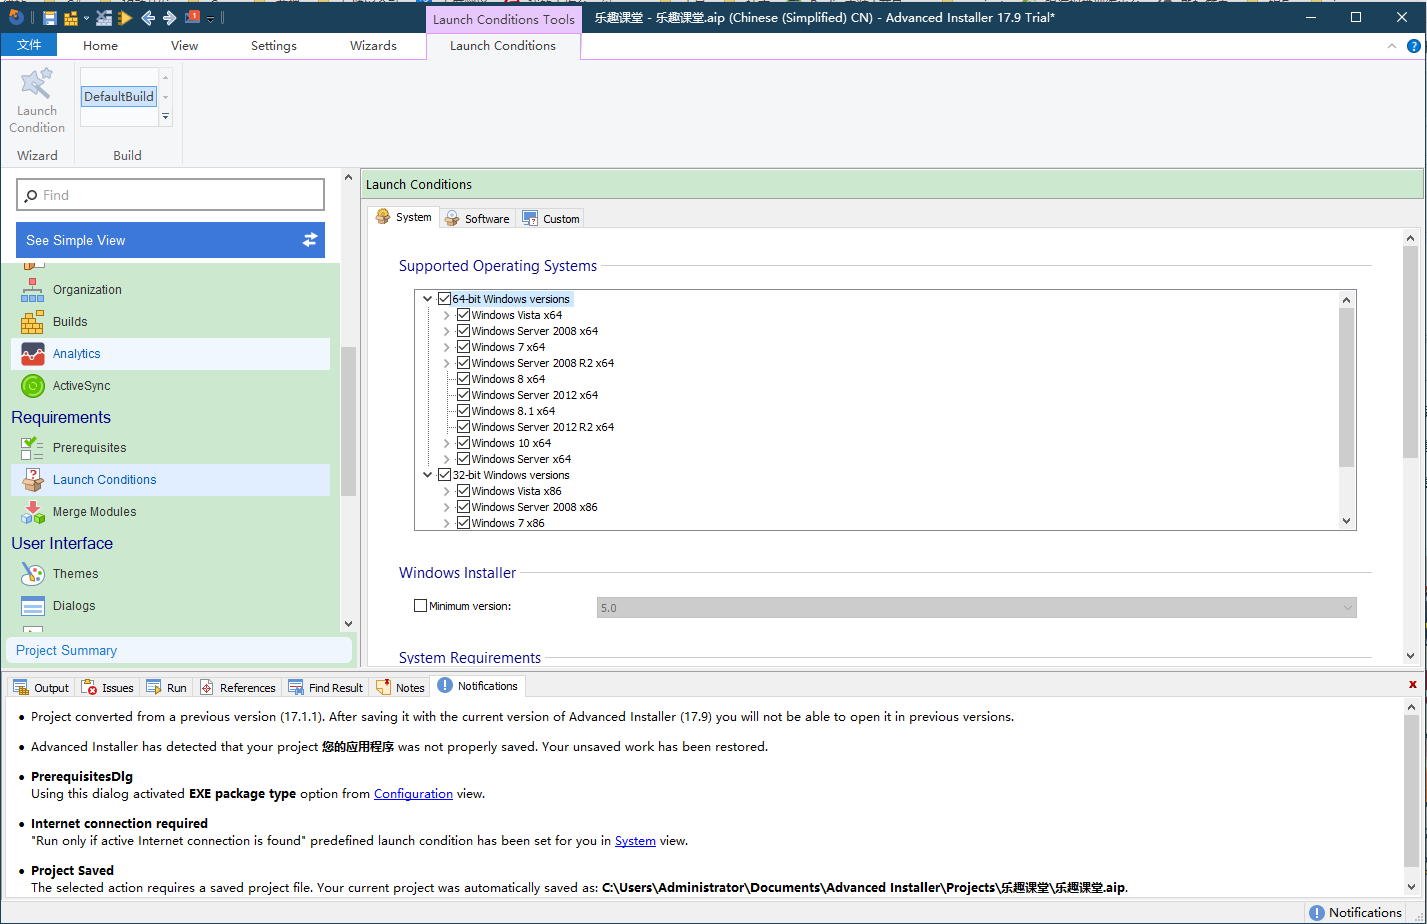
6、设置程序启动条件
看下面的界面,选择程序可运行的操作系统,分 x86 和 x64 各版本 Windows 操作系统:
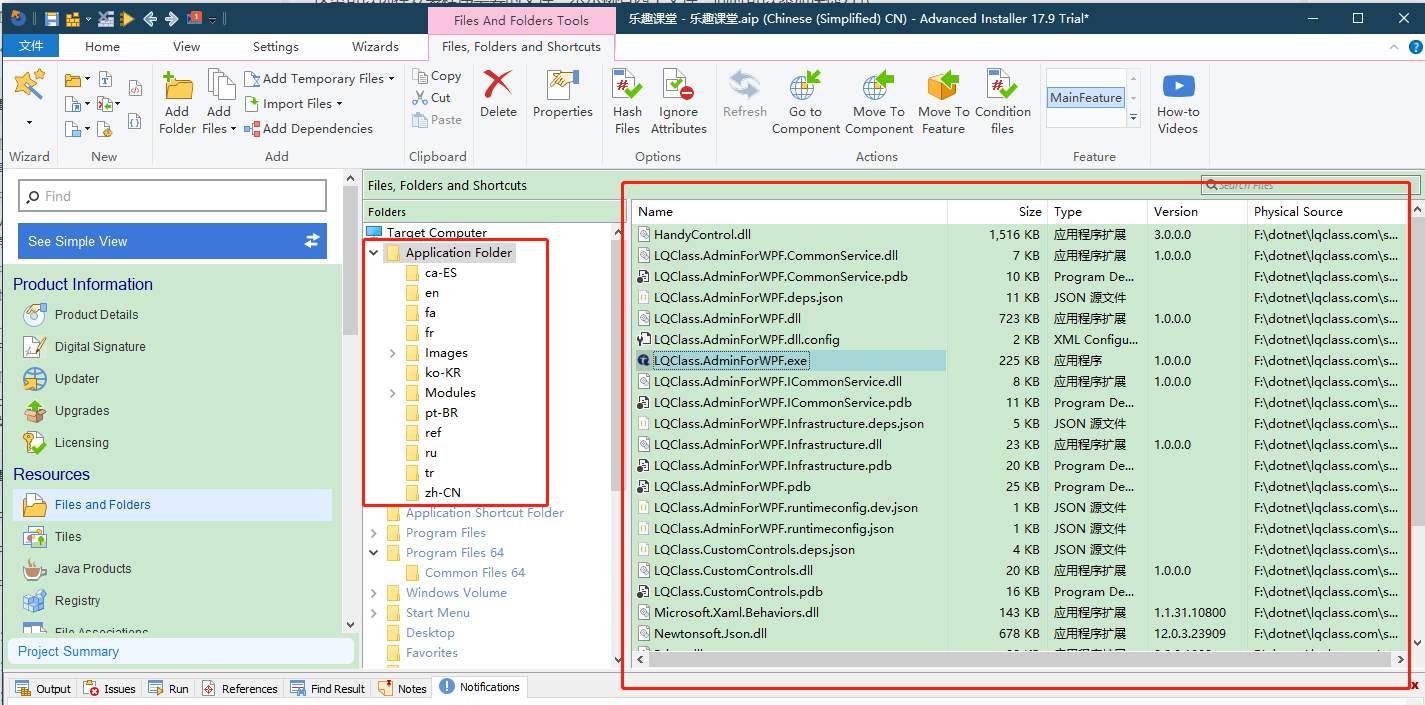
7、选择安装文件
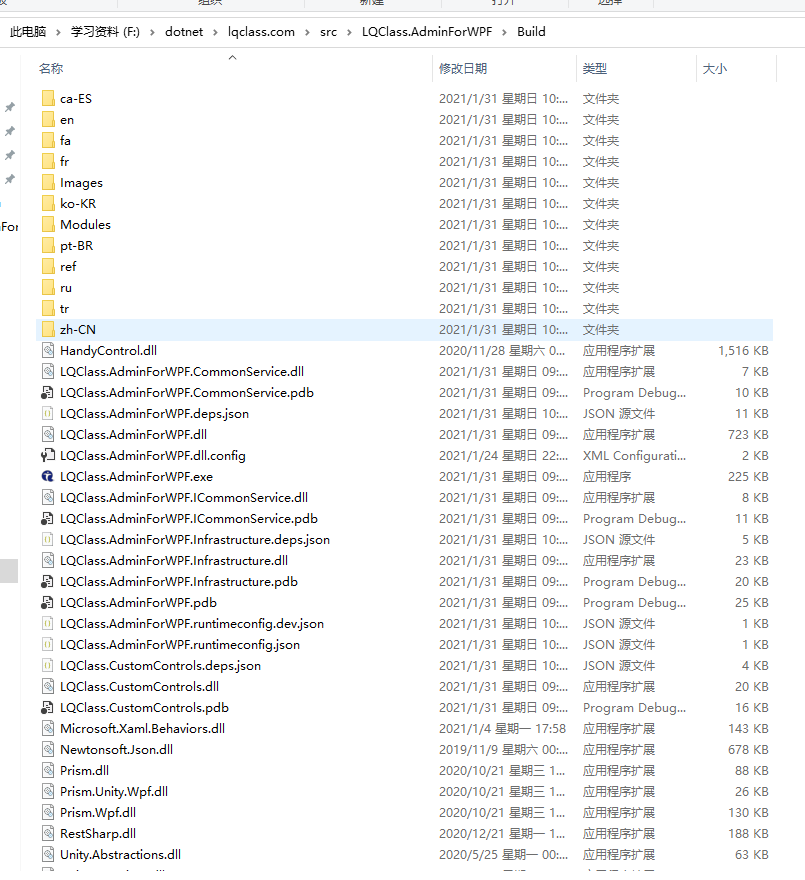
下面是目标程序目录结构结构,即待打包的目录,运行程序和依赖文件都在这个文件夹中:
乐趣课堂的程序输出目录文件一览
在软件安装包制作界面,添加应用程序的文件(夹),即选择上面的文件夹,注:子目录和文件需要分别选择。
选择程序包文件菜单

添加后,软件安装包制作界面的目录如下,中间显示添加的各子目录,右侧显示 Application Folder 目录下文件:
选择后的文件结构
8、添加快捷方式
正常程序,需要在开始菜单和桌面添加程序的快捷方式,如下图:
开始菜单快捷方式

桌面快捷方式

完成上面的效果,简单需求:
- 开始菜单添加程序目录:在【Start Menu】=>【Programs】下添加子文件夹【乐趣课堂】(改成你自己程序的名称)
- 开始菜单程序目录需要添加启动程序快捷方式、卸载程序快捷方式
- 桌面添加启动程序快捷方式
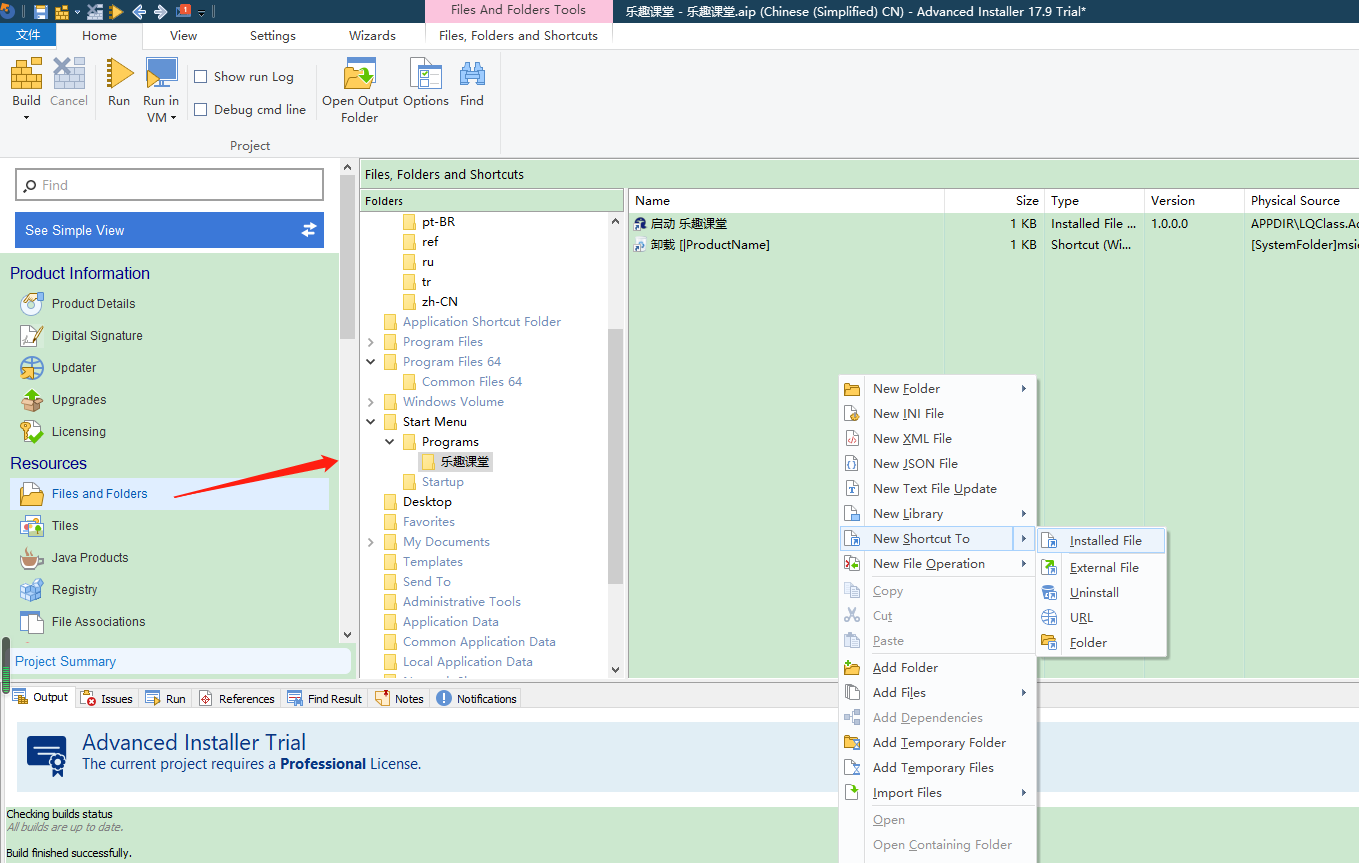
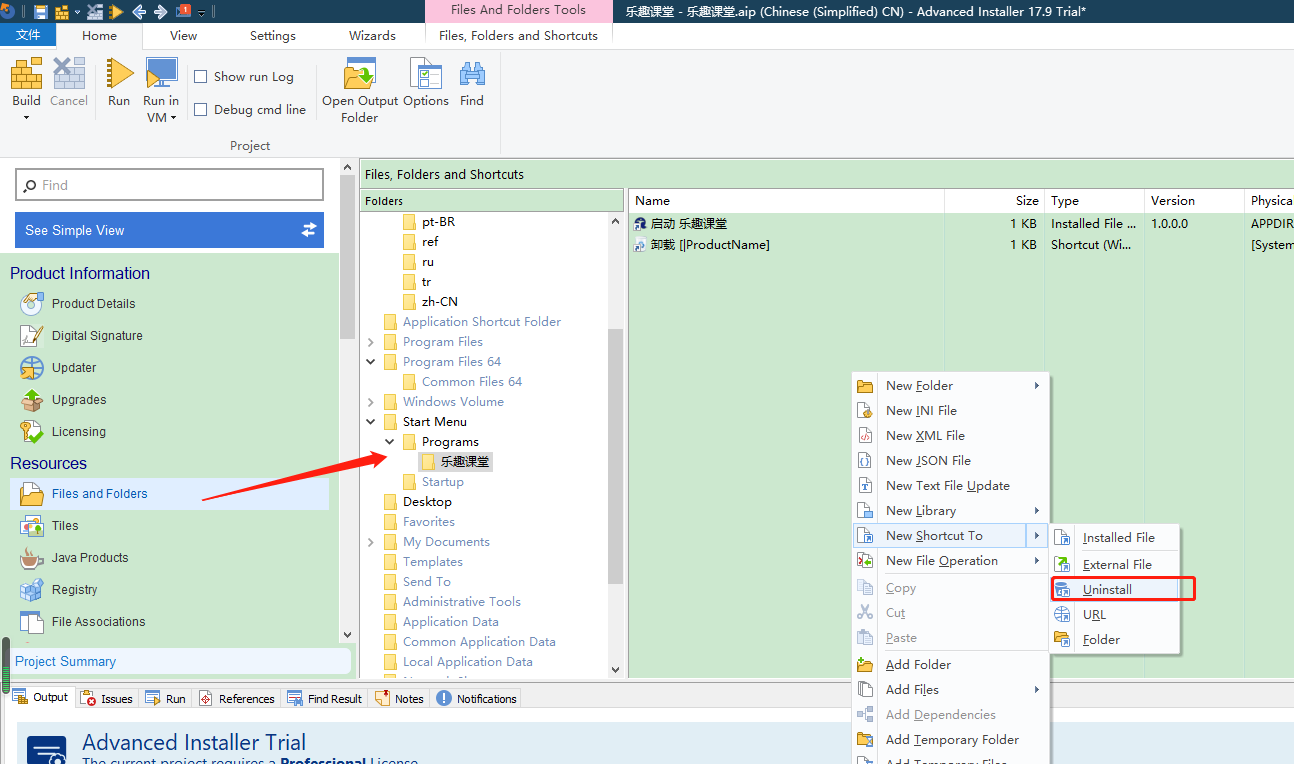
8.1 添加快捷启动方式
如下图,选中中间的”乐趣课堂“目录(Desktop目录操作同理),右侧右键菜单从安装程序添加快捷方式:
从安装文件中选择启动的程序
下图出现了选择文件列表,需要在前面的第 7 步中选择了文件才会出现,LQClass.AdminForWPF.exe 是主程序的 exe,将它作为开始菜单、桌面的启动程序快捷方式:
选择程序作为启动程序快捷方式

8.2 添加卸载快捷方式
我看大部分程序开始菜单都没添加卸载快捷方式,不过我们自信,添加上去吧,用户想卸就卸:
添加卸载快捷方式
下面弹出的卸载快捷方式编辑界面,可以不用修改,如果不想显示程序版本号,去掉也无妨:“卸载[ProductName]”显示效果为“卸载乐趣课堂”:
弹出卸载快捷方式编辑

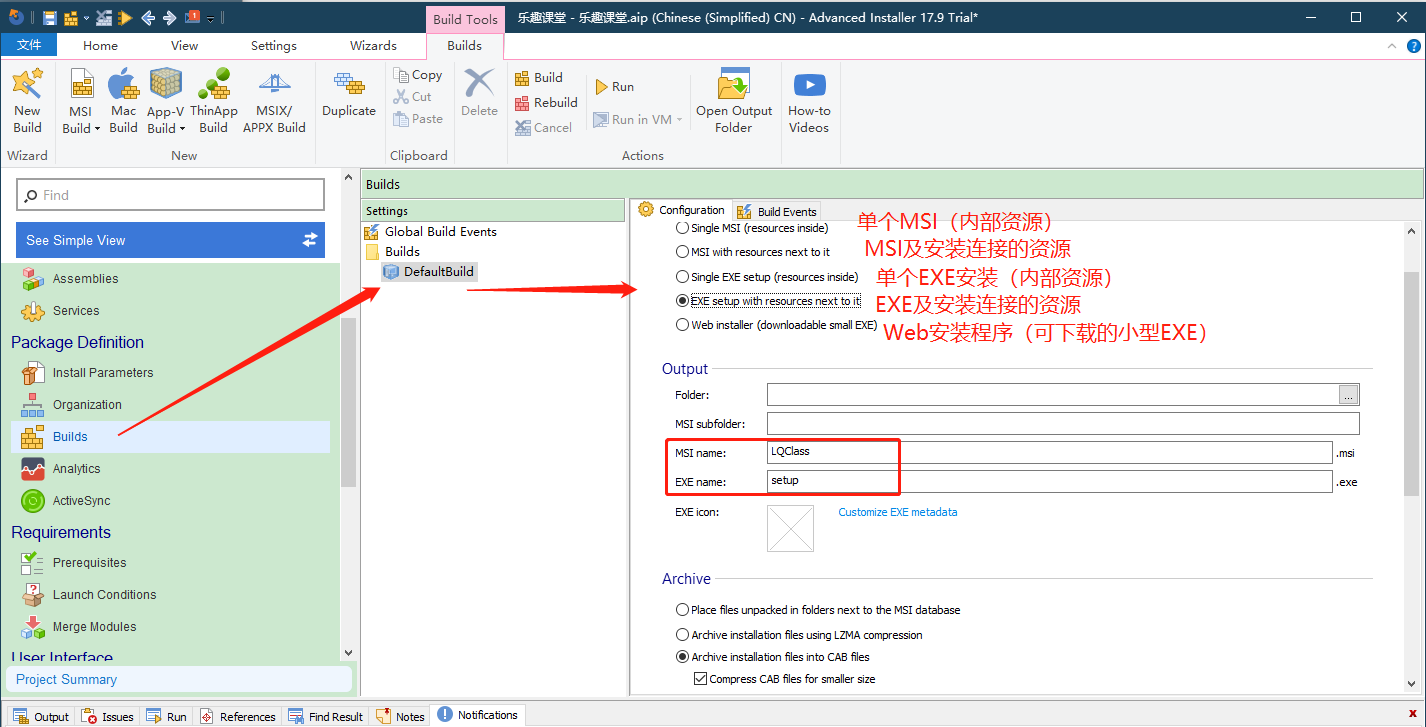
9、设置打包文件输出格式
如图中备注,选择第四个,在运行软件安装包时,可在线下载、安装运行时,可修改 MSI 安装文件的名字和 EXE 安装文件的名字:
10、配置安装界面主题风格
该软件提供的主题风格很多,站长浏览了一遍,图中的效果比较清爽,看个人喜欢选择:

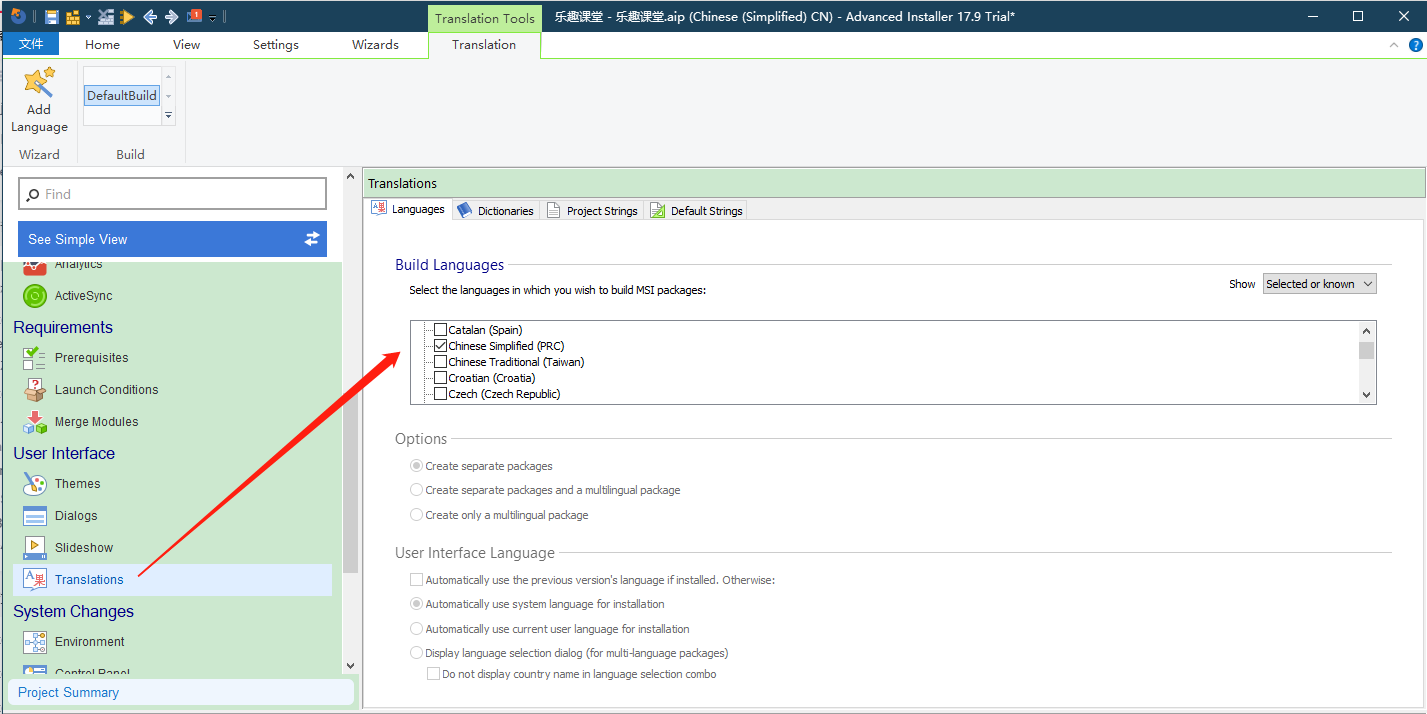
11、设置界面语言包
默认简体中文:
12、前面的配置差不多了,该浏览安装效果了
安装的每一步都可以看看效果:

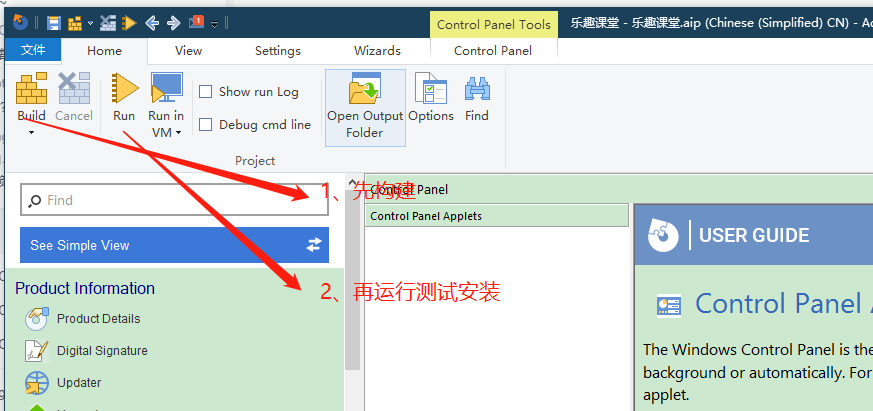
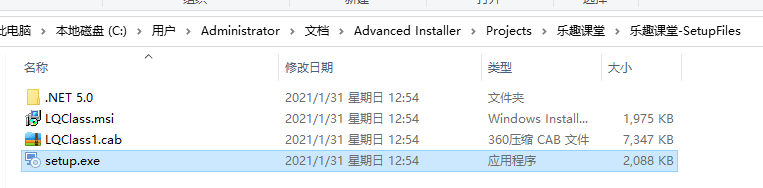
13、构建、运行
就像编程一样,前面的只是代码编写,一个简单功能完成,需要执行代码编译,生成可执行文件,制作软件安装包也是一样,先执行构建,然后就可以点击 Run 进行安装测试了,见开头的安装运行动画:
构建后产生的文件如下,下面的文件名在第 9 步中可以修改,当然你现在也可以手动修改:
好了,安装包制作完成,有什么问题欢迎留言交流。
参考文章: