
接下来就是讲跟数据库关联的内容了,会着重说明 ASP.NET Core 跟 EF Core,如果有需要改页面才会说到 Blazor,这边会花比较多篇幅着墨。
Blog
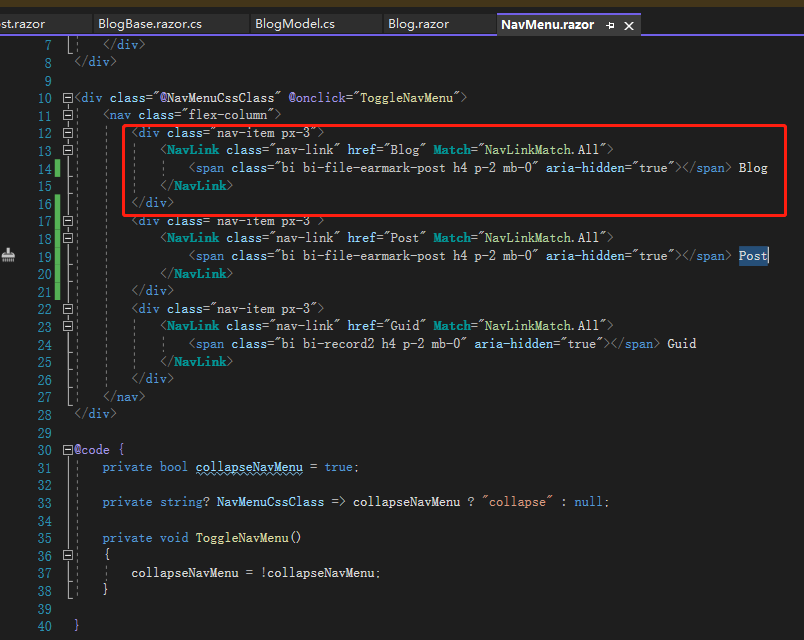
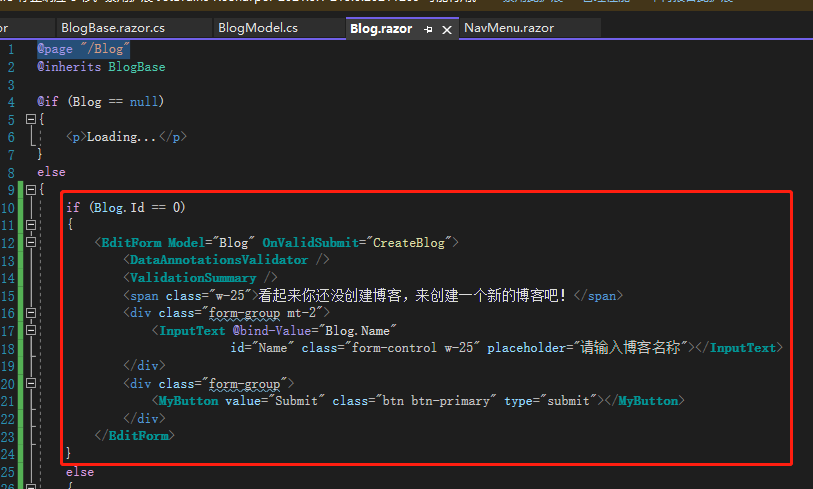
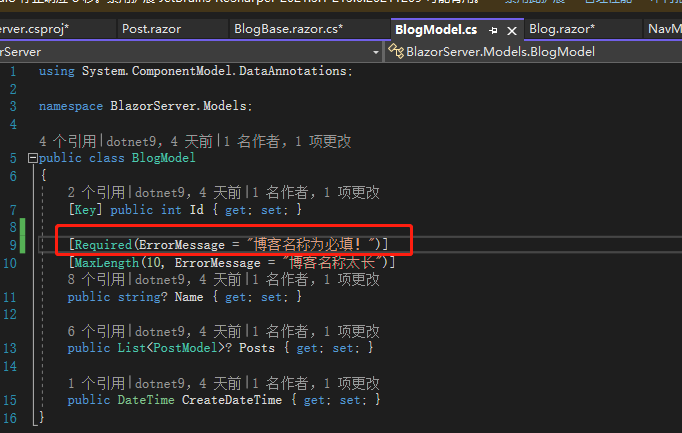
首先要把 Blog 跟 Post 分开,我们先在NavMenu.razor加入指向 Blog 的连接,接着修改Blog.razor,因为Blog.Id必须有值且大于0才是一条博客文件,所以我们在Blog.Id等于0时显示一个表单让用户输入博客名称,另外在BlogModel的Name加上Requiredattribute,毕竟一个博客要有名字。
不等于 0 的话则显示博客名称及底下的日志,且博客名称改用<h3>元素。
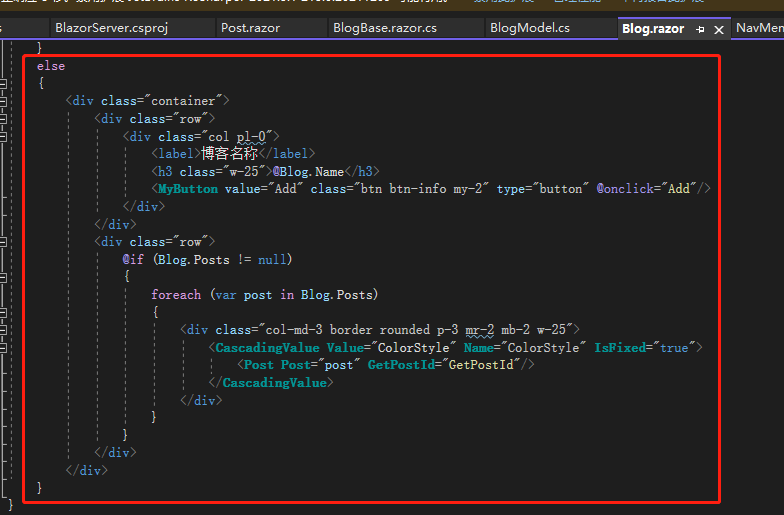
12 行有个参数OnValidSubmit="CreateBlog",表示的是如果表单验证通过,则执行指定的方法CreateBlog,笔者先写好一个放在那里,等说完取文件的部分会再说明。
(注:如果希望触发OnValidSubmit,必须有个type="submit"的按钮,否则不管怎么按都没效果)
有人问那如果Blog.Id小于0呢?因为这个字段是数据库由1开始递增产生,通常不会有这问题,除非有人窜改数据库,真的担心的话可以在数据库加入不可小于 0 的机制。
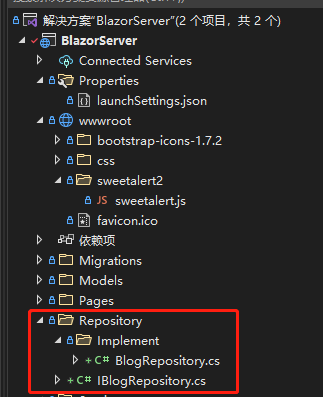
页面有了,接着来读取文件,我们在根目录建立一个文件夹Repository,建立一个接口IBlogRepository``,Repository 里面再建立一个文件夹Implement,建立一个类 BlogRepository,文件夹结构因人而异,笔者是因为看到同事这样用,觉得可以快速找到接口跟实现很方便。
接口(IBlogRepository)做的事情很简单,就是规范方法;实现(BlogRepository)的 8 到 13 行是依赖注入AppDbContext;29 到 33 行是取得第一条 Blog,31 行的Include() 就是昨天说的不用自己join table的方法,全名为Eager loading,只要建表的时候有建好关联,就可以节省时间,其他还有Explicit loading及Lazy loading,都是Entity Framework Core 提供的方便作法,如果是一对一的关联在 SQL 语句会被翻译成Inner Join,一对多则是Left Join。
using BlazorServer.Models;

namespace BlazorServer.Repository;

public interface IBlogRepository
{
	Task<ResultViewModel> CreateBlog(BlogModel blog);

	Task<BlogModel> GetBlog();
}

正常来说 Blog 会跟登录用户(User) 绑定,可能有张 Table 记录BlogId跟UserId,但目前还没实现登录机制,所以就取第一条数据,如果没有第一条表示还没建立,回传空的 Blog;15 到 27 行则是建立 Blog 的方法,17 行先检查 Blog 是否存在,不存在则建立 Blog,而不论是否存在,都回传类型为ResultViewModel的实例,里面只有两个属性:IsSuccess、Message,前端收到后是否要根据IsSuccess做事,就是前端的事了。
namespace BlazorServer.Models;

public class ResultViewModel
{
	public bool IsSuccess { get; set; }

	public string? Message { get; set; }
}
接着去Program.cs注册刚才写的Repository,有些人可能会问,上面的GuidService跟之前建立的PostService为什么叫Service 这边却叫Repository,这是笔者的习惯,笔者此前开发的 Blazor 项目是多层架构,分别为后端API、中间Model、前端Blazor,后端处理数据的文件都以Repository作为后缀词,前端取得数据的文件则以Service 作为后缀词,各端怎么分看不同公司的开发模式。后来笔者将Service 抽成另一个工程,再后来又将DbContext 抽成一个工程,都是为了方便日后有其他项目要参考Model 或是只是要调动Service 的话,不需要参考整个Blazor 或是API 项目。

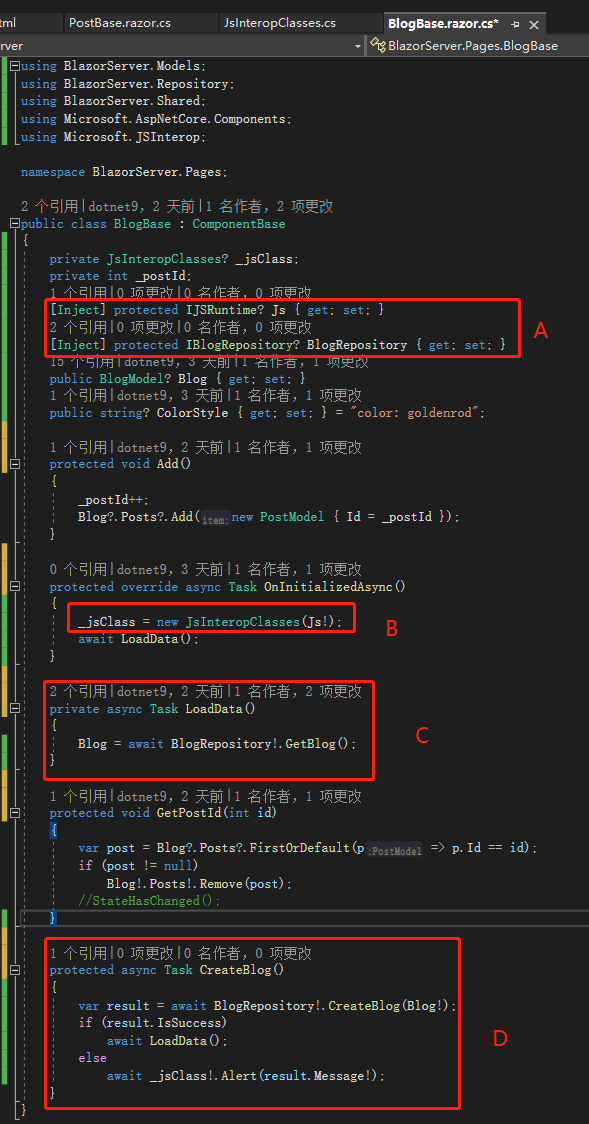
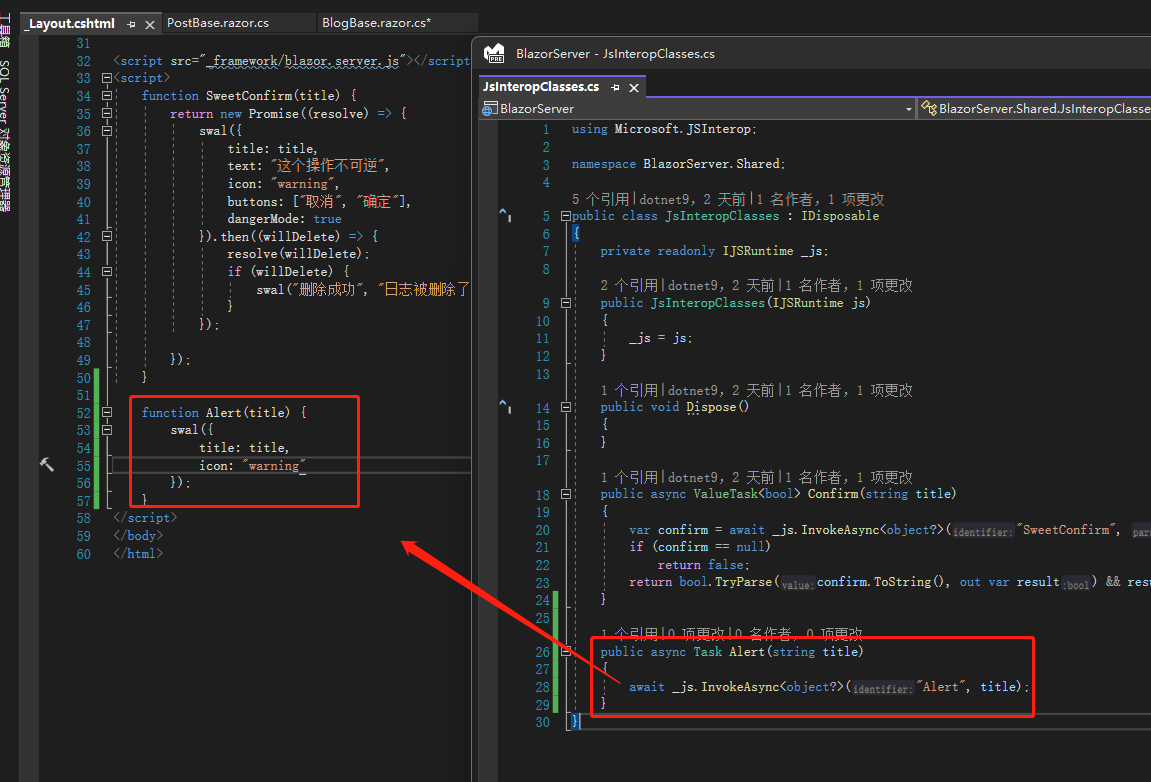
最后就是BlogBase.razor.cs了,代码块A注入 IBlogRepository、IJSRuntime,代码块B所在方法即OnInitializedAsync()改成异步方法,因为取数据、存数据都用异步,所以这边也要跟进;代码块C就是调用刚才写的GetBlog()方法取得 Blog;代码块D是这篇一开始说到的CreateBlog()方法,这里如果成功的话就取得 Blog 数据,失败则用前面说过的JsInteropClasses显示后端来的Message。
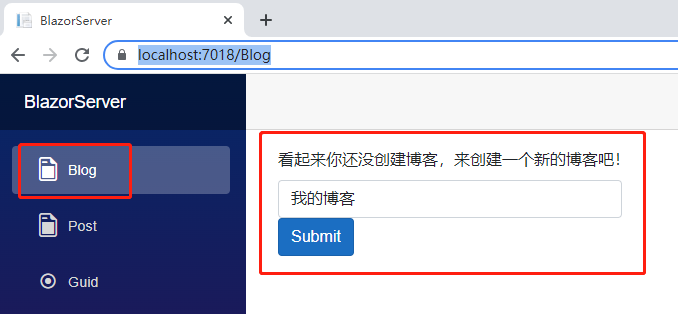
接着让我们输入博客名称,输入提交后,可以看到页面不同了,去看数据库,Blog 也能看到一条数据。

Post
前面说完 Blog,今天来说 Post 的部分,先建立IPostRepository跟PostRepository,里面只有CreatePost()跟DeletePost()两个方法,那怎么没有取得单篇的GetPost()或是多篇的GetPosts()方法呢?因为 Blog 的GetBlog()已经带入 Posts 所以不需要GetPosts(),如果之后有需要看到单个日志的话,再建立GetPost()。
(注:笔者参与的系统不多,也不知道这样的系统设计是否常见,只是因为一开始没有完整设计才会这样做。)
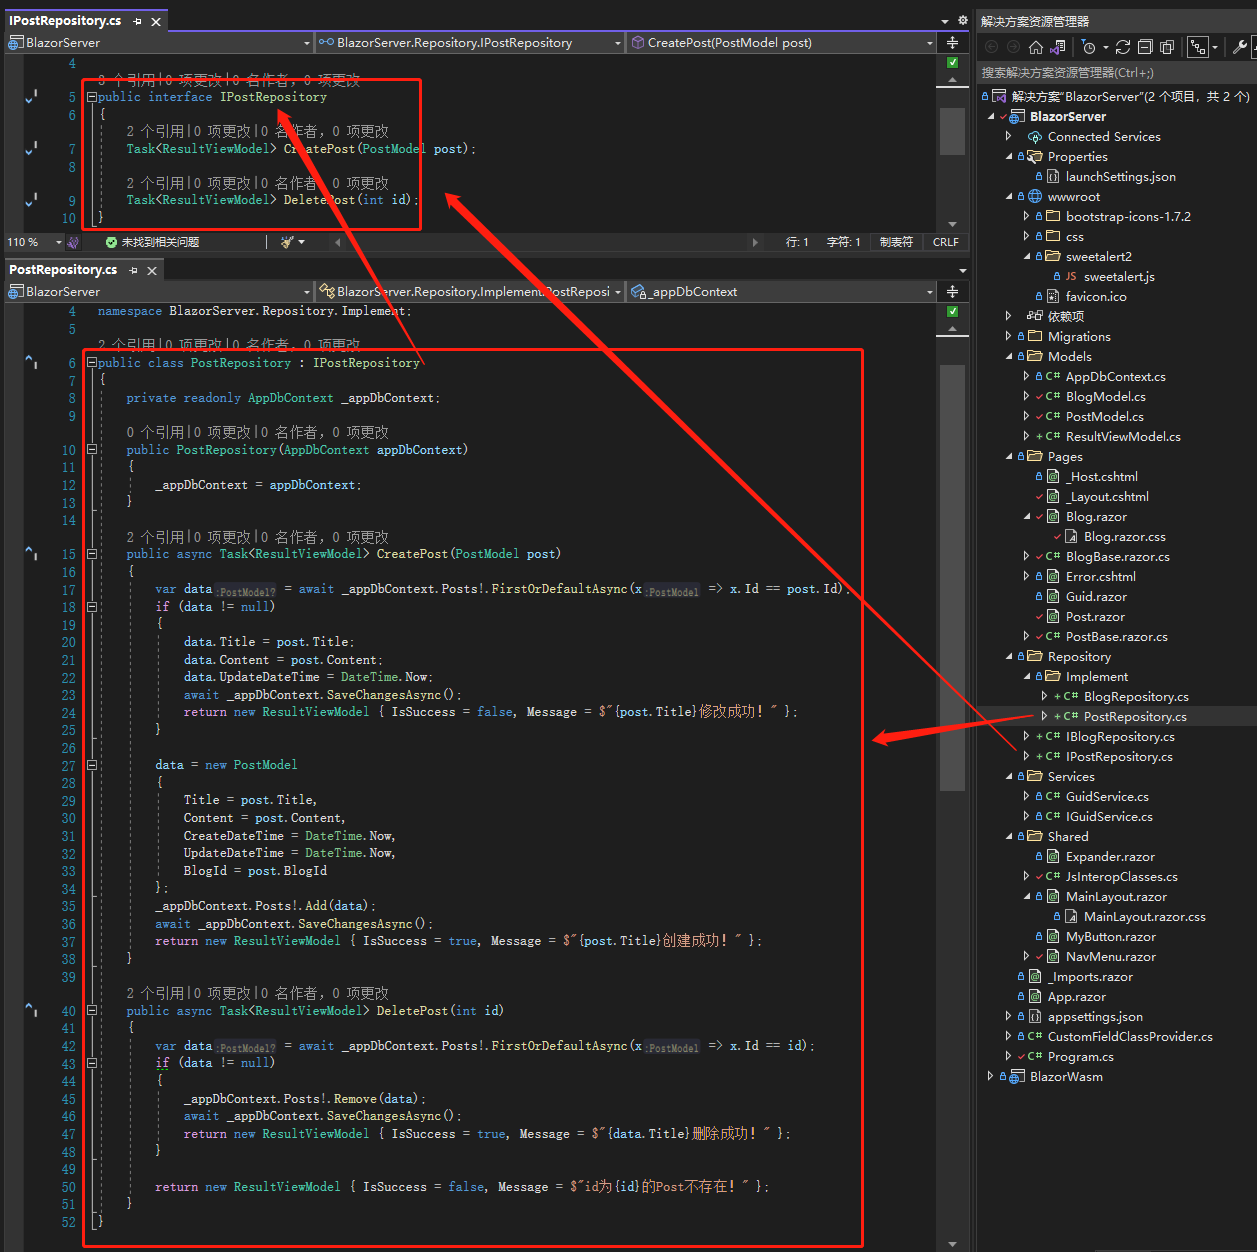
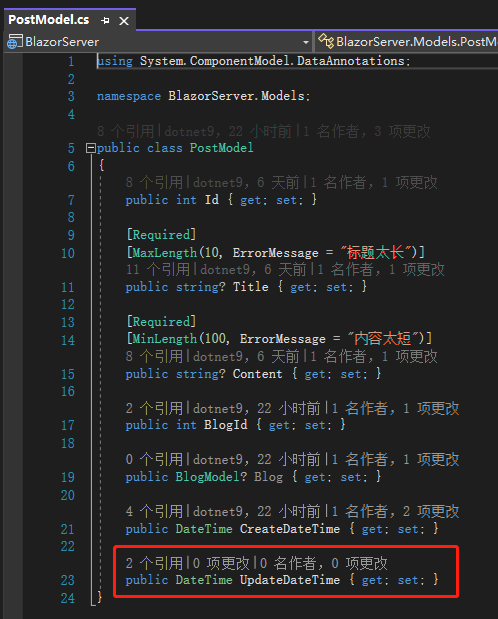
CreatePost()如果在数据库找不到 Post 就新增一条,找得到就修改,既然要修改就要有修改时间,所以我们在PostModel.cs加上UpdateDateTime字段,用命令Add-Migration新增一个 Migration 后再使用命令Update-Database更新数据库,然后去Program.cs注册这个新建的 Repository。
(注:前面说过的内容笔者就不附图了,避免占版面。)
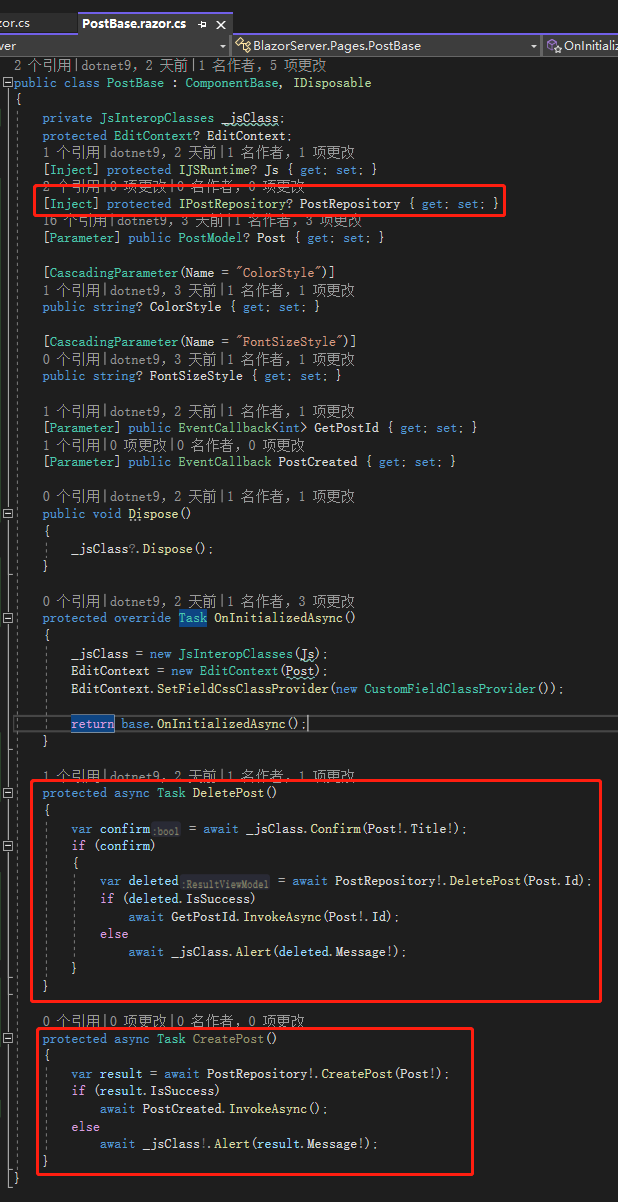
再来去PostBase.razor.cs注入PostRepository,修改一下DeletePost(),新增一个按下Submit按钮会触发的事件CreatePost(),PostBase.razor加上前面加入的更新时间UpdateDateTime、OnValidSubmit="CreatePost",Submit按钮的type改成submit,让表单真的有提交功能。
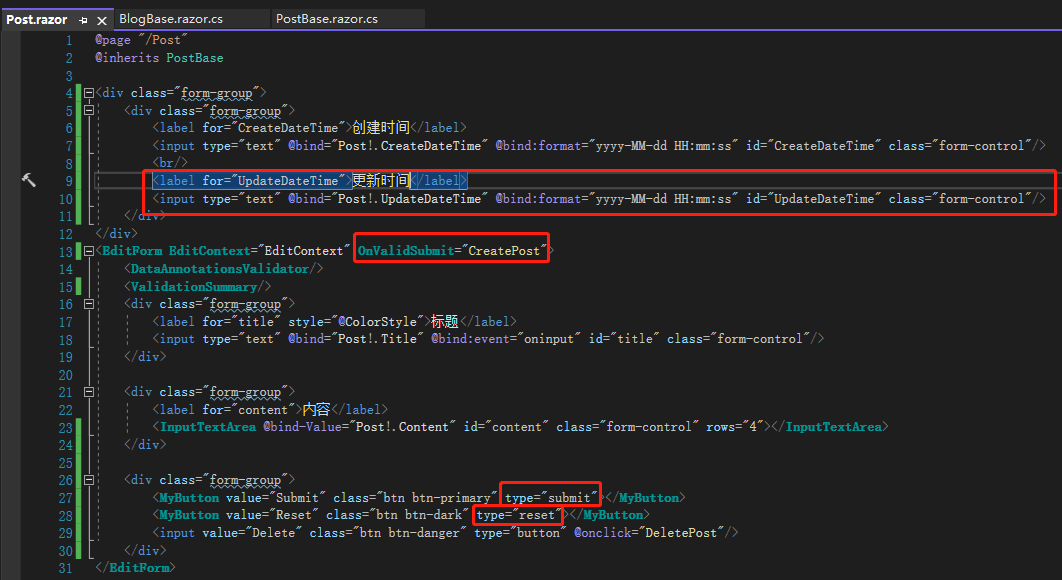
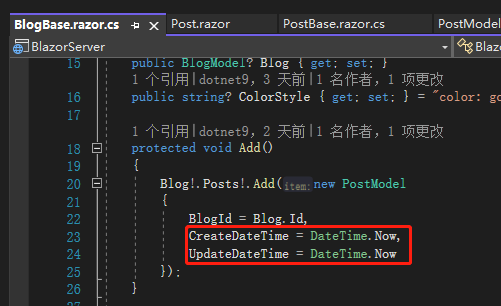
接下来就是重头戏了,我们回到BlogBase.razor.cs,把postId删除,因为用不到了,Add()则改成传BlogId跟CreateDateTime到新的 PostModel,让这条日志知道是跟着哪个 Blog。
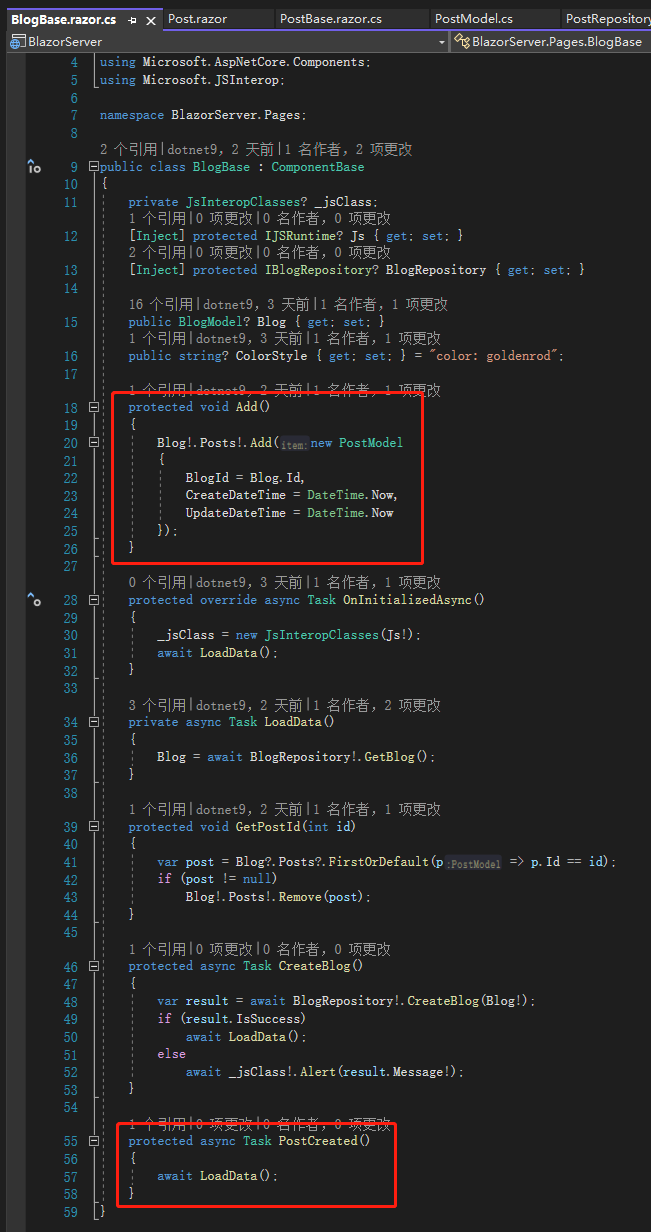
产生CreateDateTime跟UpdateDateTime有两种选择:在前端或后端决定,至于哪端看系统如何设计,因为这边在 add 一条 Post 的时候要避免看到0001-01-01 12:00:00这样的尴尬时间,所以我们在前端给DateTime.Now,至于后端要不要覆盖掉前端来的时间,就是设计问题了。
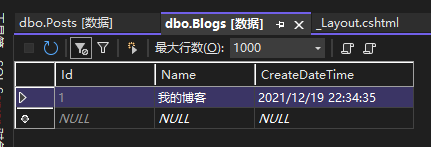
输入内容后点击 Submit 按钮,我们的第一篇日志就创建成功了!
(注:因为这边的操作是以前学的,也忘记在哪里看的,就附上学习来源)
注:本文代码通过 .NET 6 + Visual Studio 2022 重构,可点击原文链接与重构后代码比较学习,谢谢阅读,支持原作者