
1. 引言
在网络受限或完全离线的环境中开发.NET项目(本文示例为Avalonia UI项目),可能会遇到一些挑战。本文将为您提供一套完整的离线开发解决方案,包括IDE的安装、Avalonia UI模板的配置、私有化NuGet服务的部署以及NuGet包的制作和上传等。
2. IDE安装指南
Visual Studio 2022安装
Visual Studio 2022是微软推出的最新IDE,支持Avalonia UI项目的开发。以下是详细的离线安装步骤:
- 离线安装包制作:首先,根据网友 VS2022离线安装包 的指南,制作Visual Studio 2022的离线安装包。
- Avalonia UI扩展安装:安装Visual Studio后,通过 Visual Studio Marketplace 下载并安装Avalonia for Visual Studio 2022扩展。
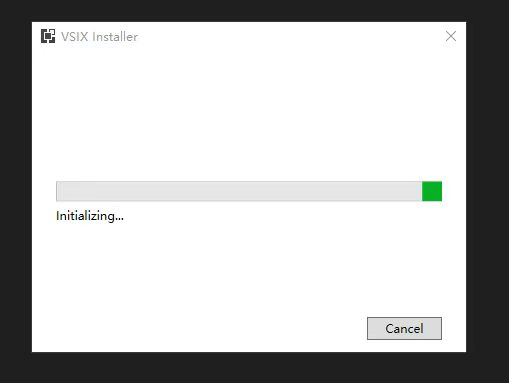
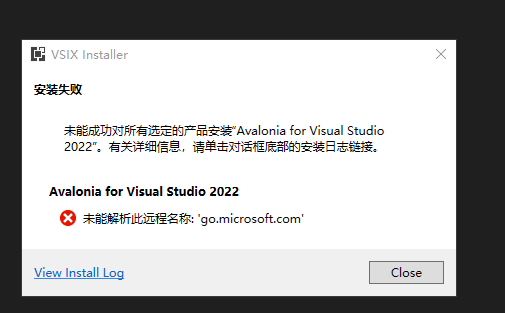
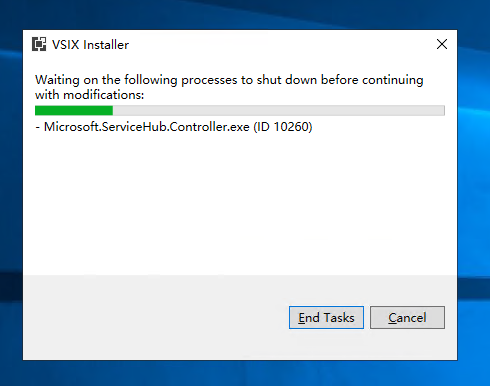
- 安装过程中遇到失败
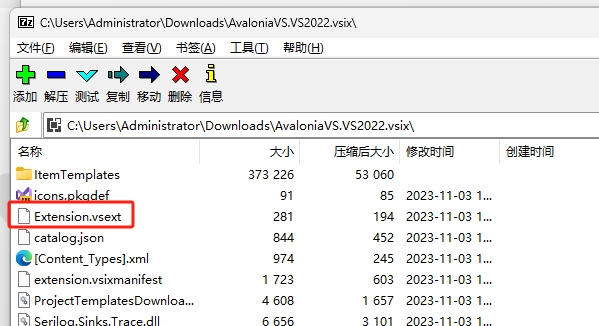
根据微信群内@rabbitism的解答(感谢@daidai_cn的帮助),我们可以通过解压该扩展文件,删除下图框选的Extension.vsext文件后再进行安装:
正常安装了:
JetBrains Rider安装
JetBrains Rider IDE在2020.3版本中开始内置支持Avalonia XAML,包括对Avalonia特定XAML功能和自定义代码检查的一流支持。
离线安装包下载地址:下载 Rider:跨平台 .NET IDE (jetbrains.com)
3. 安装Avalonia UI模板
在线安装请参考文档 Avalonia Docs,离线安装请点击 Avalonia.Templates 下载:
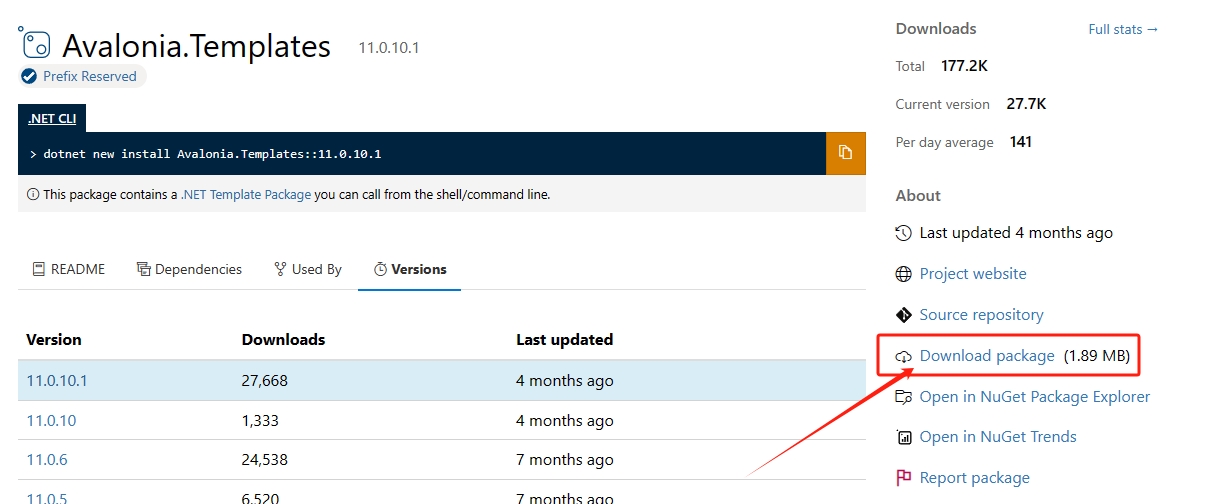
安装方式同上图.NET CLI命令脚本:
dotnet new install avalonia.templates.11.0.10.1.nupkg
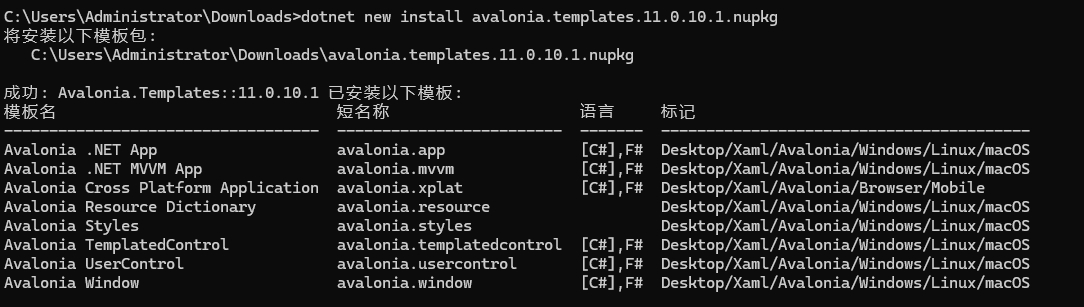
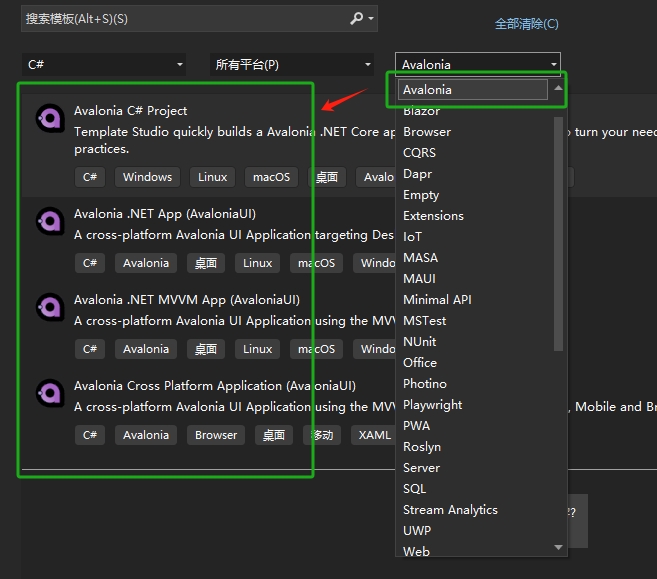
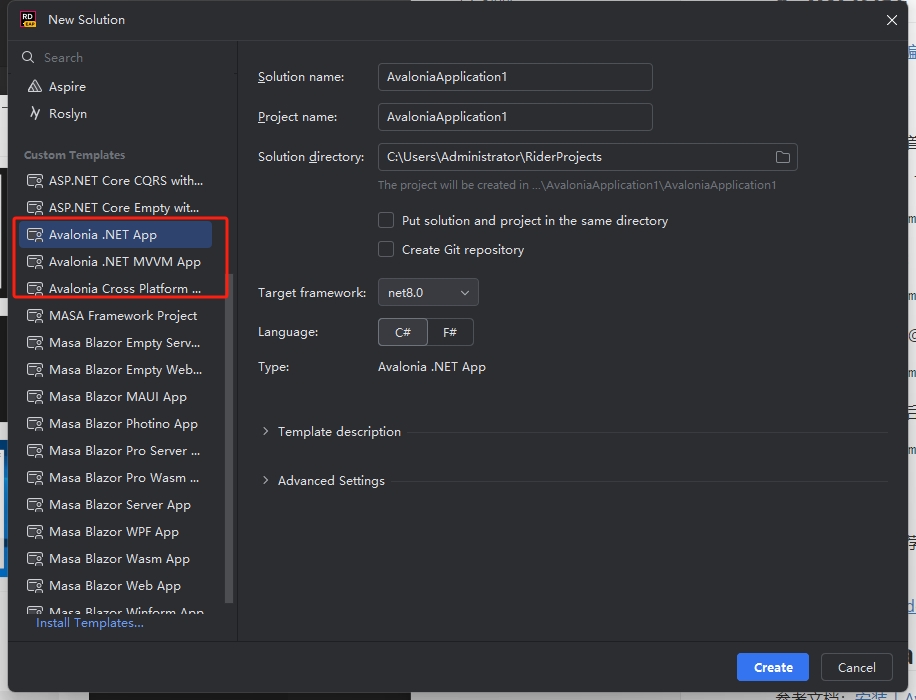
现在,无论是在Visual Studio还是JetBrains Rider中,您都可以使用Avalonia UI模板来创建新项目了。
VS 2022中Avalonia UI模板:
Rider中使用模板:
4. 私有化部署NuGet服务
创建好项目后,程序也是无法正常运行的,默认模板依赖Avalonia UI的一些NuGet包,需要在线安装,可以直接把相关库拷贝到内网,但一个一个拷贝、引用还是很麻烦。
为了方便团队内部成员之间共享和管理NuGet包,您可以考虑部署私有NuGet服务。本文推荐使用BaGet作为轻量级的NuGet服务器,参考该BaGet项目说明:
- 安装 .NET Core 3.1 SDK,该程序能支持的.NET最新版本,有兴趣可以Clone修改成
.NET 8\9(PR中有惊喜,网友有PR升级分支); - 下载最新版的Release压缩包 Releases · loic-sharma/BaGet
- 运行服务
dotnet BaGet.dll - 浏览器打开
http://localhost:5000访问:
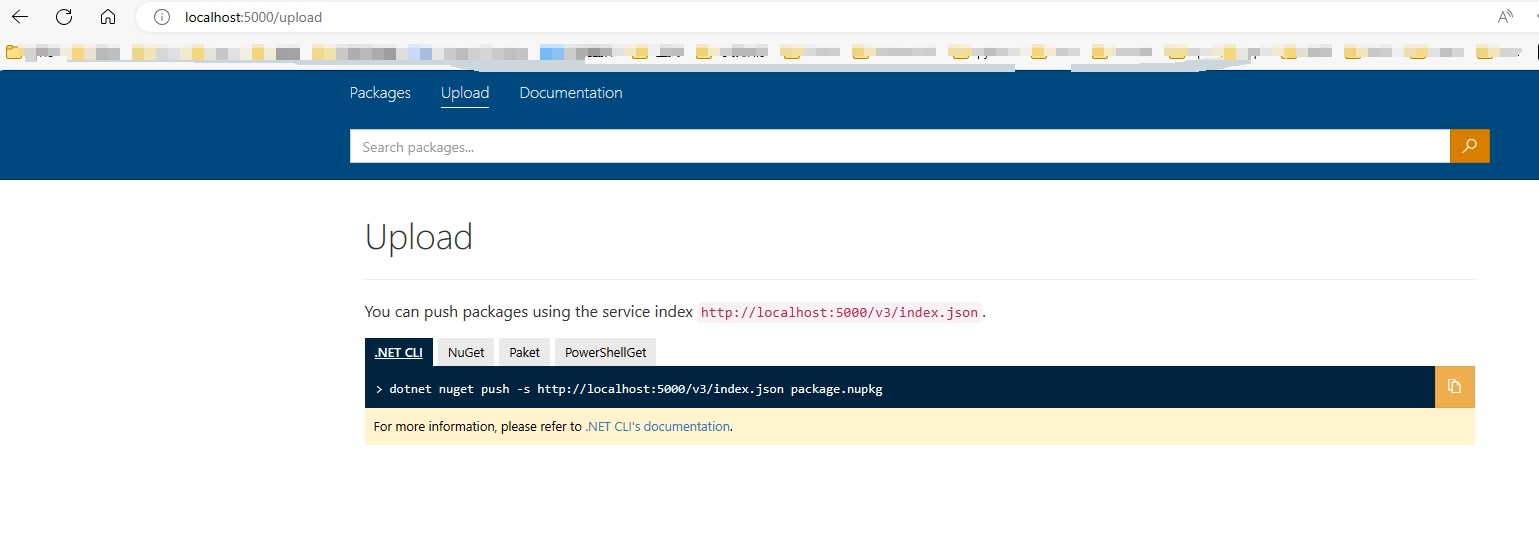
OK,这就算部署完成了。
5. NuGet包制作(可略)
网上教程较多,可简单配置库的工程文件支持NuGet包生成,参考CodeWF.EventBus:
<Project>
	<PropertyGroup>
		<Company>https://codewf.com</Company>
		<Authors>沙漠尽头的狼</Authors>
		<Owners>https://codewf.com</Owners>
		<AssemblyVersion>$(Version)</AssemblyVersion>
		<FileVersion>$(Version)</FileVersion>
		<Version>$(Version)</Version>
		<Description>通过 CodeWF.EventBus 提供的 事件总线,我们可以很轻松的实现 CQRS 模式。根据业务需求,我们可以创建并维护读模型,将读操作和写操作进行分离,从而提高应用程序的可扩展性和性能。可在各种模板项目使用:WPF、Winform、AvaloniaUI、ASP.NET Core等。The CodeWF.EventBus allows us to easily implement the CQRS mode. According to business requirements, we can create and maintain a read model to separate read and write operations, thereby improving the scalability and performance of the application. Can be used in various template projects: WPF, Winform, AvaloniaUI, ASP. NET Core, etc.</Description>
		<ApplicationIcon>Resources\logo.ico</ApplicationIcon>
		<GeneratePackageOnBuild>True</GeneratePackageOnBuild>
		<Title>$(AssemblyName)</Title>
		<Copyright>Copyright © https://codewf.com 2024</Copyright>
		<AssemblyName>$(AssemblyName)</AssemblyName>
		<RootNamespace>$(AssemblyName)</RootNamespace>
		<PackageId>$(AssemblyName)</PackageId>
		<PackageTags>C# EventBus; WPF; Winform; AvaloniaUI,ASP.NET Core;</PackageTags>
		<PackageIcon>logo.png</PackageIcon>
		<PackageProjectUrl>https://github.com/dotnet9/CodeWF.EventBus</PackageProjectUrl>
		<RepositoryUrl>https://github.com/dotnet9/CodeWF.EventBus</RepositoryUrl>
	</PropertyGroup>
	<ItemGroup>
		<None Include="Resources\logo.png">
			<Pack>True</Pack>
			<PackagePath>\</PackagePath>
		</None>
	</ItemGroup>
</Project>
生成库工程时就会生成相应的NuGet文件,这里是已经发布的NuGet包地址:https://www.nuget.org/packages/CodeWF.EventBus
6. NuGet包上传
可以上传自己制作的NuGet包,也可以上传从 NuGet官网 或第三方获得的NuGet包。
我们打开自己部署的NuGet首页http://localhost:5000:
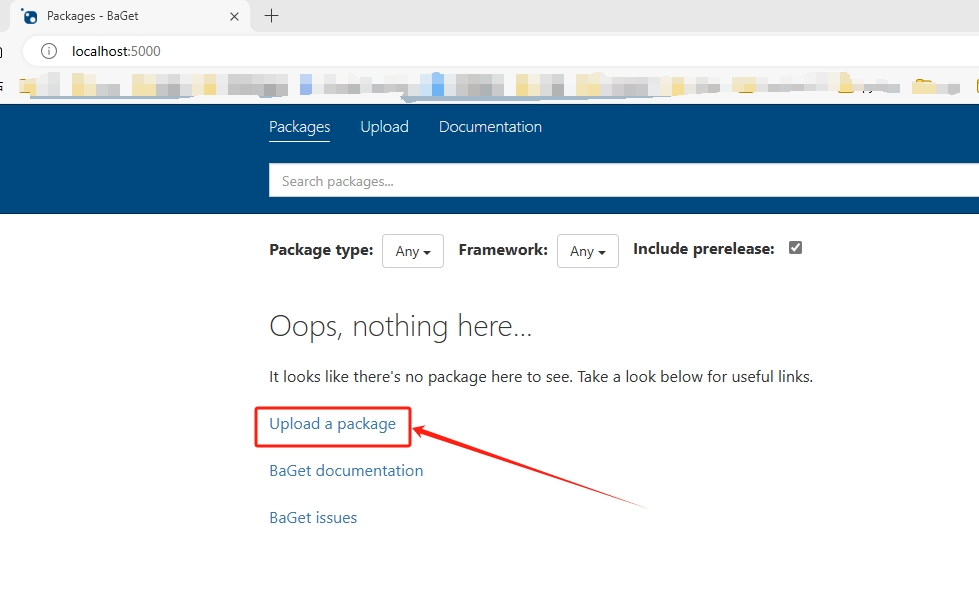
点击Upload a package,切换到NuGet包上传命令说明:
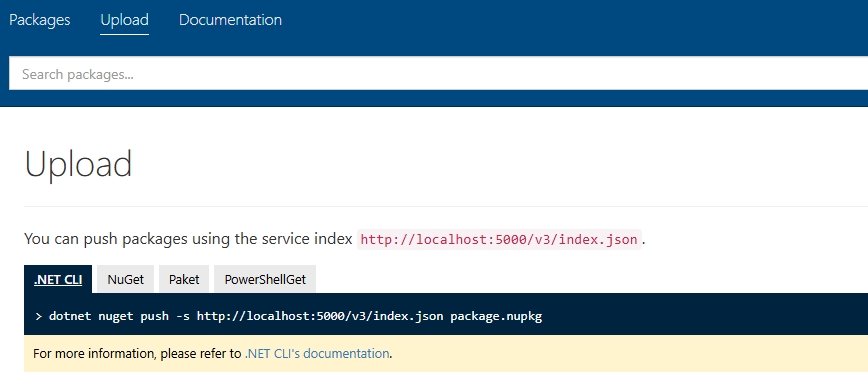
我们以.NET CLI上传NuGet包举例,首先准备NuGet文件,比如从NuGet官网搜索下载Avalonia UI的基础包:
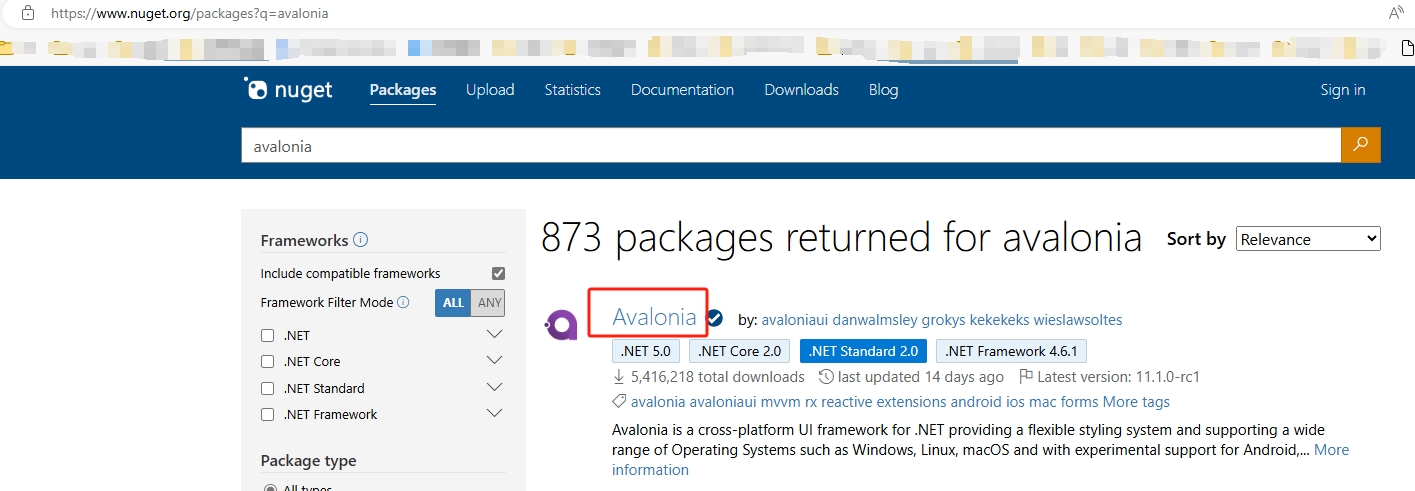
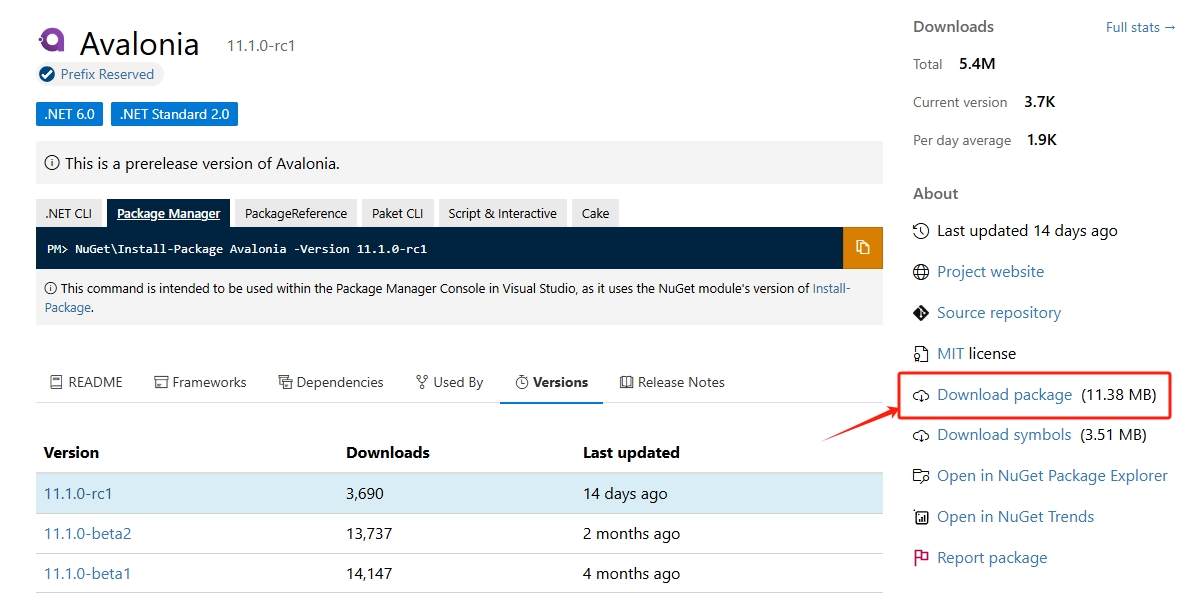
下载好以后,在当前下载目录打开CMD命令行输入:
dotnet nuget push -s http://localhost:5000/v3/index.json avalonia.11.1.0-rc1.nupkg
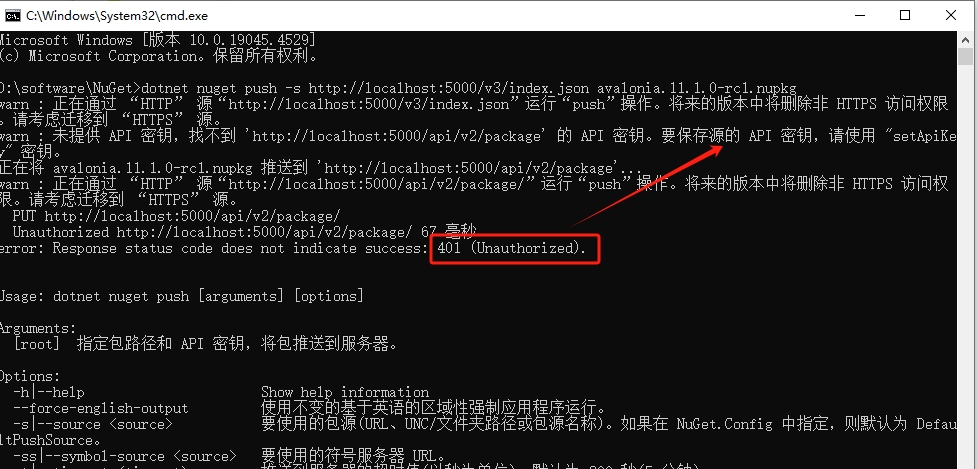
上面提示NuGet服务配置了密钥,我们为了简单,先停止NuGet服务,打开它的配置文件appsettings.json,清空ApiKey节点值,再运行NuGet服务:
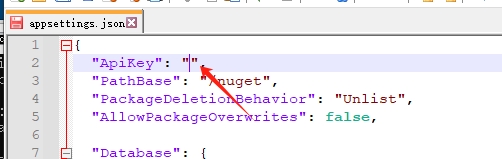
再执行上传命令,现在成功了:

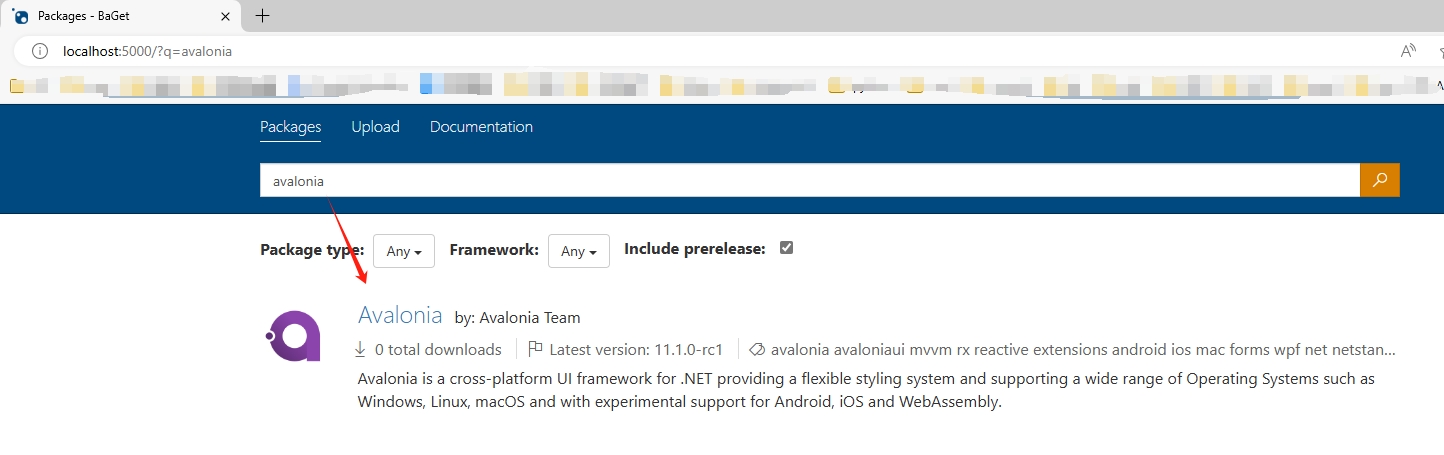
NuGet首页也能搜索到了:
7. IDE配置NuGet源
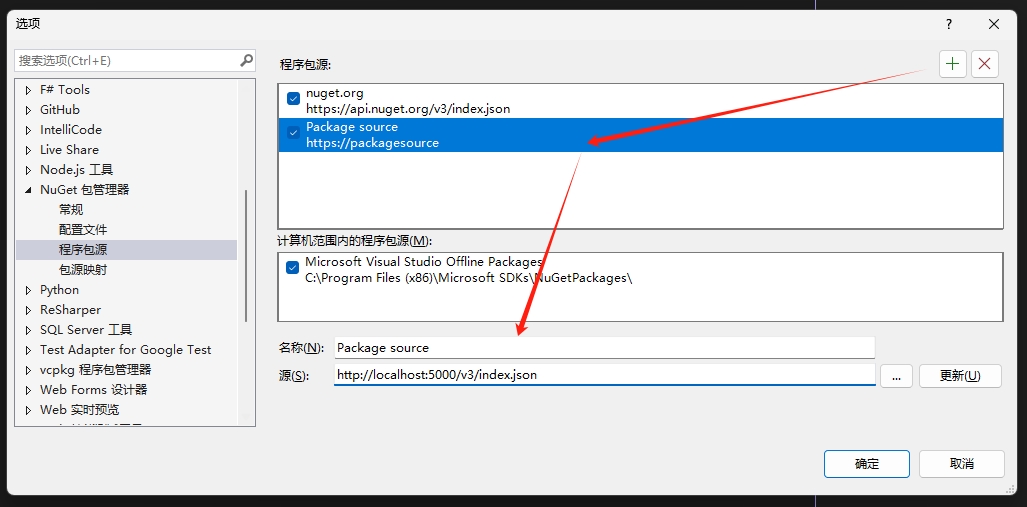
复制前面NuGet上传页面图中红色字体的URL地址:http://localhost:5000/v3/index.json, 在VS中配置NuGet搜索地址:
剩下的就和平时安装包一致了。
小知识:个人临时开发可将上面的源配置为本地NuGet目录路径。
8. 总结
本文介绍了如何在本地网络环境中成功安装并配置AvaloniaUI所需的开发工具和模板,以及如何部署私有NuGet服务并制作及上传NuGet包以便团队内部成员之间共享和管理NuGet包。
希望这些信息能对您的AvaloniaUI项目开发有所帮助。如有其他问题,欢迎随时向我提问。